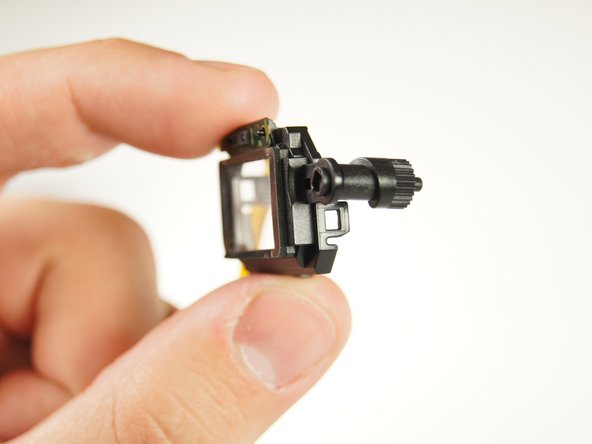
주요 콘텐츠로 건너뛰기

Sony SLT Alpha-65V Viewfinder Replacement

필요한 것

  1. Sony SLT Alpha-65V Viewfinder Replacement, Back Panel: 1 단계, 이미지 1/1
    • Unscrew the four 4.0 mm Phillips #00 screws with a on the base of the camera below the the scheme that separates the front and back panels.

    • Unscrew the 5.0 mm Phillips #00 screw on the bottom right of the camera.

  2. Sony SLT Alpha-65V Viewfinder Replacement: 2 단계, 이미지 1/1
    • Unscrew the 4.0 mm Phillips #00 screw on bottom of the left side of the camera.

    • Unscrew the 5.0 mm Phillips #00 screw near the top of the left side of the camera.

  3. Sony SLT Alpha-65V Viewfinder Replacement: 3 단계, 이미지 1/1
    • Be careful when pulling the back panel away as it will still be connected to the body of the camera by two strips of film.

    • When unscrewing the 5.0 mm screw on the dial, make sure to hold onto the dial that becomes detached after taking out the screw.

    • Unscrew the two 4.0 mm Phillips #00 screw at the top of the camera by the eyepiece.

    • Unscrew the 5.0 mm Phillips #00 screw of the dial below the other two screws.

    • Once all the screws are removed, carefully use your hands to detach the back panel from the camera. Working around the edges can help as well.

  4. Sony SLT Alpha-65V Viewfinder Replacement: 4 단계, 이미지 1/3 Sony SLT Alpha-65V Viewfinder Replacement: 4 단계, 이미지 2/3 Sony SLT Alpha-65V Viewfinder Replacement: 4 단계, 이미지 3/3
    • Remove the two 4.0 mm Phillips #00 screws on the right of the camera that are located on the upper right side and under the "Remote" port flap.

    • Detach the right side panel with the remote and HDMI ports of the camera by gently pulling on the panel.

  5. Sony SLT Alpha-65V Viewfinder Replacement: 5 단계, 이미지 1/1
    • When the back panel is removed, be careful when moving the camera. There are parts inside the camera which now may come loose.

    • Use tweezers to remove the blue and orange ribbon connectors from their connection points pictured here.

  6. Sony SLT Alpha-65V Viewfinder Replacement, Motherboard: 6 단계, 이미지 1/1
    • Remove the four 3.0 mm Phillips #00 screws.

    • Remove the 5.0 mm Phillips #00 screw.

  7. Sony SLT Alpha-65V Viewfinder Replacement: 7 단계, 이미지 1/3 Sony SLT Alpha-65V Viewfinder Replacement: 7 단계, 이미지 2/3 Sony SLT Alpha-65V Viewfinder Replacement: 7 단계, 이미지 3/3
    • Don't forget to close these switches and lock the film back into place when reassembling the camera.

    • Use your finger to flip the switch that holds the dual ribbon connector in place.

    • Gently use tweezers to disconnect the dual ribbon connector and the thin blue ribbon connector to the right of it from the circuit board.

  8. Sony SLT Alpha-65V Viewfinder Replacement: 8 단계, 이미지 1/3 Sony SLT Alpha-65V Viewfinder Replacement: 8 단계, 이미지 2/3 Sony SLT Alpha-65V Viewfinder Replacement: 8 단계, 이미지 3/3
    • Use tweezers to disconnect the blue, gold, and brown ribbon connectors near the top of the camera.

  9. Sony SLT Alpha-65V Viewfinder Replacement: 9 단계, 이미지 1/2 Sony SLT Alpha-65V Viewfinder Replacement: 9 단계, 이미지 2/2
    • Use a plastic opening tool to pop open the connector holding the next ribbon to the circuit board.

    • Use tweezers to disconnect the ribbon.

  10. Sony SLT Alpha-65V Viewfinder Replacement: 10 단계, 이미지 1/1
    • Use tweezers to unplug the blue adapter located at the top right of the circuit board.

  11. Sony SLT Alpha-65V Viewfinder Replacement: 11 단계, 이미지 1/1
    • Use either plastic opening tools or tweezers to unplug the white adapter located on the right side of the circuit board.

  12. Sony SLT Alpha-65V Viewfinder Replacement: 12 단계, 이미지 1/1
    • The circuit board will still be connected to the body of the camera by two pairs of cords.

    • Gently lift the circuit board away from the camera and turn it over.

    • Use tweezers to disconnect the final two plugs and completely remove the circuit board from the camera.

  13. Sony SLT Alpha-65V Viewfinder Replacement, Viewfinder: 13 단계, 이미지 1/3 Sony SLT Alpha-65V Viewfinder Replacement, Viewfinder: 13 단계, 이미지 2/3 Sony SLT Alpha-65V Viewfinder Replacement, Viewfinder: 13 단계, 이미지 3/3
    • The rotating dial on the right side of the eyepiece sensor is loosely connected and may fall out when removing the sensor.

    • Gently remove the eyepiece sensor from the viewfinder.

  14. Sony SLT Alpha-65V Viewfinder Replacement: 14 단계, 이미지 1/2 Sony SLT Alpha-65V Viewfinder Replacement: 14 단계, 이미지 2/2
    • The viewfinder will pop out of its slot.

    • Gently remove the viewfinder from the camera.

결론

To reassemble your device, follow these instructions in reverse order.

다른 2명이 해당 안내서를 완성하였습니다.

Zhengjun Jiang

회원 가입일: 04/28/15

140 평판

안내서 1개 작성함

Cal Poly, Team 14-11, Amido Spring 2015 Cal Poly, Team 14-11, Amido Spring 2015 회원

CPSU-AMIDO-S15S14G11

4 회원들

안내서 13개 작성하였습니다

댓글 0개

댓글 쓰기

조회 통계:

24 시간 전: 0

7일 전: 6

30일 전: 12

전체 시간: 1,376