주요 콘텐츠로 건너뛰기

Sony SRS-XE200 Battery Replacement

필요한 것

  1. Sony SRS-XE200 Battery Replacement, Speaker Assembly: 1 단계, 이미지 1/2 Sony SRS-XE200 Battery Replacement, Speaker Assembly: 1 단계, 이미지 2/2
    • Pry the outer cover of the speaker from the body using a spudger.

    • A clicking noise can be heard as the cover is detaching.

  2. Sony SRS-XE200 Battery Replacement: 2 단계, 이미지 1/1
    • Pry the rubber cap away from the body of the speaker using a spudger.

  3. Sony SRS-XE200 Battery Replacement: 3 단계, 이미지 1/2 Sony SRS-XE200 Battery Replacement: 3 단계, 이미지 2/2
    • Remove the eight 1 mm screws that connect the motherboard case and the speaker case with a Phillips #1 screwdriver.

    • Remove the four 0.8 mm screws that connect the motherboard case and the speaker case with a Phillips #1 screwdriver.

  4. Sony SRS-XE200 Battery Replacement: 4 단계, 이미지 1/2 Sony SRS-XE200 Battery Replacement: 4 단계, 이미지 2/2
    • Unplug the colored wires from the motherboard to detach the speaker assembly.

  5. Sony SRS-XE200 Battery Replacement, Battery: 5 단계, 이미지 1/3 Sony SRS-XE200 Battery Replacement, Battery: 5 단계, 이미지 2/3 Sony SRS-XE200 Battery Replacement, Battery: 5 단계, 이미지 3/3
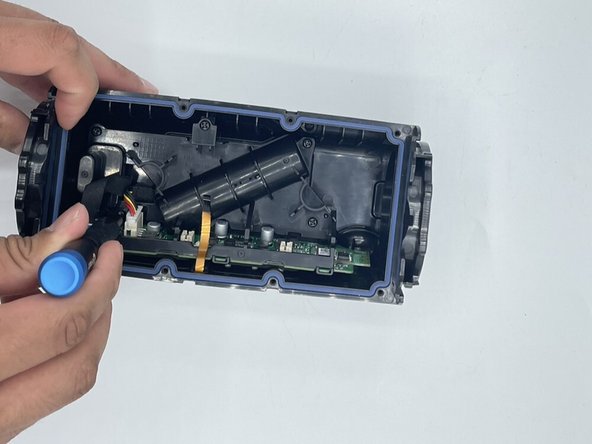
    • Remove the five 1 mm screws connecting the motherboard to the case with a Phillips #1 screwdriver.

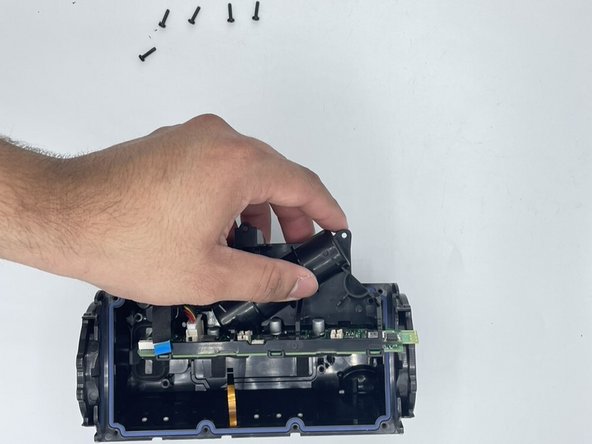
    • Separate the motherboard from the case.

  6. Sony SRS-XE200 Battery Replacement: 6 단계, 이미지 1/3 Sony SRS-XE200 Battery Replacement: 6 단계, 이미지 2/3 Sony SRS-XE200 Battery Replacement: 6 단계, 이미지 3/3
    • Remove the battery from the battery holder with a nylon spudger.

    • Unplug the battery from the motherboard.

결론

To reassemble your device, follow these instructions in reverse order.

다른 한 분이 해당 안내서를 완성하였습니다.

Vishant Savaliya

회원 가입일: 02/09/23

361 평판

안내서 4개 작성하였습니다

댓글 2개

Thanks what is the replacement battery number?

fred Pope - 답글

What is the battery number for the SRS replacement

fred Pope - 답글

댓글 쓰기

조회 통계:

24 시간 전: 1

7일 전: 5

30일 전: 33

전체 시간: 566