이 버전에는 잘못된 편집 사항이 있을 수 있습니다. 최신 확인된 스냅샷으로 전환하십시오.
필요한 것
-
이 단계는 번역되지 않았습니다. 번역을 도와주십시오
-
Remove the following color-coded screws:
-
These screws secure the RAM and hard drive covers, respectively.
-
These screws secure the optical drive to the lower case of the laptop.
-
-
이 단계는 번역되지 않았습니다. 번역을 도와주십시오
-
Remove the following screws:
-
Five screws highlighted in orange.
-
Two screws highlighted in blue.
-
Pry the hard drive connector upwards from its socket on the logic board.
-
-
-
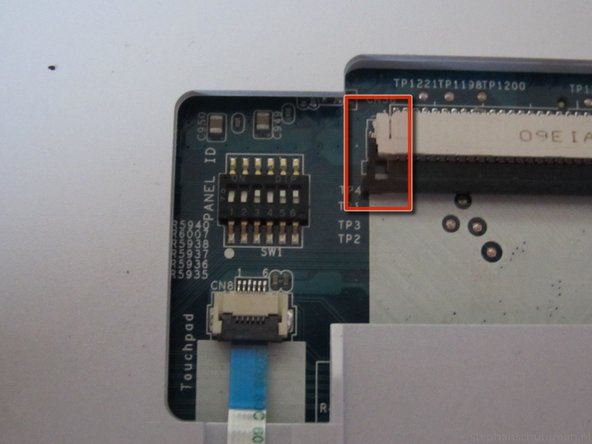
이 단계는 번역되지 않았습니다. 번역을 도와주십시오
-
Flip up the retaining flap (highlighted in red) on the keyboard ribbon cable ZIF socket.
-
Pull the keyboard ribbon cable straight out of its socket toward the front edge of the laptop.
-


다른 7명이 해당 안내서를 완성하였습니다.
댓글 3개
OMG... guys, you need just unscrew FOUR screws on the bottom (two orange circles on the same level that yellow sticker and two orange-circled screws in the middle of left and right side) and then pop the keyboard up with knife, etc, and disconnect the cable.
agree with Paul G. you don’t need to remove all the plastic case to change the keyboard
Pierret -