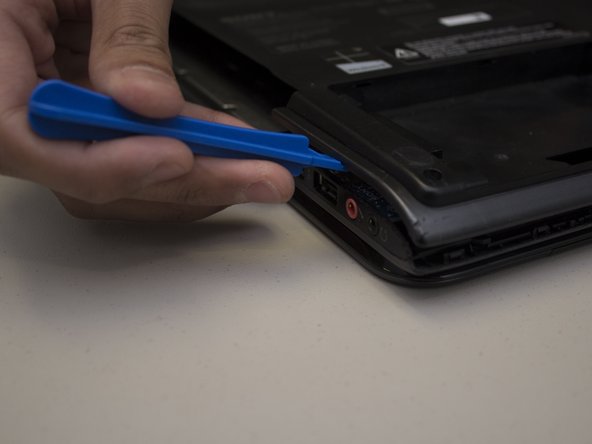
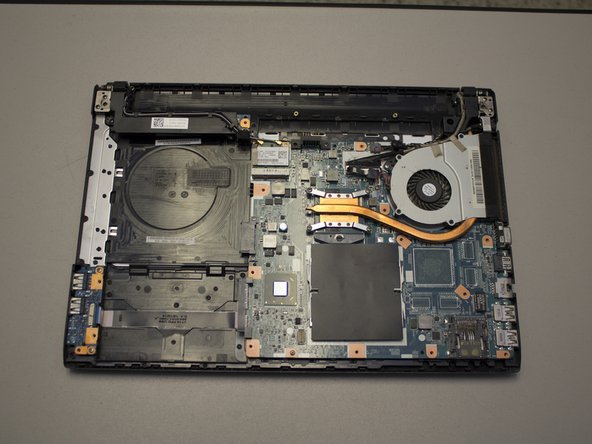
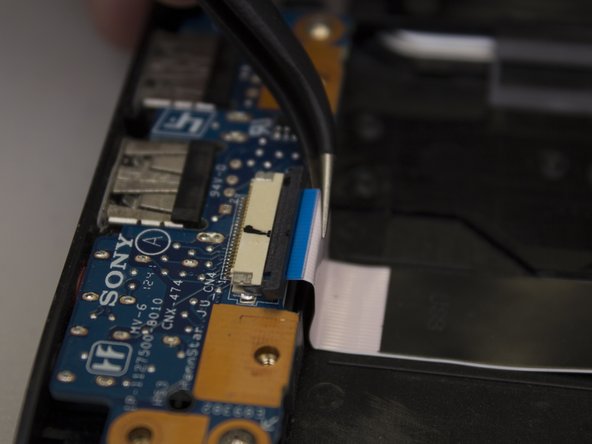
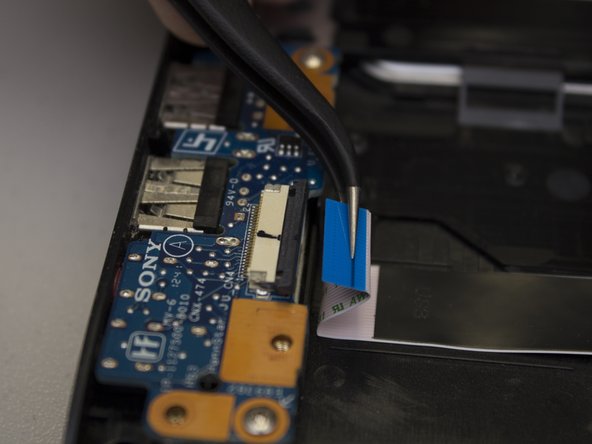
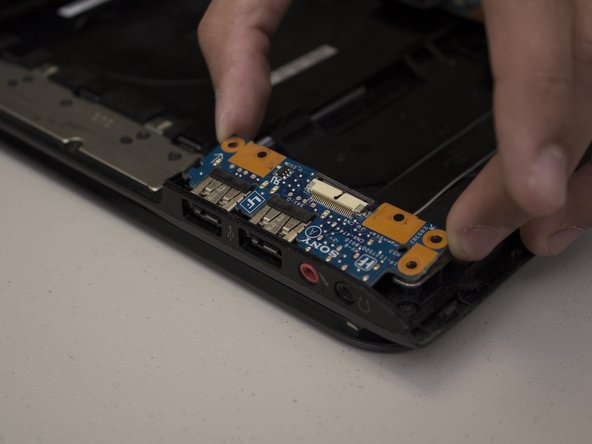
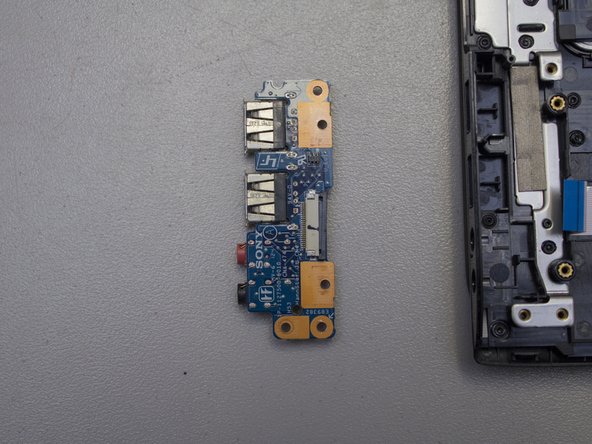
주요 콘텐츠로 건너뛰기

Sony VAIO SVE14AJ16L I/O Card Replacement

필요한 것

  1. Sony VAIO SVE14AJ16L I/O Card Replacement, I/O Card: 1 단계, 이미지 1/1
    • Flip the laptop so the bottom is facing you.

  2. Sony VAIO SVE14AJ16L I/O Card Replacement: 2 단계, 이미지 1/2 Sony VAIO SVE14AJ16L I/O Card Replacement: 2 단계, 이미지 2/2
    • Remove the battery, hard drive cover, and RAM cover.

    • Unscrew the two Phillips screws to remove the hard drive from the computer

    • If you're unsure how to remove the covers for the hard drive, battery, and RAM, refer to the guides on replacing these components.

  3. Sony VAIO SVE14AJ16L I/O Card Replacement: 3 단계, 이미지 1/3 Sony VAIO SVE14AJ16L I/O Card Replacement: 3 단계, 이미지 2/3 Sony VAIO SVE14AJ16L I/O Card Replacement: 3 단계, 이미지 3/3
    이 단계에 사용된 도구:
    Magnetic Project Mat
    $19.95
    구매
    • Remove the 13 Phillips #0 screws.

    • Make sure you have an organization system to remember which screws go where, as the majority are different sizes! The iFixit Magnetic Project Mat is an awesome tool for this exact reason!

    • Carefully pry apart the clipped-on bottom panel of the laptop to expose the internals using the iFixit opening tool.

  4. Sony VAIO SVE14AJ16L I/O Card Replacement: 4 단계, 이미지 1/1
    • Locate the I/O card in the bottom left hand corner (or upper right hand corner depending on which direction you have the laptop) of the case.

  5. Sony VAIO SVE14AJ16L I/O Card Replacement: 5 단계, 이미지 1/3 Sony VAIO SVE14AJ16L I/O Card Replacement: 5 단계, 이미지 2/3 Sony VAIO SVE14AJ16L I/O Card Replacement: 5 단계, 이미지 3/3
    • Carefully slide the black retainer bar towards the ribbon cable with a nylon supdger until parallel.

    • Carefully pull the ribbon cable out of its socket with a pair of tweezers.

  6. Sony VAIO SVE14AJ16L I/O Card Replacement: 6 단계, 이미지 1/3 Sony VAIO SVE14AJ16L I/O Card Replacement: 6 단계, 이미지 2/3 Sony VAIO SVE14AJ16L I/O Card Replacement: 6 단계, 이미지 3/3
    • Remove the two screws on the corners of the I/O card using a Phillips #0 screwdriver.

    • Lift the edge of the card up and away from the laptop, then pull it away from the side ports.

결론

To put Humpty Dumpty together again, follow these instructions in the reverse order.

Carlos Landa

회원 가입일: 09/28/18

219 평판

안내서 1개 작성함

댓글 0개

댓글 쓰기

조회 통계:

24 시간 전: 2

7일 전: 4

30일 전: 7

전체 시간: 262