주요 콘텐츠로 건너뛰기

Sony VAIO SVE14AJ16L RAM Replacement

필요한 것

  1. Sony VAIO SVE14AJ16L RAM Replacement, RAM: 1 단계, 이미지 1/1
    • Turn your laptop off before starting.

    • Turn the laptop upside down onto the closed lid so that the bottom is facing you.

  2. Sony VAIO SVE14AJ16L RAM Replacement: 2 단계, 이미지 1/2 Sony VAIO SVE14AJ16L RAM Replacement: 2 단계, 이미지 2/2
    • Locate and remove the lone screw on the RAM cover with a Phillips #0 head screw driver.

    • Carefully pry the RAM cover up.

    • There will be some resistance, so use strength and not speed to remove the cover.

  3. Sony VAIO SVE14AJ16L RAM Replacement: 3 단계, 이미지 1/3 Sony VAIO SVE14AJ16L RAM Replacement: 3 단계, 이미지 2/3 Sony VAIO SVE14AJ16L RAM Replacement: 3 단계, 이미지 3/3
    이 단계에 사용된 도구:
    iFixit Opening Tool
    $1.99
    구매
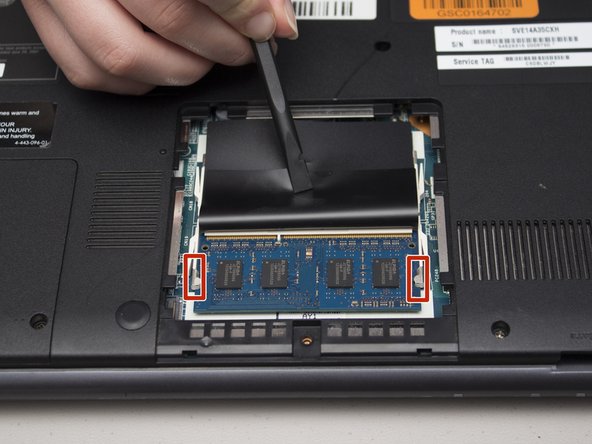
    • With the cover removed, peel back the black protective plastic to expose one of the two RAM sticks.

    • Make sure not to touch any part of the blue board itself, and only handle the stick from it's edges.

    • Gently, but firmly push back the two side anchors that hold in the RAM using either an iFixit Opening Tool or your fingernails.

  4. Sony VAIO SVE14AJ16L RAM Replacement: 4 단계, 이미지 1/2 Sony VAIO SVE14AJ16L RAM Replacement: 4 단계, 이미지 2/2
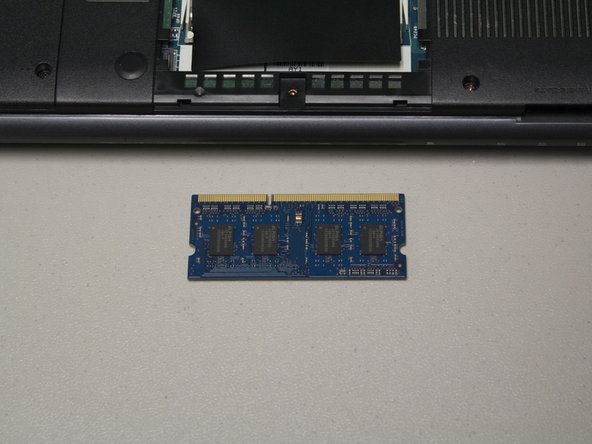
    • Once both anchors are released from the RAM stick, the stick will spring up at an angle

    • Finally, carefully pull the RAM stick away from the laptop at the same angle it is sitting at.

결론

To reassemble your device, follow these instructions in reverse order.

Dustin Smith

회원 가입일: 09/21/18

236 평판

안내서 2개 작성하였습니다

댓글 0개

댓글 쓰기

조회 통계:

24 시간 전: 0

7일 전: 0

30일 전: 1

전체 시간: 532