주요 콘텐츠로 건너뛰기

Sony Vaio Fit 13A Wireless Card Replacement

필요한 것

  1. Sony Vaio Fit 13A Wireless Card Replacement, Back Cover: 1 단계, 이미지 1/2 Sony Vaio Fit 13A Wireless Card Replacement, Back Cover: 1 단계, 이미지 2/2
    • Starting with the laptop top-down, locate and remove the twelve 1mm Phillips #0 screws securing the back cover to the main body of the computer.

  2. Sony Vaio Fit 13A Wireless Card Replacement: 2 단계, 이미지 1/2 Sony Vaio Fit 13A Wireless Card Replacement: 2 단계, 이미지 2/2
    • Use the Plastic Opening Tools or Metal Spudger to carefully loosen back cover from the body of the computer.

    • Be sure to avoid headphone jack when removing back cover by lifting cover away from computer and up.

  3. Sony Vaio Fit 13A Wireless Card Replacement: 3 단계, 이미지 1/1
    • Lift off back cover to access inner components of computer.

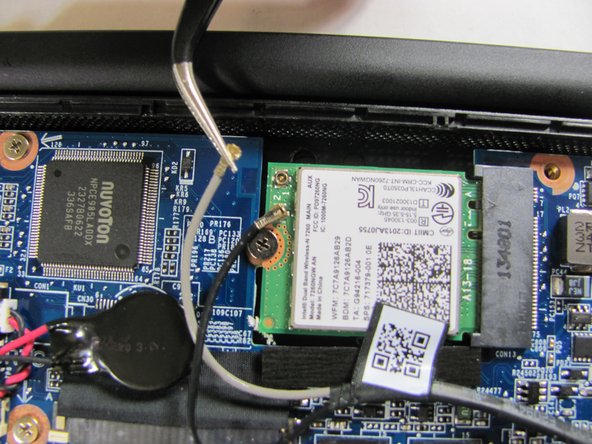
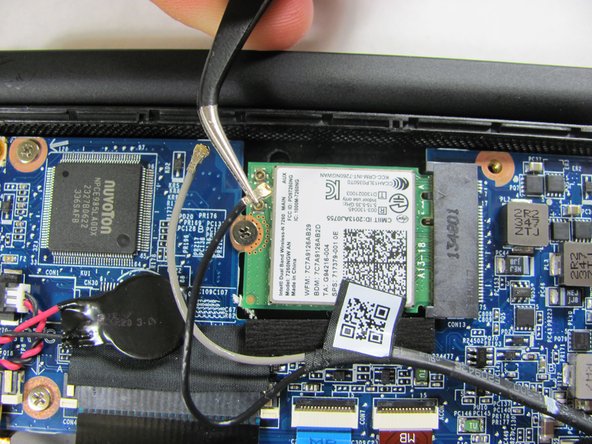
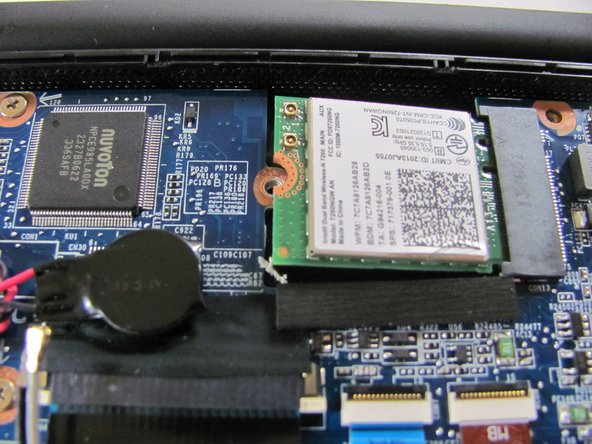
  4. Sony Vaio Fit 13A Wireless Card Replacement, Wireless Card: 4 단계, 이미지 1/3 Sony Vaio Fit 13A Wireless Card Replacement, Wireless Card: 4 단계, 이미지 2/3 Sony Vaio Fit 13A Wireless Card Replacement, Wireless Card: 4 단계, 이미지 3/3
    • Use a pair of tweezers to gently disconnect the two antenna cables.

  5. Sony Vaio Fit 13A Wireless Card Replacement: 5 단계, 이미지 1/2 Sony Vaio Fit 13A Wireless Card Replacement: 5 단계, 이미지 2/2
    • Locate and remove the single 1mm Phillips #0 screw that is securing the wireless card to the motherboard.

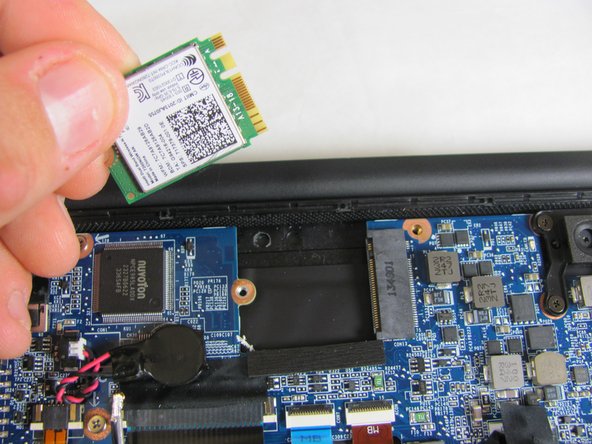
  6. Sony Vaio Fit 13A Wireless Card Replacement: 6 단계, 이미지 1/2 Sony Vaio Fit 13A Wireless Card Replacement: 6 단계, 이미지 2/2
    • Gently grasp wireless card with two fingers and pull away from motherboard to the left.

    • Do not pull the wireless card up when removing it. This could snap the connections.

결론

To reassemble your device, follow these instructions in reverse order.

Alex Prange

회원 가입일: 01/08/15

527 평판

안내서 3개 작성하였습니다

Cal Poly, Team 21-19, Maness Winter 2015 Cal Poly, Team 21-19, Maness Winter 2015 회원

CPSU-MANESS-W15S21G19

4 회원들

안내서 12개 작성하였습니다

댓글 0개

댓글 쓰기

조회 통계:

24 시간 전: 1

7일 전: 1

30일 전: 3

전체 시간: 1,814