이 버전에는 잘못된 편집 사항이 있을 수 있습니다. 최신 확인된 스냅샷으로 전환하십시오.
필요한 것
-
이 단계는 번역되지 않았습니다. 번역을 도와주십시오
-
Turn your device upside down and remove the 6 10mm screws attaching the back casing to the device using a phillips head screwdriver.
-
-
이 단계는 번역되지 않았습니다. 번역을 도와주십시오
-
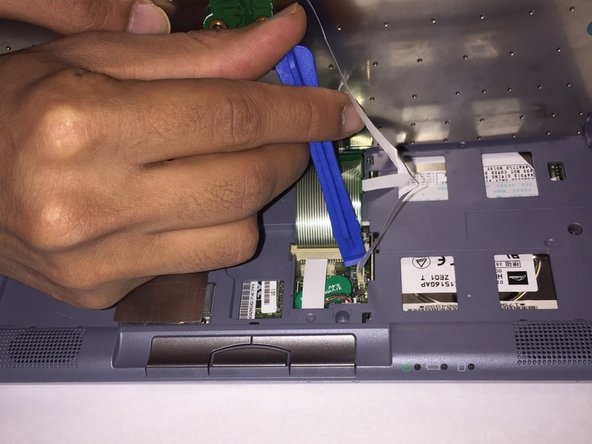
Lift up underneath the keyboard using the iFixit opening tool to expose the ribbon wires connecting the keyboard to the motherboard.
-
-
이 단계는 번역되지 않았습니다. 번역을 도와주십시오
-
Use a plastic opening tool or your fingernail to flip up the small retaining flaps, then pull the ribbon cables out of their connectors.
-
-
-
이 단계는 번역되지 않았습니다. 번역을 도와주십시오
-
Remove the three 10 mm screws holding the casing to the top of the motherboard using a Phillips screwdriver.
-
-
이 단계는 번역되지 않았습니다. 번역을 도와주십시오
-
Remove the 6 mm Phillips #0 screw on the left side of the battery that holds the casing to the device.
-
-
이 단계는 번역되지 않았습니다. 번역을 도와주십시오
-
Turn the device upside down and remove the 6 mm Phillips #0 screw holding the casing to the device.
-
-
이 단계는 번역되지 않았습니다. 번역을 도와주십시오
-
Remove the top casing by lifting up on the plastic exposing the two speakers.
-
-
이 단계는 번역되지 않았습니다. 번역을 도와주십시오
-
Disconnect the wire from the board by pulling the wire out of the harness.
-


다른 한 분이 해당 안내서를 완성하였습니다.
팀

UMass Dartmouth, Team S3-G2, Botvin Spring 2017 UMass Dartmouth, Team S3-G2, Botvin Spring 2017 회원
UMASSD-BOTVIN-S17S3G2
3 회원들
안내서 8개 작성하였습니다