주요 콘텐츠로 건너뛰기

Sony Vaio PCG-31311L Keyboard Replacement

필요한 것

  1. Sony Vaio PCG-31311L Keyboard Replacement, Keyboard: 1 단계, 이미지 1/2 Sony Vaio PCG-31311L Keyboard Replacement, Keyboard: 1 단계, 이미지 2/2
    • Start with device closed, powered off, and upside down.

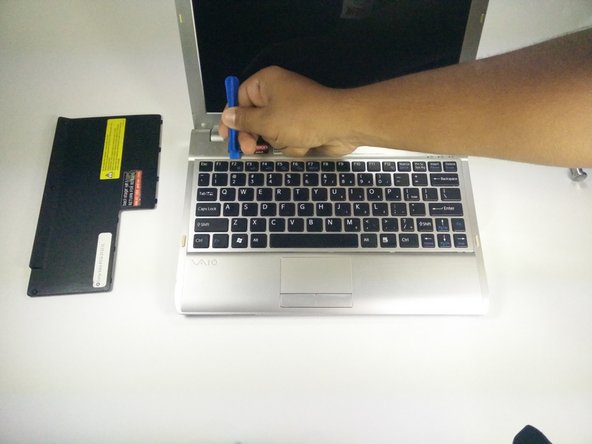
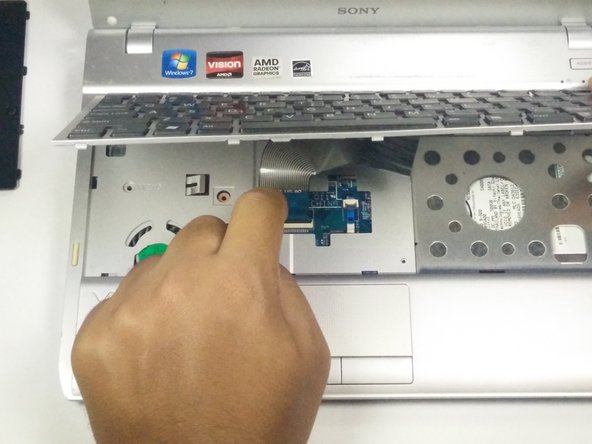
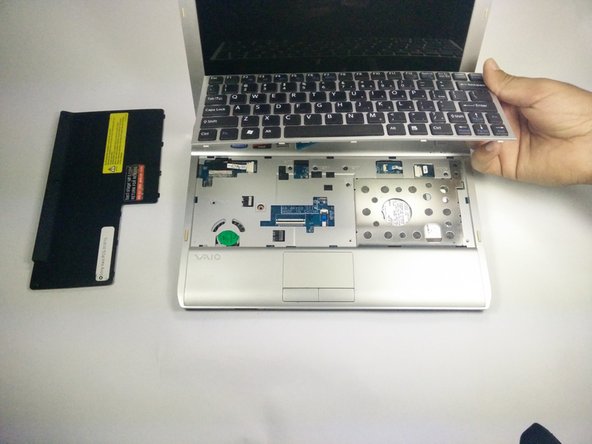
    • Locate 3 screws on the bottom plate and unscrew

    • These screws do not detach from the bottom plate.

  2. Sony Vaio PCG-31311L Keyboard Replacement: 2 단계, 이미지 1/2 Sony Vaio PCG-31311L Keyboard Replacement: 2 단계, 이미지 2/2
    • Use a plastic opening tool to pry up on the plate and remove from device.

  3. Sony Vaio PCG-31311L Keyboard Replacement: 3 단계, 이미지 1/1
    • Locate screw labeled "KB" and remove.

  4. Sony Vaio PCG-31311L Keyboard Replacement: 4 단계, 이미지 1/3 Sony Vaio PCG-31311L Keyboard Replacement: 4 단계, 이미지 2/3 Sony Vaio PCG-31311L Keyboard Replacement: 4 단계, 이미지 3/3
    • Use a plastic opening tool tool to pry around the edge of the keyboard.

  5. Sony Vaio PCG-31311L Keyboard Replacement: 5 단계, 이미지 1/3 Sony Vaio PCG-31311L Keyboard Replacement: 5 단계, 이미지 2/3 Sony Vaio PCG-31311L Keyboard Replacement: 5 단계, 이미지 3/3
    • Once detached, tilt the keyboard forward, exposing a blue ribbon cable.

    • Place finger on black tab and pull back. Then, give a gentle tug on the ribbon cable and it will detach.

    • Once the ribbon cable has been detached, lift the keyboard away from the device.

결론

To reassemble your device, follow these instructions in reverse order.

Tyler

회원 가입일: 08/24/16

45 평판

안내서 5개 작성하였습니다

USF Tampa, Team 1-1, Lacy Fall 2016 USF Tampa, Team 1-1, Lacy Fall 2016 회원

USFT-LACY-F16S1G1

5 회원들

안내서 10개 작성하였습니다

댓글 0개

댓글 쓰기

조회 통계:

24 시간 전: 0

7일 전: 3

30일 전: 6

전체 시간: 533