주요 콘텐츠로 건너뛰기

Sony Vaio PCG-41216L Hard Drive Replacement

필요한 것

  1. Sony Vaio PCG-41216L Hard Drive Replacement, Hard Drive: 1 단계, 이미지 1/2 Sony Vaio PCG-41216L Hard Drive Replacement, Hard Drive: 1 단계, 이미지 2/2
    • Flip the laptop over to begin the process.

    • Make sure the laptop is turned off and unplugged from the power cable.

  2. Sony Vaio PCG-41216L Hard Drive Replacement: 2 단계, 이미지 1/3 Sony Vaio PCG-41216L Hard Drive Replacement: 2 단계, 이미지 2/3 Sony Vaio PCG-41216L Hard Drive Replacement: 2 단계, 이미지 3/3
    • Remove the two 7mm Phillips #1 screws holding the battery cover.

  3. Sony Vaio PCG-41216L Hard Drive Replacement: 3 단계, 이미지 1/3 Sony Vaio PCG-41216L Hard Drive Replacement: 3 단계, 이미지 2/3 Sony Vaio PCG-41216L Hard Drive Replacement: 3 단계, 이미지 3/3
    • Peel off the ribbon cable, starting at the top by the wifi card.

  4. Sony Vaio PCG-41216L Hard Drive Replacement: 4 단계, 이미지 1/3 Sony Vaio PCG-41216L Hard Drive Replacement: 4 단계, 이미지 2/3 Sony Vaio PCG-41216L Hard Drive Replacement: 4 단계, 이미지 3/3
    • Remove all of the 7mm Phillips #1 casing screws around the hard drive.

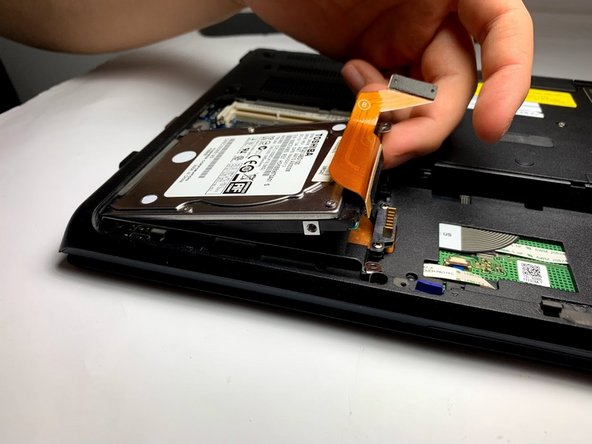
  5. Sony Vaio PCG-41216L Hard Drive Replacement: 5 단계, 이미지 1/1
    • Pull the hard drive out, then remove the 3mm Phillips screws that connect the hard drive to the casing.

결론

To reassemble your device, follow these instructions in reverse order.

john nunnelee

회원 가입일: 01/10/19

174 평판

안내서 1개 작성함

댓글 0개

댓글 쓰기

조회 통계:

24 시간 전: 1

7일 전: 5

30일 전: 23

전체 시간: 2,214