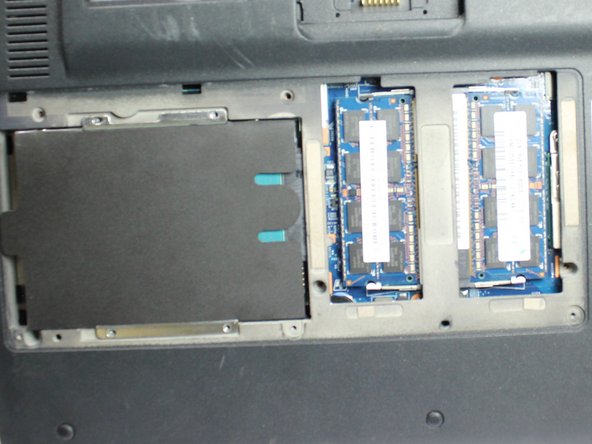
주요 콘텐츠로 건너뛰기

Sony Vaio VPC-Y2190X RAM Card Replacement

필요한 것

  1. Sony Vaio VPC-Y2190X RAM Card Replacement, Battery: 1 단계, 이미지 1/1
    • Flip your laptop so that the bottom is facing up.

  2. Sony Vaio VPC-Y2190X RAM Card Replacement: 2 단계, 이미지 1/1
    • Slide the “Lock” switch to the right.

    • Slide and hold the “Release” switch to the left.

  3. Sony Vaio VPC-Y2190X RAM Card Replacement: 3 단계, 이미지 1/2 Sony Vaio VPC-Y2190X RAM Card Replacement: 3 단계, 이미지 2/2
    • While holding the “Release” switch, lift the lip of the battery.

    • Lift the battery up and out of the laptop.

  4. Sony Vaio VPC-Y2190X RAM Card Replacement, RAM Card: 4 단계, 이미지 1/2 Sony Vaio VPC-Y2190X RAM Card Replacement, RAM Card: 4 단계, 이미지 2/2
    • Use a #0PH screwdriver to unscrew the three 4.80mm screws.

    • Remove the panel.

  5. Sony Vaio VPC-Y2190X RAM Card Replacement: 5 단계, 이미지 1/1
    • Pull the metal tabs in opposite directions, away from the RAM card.

    • The RAM card will swing upwards.

  6. Sony Vaio VPC-Y2190X RAM Card Replacement: 6 단계, 이미지 1/1
    • Grab the RAM card from its center.

    • Gently pull the RAM card out.

결론

To reassemble your device, follow these instructions in reverse order.

다른 한 분이 해당 안내서를 완성하였습니다.

Kris Fleming

회원 가입일: 01/31/19

285 평판

안내서 2개 작성하였습니다

댓글 0개

댓글 쓰기

조회 통계:

24 시간 전: 0

7일 전: 2

30일 전: 6

전체 시간: 318