주요 콘텐츠로 건너뛰기

Sony Vaio VPCCW17FX Wifi Card Replacement

필요한 것

  1. Sony Vaio VPCCW17FX Wifi Card  Replacement, Back case: 1 단계, 이미지 1/1
    • Turn the laptop over and orient it as shown.

  2. Sony Vaio VPCCW17FX Wifi Card  Replacement: 2 단계, 이미지 1/3 Sony Vaio VPCCW17FX Wifi Card  Replacement: 2 단계, 이미지 2/3 Sony Vaio VPCCW17FX Wifi Card  Replacement: 2 단계, 이미지 3/3
    • Remove the battery by pinching the two lock tabs towards the center.

    • Next, lift up on the battery to remove it.

  3. Sony Vaio VPCCW17FX Wifi Card  Replacement: 3 단계, 이미지 1/1
    • Using a Phillips #00 screwdriver, remove the twenty-two 5.6 mm screws from the back of the laptop.

    • Be sure to remove all screws, including those that are typically covered by the battery.

  4. Sony Vaio VPCCW17FX Wifi Card  Replacement: 4 단계, 이미지 1/3 Sony Vaio VPCCW17FX Wifi Card  Replacement: 4 단계, 이미지 2/3 Sony Vaio VPCCW17FX Wifi Card  Replacement: 4 단계, 이미지 3/3
    • Now, remove the small covers from the back of the case.

    • Using a Phillips #00 screwdriver, unscrew the three 5.6 mm screws from the covers (one screw on the RAM cover [middle] and two screws on the Hard Drive cover [bottom right]).

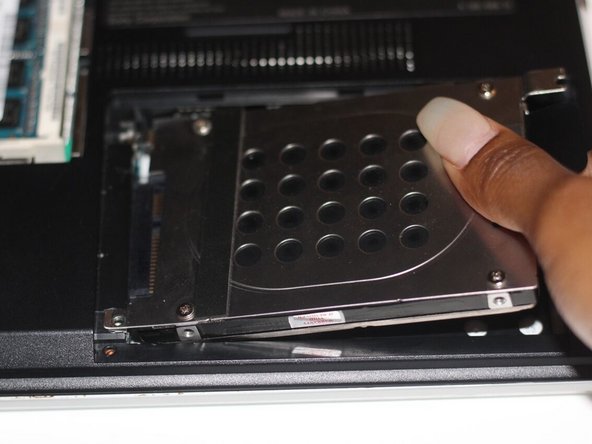
    • Then, lift up on and remove these covers as shown in the third image.

  5. Sony Vaio VPCCW17FX Wifi Card  Replacement: 5 단계, 이미지 1/3 Sony Vaio VPCCW17FX Wifi Card  Replacement: 5 단계, 이미지 2/3 Sony Vaio VPCCW17FX Wifi Card  Replacement: 5 단계, 이미지 3/3
    • Remove the hard drive.

    • Using a Phillips #00 screwdriver, unscrew the two remaining 4.9 mm screws holding the hard drive into place.

    • Next, lift up and pull outwards to release the hard drive from its socket.

  6. Sony Vaio VPCCW17FX Wifi Card  Replacement: 6 단계, 이미지 1/1
    • Using your fingers, grasp the black tab and lightly pull up on the ribbon cable to detach it from the motherboard.

  7. Sony Vaio VPCCW17FX Wifi Card  Replacement: 7 단계, 이미지 1/1
    • After proper removal of all necessary screws, gently lift up on the back case to remove it.

  8. Sony Vaio VPCCW17FX Wifi Card  Replacement, Wifi Card: 8 단계, 이미지 1/2 Sony Vaio VPCCW17FX Wifi Card  Replacement, Wifi Card: 8 단계, 이미지 2/2
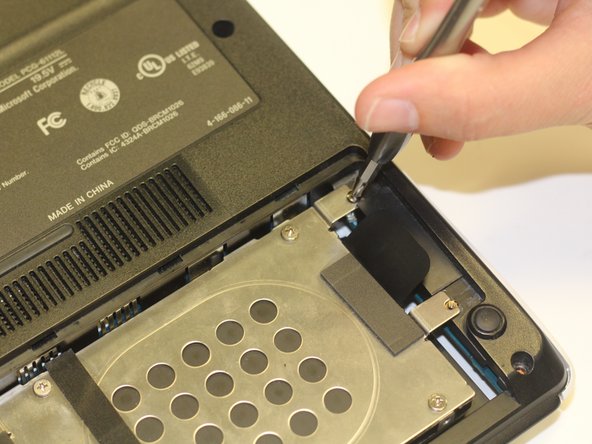
    • Using your fingers, grasp the white and black wires connected to the wifi card. Pull up on these wires until they release from the card. Do not be afraid to use some force.

  9. Sony Vaio VPCCW17FX Wifi Card  Replacement: 9 단계, 이미지 1/1
    • Using the Phillips #00 screwdriver, unscrew the two 4.9 mm screws that connect the WiFi card to the motherboard.

  10. Sony Vaio VPCCW17FX Wifi Card  Replacement: 10 단계, 이미지 1/1
    • Using your fingers, lightly grasp the wifi card and firmly pull up and out on the card in order to release the wifi card from its socket.

결론

To reassemble your device, follow these instructions in reverse order.

Makaila Howard

회원 가입일: 01/29/18

445 평판

안내서 4개 작성하였습니다

University of Alabama, Team S3-G9, Bedsole Spring 2018 University of Alabama, Team S3-G9, Bedsole Spring 2018 회원

UA-BEDSOLE-S18S3G9

3 회원들

안내서 12개 작성하였습니다

댓글 0개

댓글 쓰기

조회 통계:

24 시간 전: 0

7일 전: 4

30일 전: 16

전체 시간: 829