이 버전에는 잘못된 편집 사항이 있을 수 있습니다. 최신 확인된 스냅샷으로 전환하십시오.
필요한 것
-
이 단계는 번역되지 않았습니다. 번역을 도와주십시오
-
Turn the laptop off and unplug it.
-
Remove the screw on the left-hand side of the computer towards the back using a small Phillips #0 screwdriver.
-
-
이 단계는 번역되지 않았습니다. 번역을 도와주십시오
-
Open the laptop with the screen facing you.
-
Carefully lift the left side of the panel and unhook the right side. Do not pull beyond the length of the ribbon cable that secures it to the motherboard.
-
To separate the ribbon cable from the motherboard, grip it near the base and gently pull.
-
-
이 단계는 번역되지 않았습니다. 번역을 도와주십시오
-
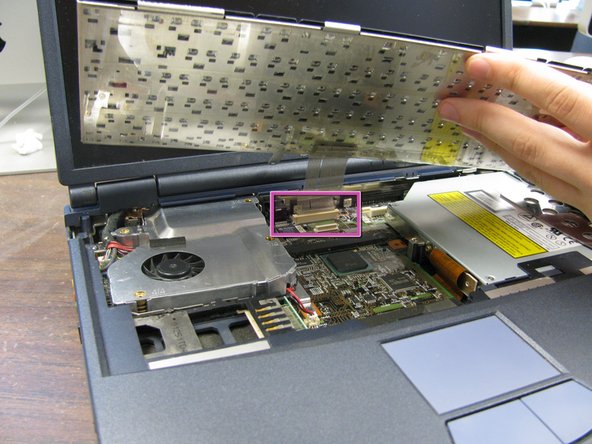
To remove the keyboard, lift it a few inches from the computer, taking care not to pull beyond the length of the ribbon cable that secures it to the motherboard.
-
Separate the ribbon cable from the motherboard by placing your fingers at the base and pulling gently.
-
-
-
이 단계는 번역되지 않았습니다. 번역을 도와주십시오
-
Attach the new keyboard’s ribbon cable to the motherboard by carefully inserting it into the white plastic outlet located at the top center of the motherboard.
-
Set the keyboard in place.
-
-
이 단계는 번역되지 않았습니다. 번역을 도와주십시오
-
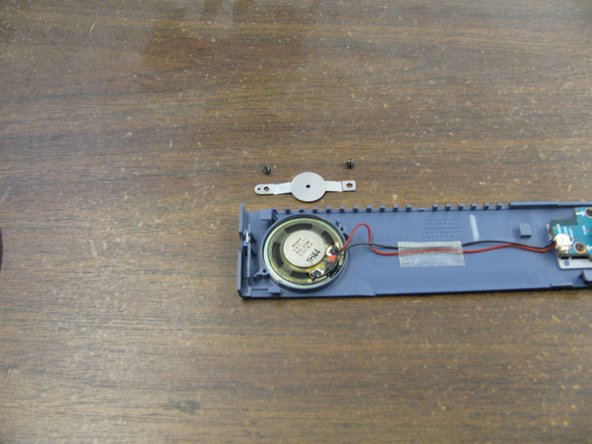
There are two speakers on the underside of the speaker panel, one on each end. Unplug both sets of the black and red wires from the circuit board by gently pulling at the base.
-
Remove the screws (two per speaker) with the Phillips #0 screwdriver. Then remove the metal brackets holding the speakers in place.
-
Remove the adhesive tape securing the speaker wires to the panel.
-
-
이 단계는 번역되지 않았습니다. 번역을 도와주십시오
-
The speakers are cemented to the panel. To remove the speakers from the panel, place either the screw driver or tweezers in the hole on the outer edge of the speaker and pry it off.
-


다른 한 분이 해당 안내서를 완성하였습니다.
팀

Cal Poly, Team 18-68, Johann Spring 2010 Cal Poly, Team 18-68, Johann Spring 2010 회원
CPSU-JOHANN-S10S18G68
4 회원들
안내서 9개 작성하였습니다