이 버전에는 잘못된 편집 사항이 있을 수 있습니다. 최신 확인된 스냅샷으로 전환하십시오.
필요한 것
-
이 단계는 번역되지 않았습니다. 번역을 도와주십시오
-
The battery is located on the left side of the laptop, as shown by the red circle.
-
Make sure the laptop is disconnected and turned completely off.
-
-
이 단계는 번역되지 않았습니다. 번역을 도와주십시오
-
Pull the plastic cover down (indicated by the arrow on the cover) and then swing it upwards to reveal the battery compartment.
-
The battery can now be removed by pulling it.
-
-
이 단계는 번역되지 않았습니다. 번역을 도와주십시오
-
Use your Philips #00 screwdriver to unscrew the small screw counterclockwise. This screw is for the audio/visual jacks on the left side of the laptop.
-
-
이 단계는 번역되지 않았습니다. 번역을 도와주십시오
-
Unlock the cover between the keyboard and screen.
-
Gently slide it to the right and lift it up.
-
Exercise caution to avoid excessive force, as wires are connected.
-
-
이 단계는 번역되지 않았습니다. 번역을 도와주십시오
-
Lift up the cover and lean it against the display so it is out of the way for the rest of the process.
-
Remove the small screw above the F6 key on the keyboard. Place screw in container to ensure it wont be lost.
-
-
-
이 단계는 번역되지 않았습니다. 번역을 도와주십시오
-
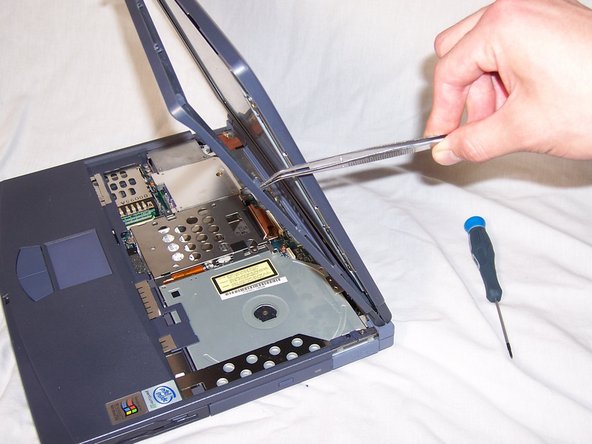
Find the green ribbon as indicated in the picture by the red circle. This is what connects the keyboard to the motherboard.
-
-
이 단계는 번역되지 않았습니다. 번역을 도와주십시오
-
Carefully unplug the ribbon cable using a pair of tweezers.
-
Lift up the white bar near the connection to the motherboard, and lightly lift the ribbon to release it from the motherboard.
-
-
이 단계는 번역되지 않았습니다. 번역을 도와주십시오
-
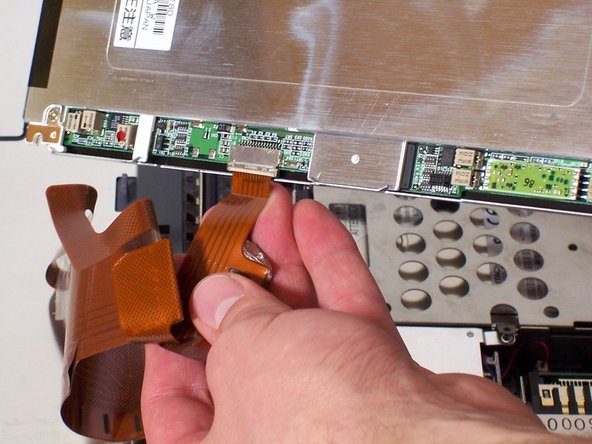
Now, pull on the ribbon cable, and it will detach from the motherboard.
-
-
이 단계는 번역되지 않았습니다. 번역을 도와주십시오
-
Your keyboard is now safety detached. Necessary repairs or replacements can be made from here.
-
-
이 단계는 번역되지 않았습니다. 번역을 도와주십시오
-
Use tweezers to remove the rubber covers on the four screws at the corners near the display.
-
-
이 단계는 번역되지 않았습니다. 번역을 도와주십시오
-
With the screwdriver, unscrew the four screws that attached the front bezel panel with the display assembly, as shown in the image.
-
-
이 단계는 번역되지 않았습니다. 번역을 도와주십시오
-
Using a spudger or another flat-headed tool, pry away the front bezel panel from the display assembly.
-
Apply pressure carefully while placing the spudger on the seam connecting the front and rear bezels.
-
Clips attaching the two panels should start to come apart.
-
-
이 단계는 번역되지 않았습니다. 번역을 도와주십시오
-
Remove all 14 clips and place them in a safe area.
-
Once all 14 clips are removed the bezel can be removed.
-
-
이 단계는 번역되지 않았습니다. 번역을 도와주십시오
-
Find and unscrew the four gold Philips-head screws that attach the display to the rear bezel of the display assembly.
-
Take care not to immediately remove the display, as cables are still attached.
-
-
이 단계는 번역되지 않았습니다. 번역을 도와주십시오
-
Locate the ribbon cable slot and the two-pin backlight cable. These are essential connections for the display.
-
Gently, but firmly, grasp the ribbon cable near its connection point.
-
Use steady, even pressure to pull the ribbon cable out of its socket. Be careful not to use excessive force.
-
Similarly, disconnect the two-pin backlight cable with gentle and controlled force. Ensure you disconnect both cables securely to avoid any damage during removal.
-


팀

Cal Poly, Team 29-77, Johann Spring 2010 Cal Poly, Team 29-77, Johann Spring 2010 회원
CPSU-JOHANN-S10S29G77
5 회원들
안내서 12개 작성하였습니다