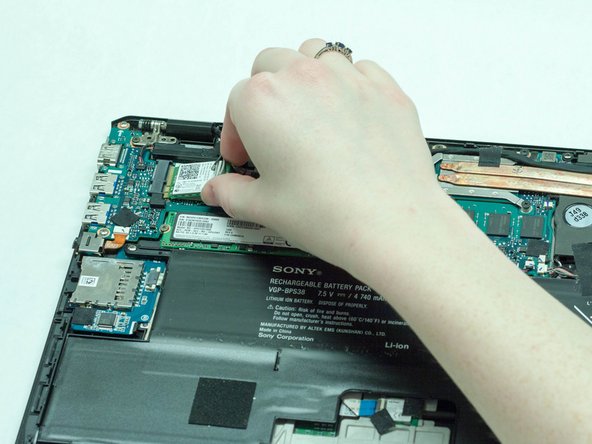
주요 콘텐츠로 건너뛰기

Sony Vaio Pro 13 WiFi Card Replacement

필요한 것

  1. Sony Vaio Pro 13 WiFi Card Replacement, Bottom Cover: 1 단계, 이미지 1/2 Sony Vaio Pro 13 WiFi Card Replacement, Bottom Cover: 1 단계, 이미지 2/2
    • Remove cover for the extended battery connector. Use your finger nail or a plastic opening tool to remove it.

    • Remove the two rubber feet at the back of the computer, these can be removed in the same way.

  2. Sony Vaio Pro 13 WiFi Card Replacement: 2 단계, 이미지 1/2 Sony Vaio Pro 13 WiFi Card Replacement: 2 단계, 이미지 2/2
    • Remove the four 5.6mm Philips #00 screws located at the top of the computer.

    • Remove the eight 3.6mm Philips #00 screws on the base of the computer.

  3. Sony Vaio Pro 13 WiFi Card Replacement: 3 단계, 이미지 1/2 Sony Vaio Pro 13 WiFi Card Replacement: 3 단계, 이미지 2/2
    • Using a plastic opening tool, pry the plastic casing away from the base of the computer, the remaining clips around the edges can be released using your hands.

    • Leave the side with the USB and audio port until last, then slide the case out and off, so the audio port doesn't get caught.

  4. Sony Vaio Pro 13 WiFi Card Replacement, WiFi Card: 4 단계, 이미지 1/3 Sony Vaio Pro 13 WiFi Card Replacement, WiFi Card: 4 단계, 이미지 2/3 Sony Vaio Pro 13 WiFi Card Replacement, WiFi Card: 4 단계, 이미지 3/3
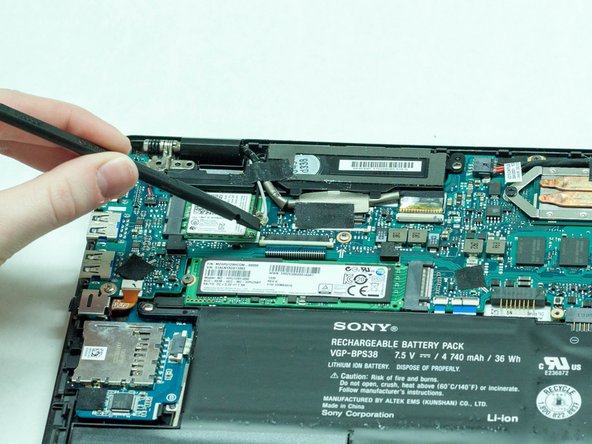
    • Remove the black tape from on top of the WiFi card.

    • Use the spudger to remove the white wire from the WiFi card.

  5. Sony Vaio Pro 13 WiFi Card Replacement: 5 단계, 이미지 1/2 Sony Vaio Pro 13 WiFi Card Replacement: 5 단계, 이미지 2/2
    • Remove the 4.2mm Philips #00 screw located at the top of the battery.

    • Simply lift the WiFi card away from the computer.

결론

To reassemble your device, follow these instructions in reverse order.

다른 한 분이 해당 안내서를 완성하였습니다.

Alex R

회원 가입일: 01/29/16

1,005 평판

안내서 5개 작성하였습니다

댓글 0개

댓글 쓰기

조회 통계:

24 시간 전: 2

7일 전: 4

30일 전: 15

전체 시간: 3,117