주요 콘텐츠로 건너뛰기

Sony Vaio SVE171C11L Hard Drive Replacement

필요한 것

  1. Sony Vaio SVE171C11L Hard Drive Replacement, Battery: 1 단계, 이미지 1/1
    • Turn the laptop over so its underside is facing upwards and visible.

  2. Sony Vaio SVE171C11L Hard Drive Replacement: 2 단계, 이미지 1/1
    • Once you flip the laptop over, make sure the right tab is pushed upwards to unlock it.

    • Use your left hand to push up the left tab to release the battery.

  3. Sony Vaio SVE171C11L Hard Drive Replacement: 3 단계, 이미지 1/1
    • After the battery is released, locate the small gap where the battery and the shell meet. Then lift the gap up and rotate the battery up and away from yourself.

  4. Sony Vaio SVE171C11L Hard Drive Replacement: 4 단계, 이미지 1/1
    • Pull the battery away.

  5. Sony Vaio SVE171C11L Hard Drive Replacement, Hard Drive: 5 단계, 이미지 1/1
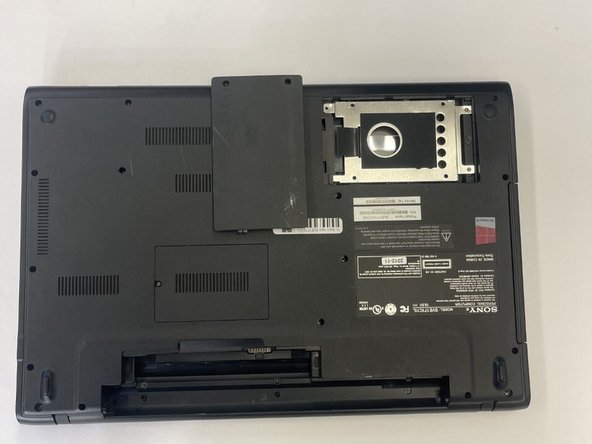
    • Use a Phillips #00 screwdriver to remove the two screws that secure the hard drive cover.

  6. Sony Vaio SVE171C11L Hard Drive Replacement: 6 단계, 이미지 1/2 Sony Vaio SVE171C11L Hard Drive Replacement: 6 단계, 이미지 2/2
    • After the screw have been removed, pop the hard drive cover open.

  7. Sony Vaio SVE171C11L Hard Drive Replacement: 7 단계, 이미지 1/1
    • Use a Phillips #00 screwdriver to remove the 3 screws that secure the hard drive.

  8. Sony Vaio SVE171C11L Hard Drive Replacement: 8 단계, 이미지 1/1
    • When finished removing the screws, use your fingers to hold the blue ribbon attached from the hard drive to remove it from laptop

결론

To reassemble your device, follow these instructions in reverse order.

Edward Briseno

회원 가입일: 09/26/22

893 평판

안내서 6개 작성하였습니다

CSU Los Angeles, Team 6-3, Adachi Fall 2022 CSU Los Angeles, Team 6-3, Adachi Fall 2022 회원

CSULA-ADACHI-F22S6G3

3 회원들

안내서 12개 작성하였습니다

댓글 0개

댓글 쓰기

조회 통계:

24 시간 전: 0

7일 전: 0

30일 전: 12

전체 시간: 219