주요 콘텐츠로 건너뛰기

Sony Vaio VPCW21FX Disc Drive Replacement

보관된 가이드
해당 안내서는 단지 역사적인 목적으로 보관됩니다. 최신 버전 안내서를 사용하여 수리 하십시오.

필요한 것

  1. Sony Vaio VPCW21FX Disc Drive Replacement, Battery: 1 단계, 이미지 1/1
    • Make sure your device is powered off and unplugged to avoid electric shock.

    • Place your device upside down with the bottom panel facing upwards.

    • Orient the device so the battery is away from you as shown

  2. Sony Vaio VPCW21FX Disc Drive Replacement: 2 단계, 이미지 1/2 Sony Vaio VPCW21FX Disc Drive Replacement: 2 단계, 이미지 2/2
    • Unlock the battery by sliding the lock switch to the right.

    • Locate the release latch. Slide the latch to the left to remove the battery from your laptop.

    • Be sure to lift up on the battery while you slide the latch to the left.

  3. Sony Vaio VPCW21FX Disc Drive Replacement: 3 단계, 이미지 1/2 Sony Vaio VPCW21FX Disc Drive Replacement: 3 단계, 이미지 2/2
    • Remove the battery from your laptop.

  4. Sony Vaio VPCW21FX Disc Drive Replacement, Disc Drive: 4 단계, 이미지 1/2 Sony Vaio VPCW21FX Disc Drive Replacement, Disc Drive: 4 단계, 이미지 2/2
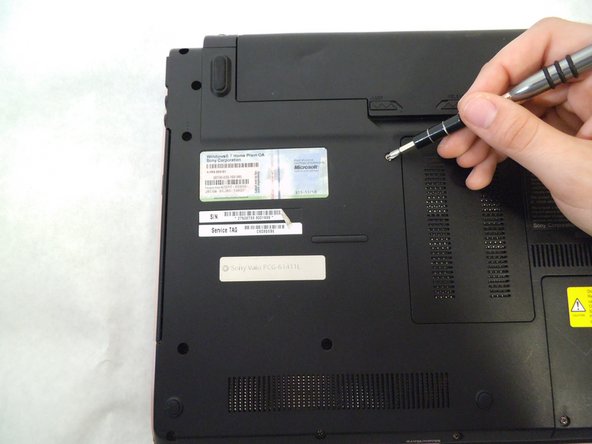
    • Remove the four 5.2mm screws that are holding in the Disc Drive.

  5. Sony Vaio VPCW21FX Disc Drive Replacement: 5 단계, 이미지 1/3 Sony Vaio VPCW21FX Disc Drive Replacement: 5 단계, 이미지 2/3 Sony Vaio VPCW21FX Disc Drive Replacement: 5 단계, 이미지 3/3
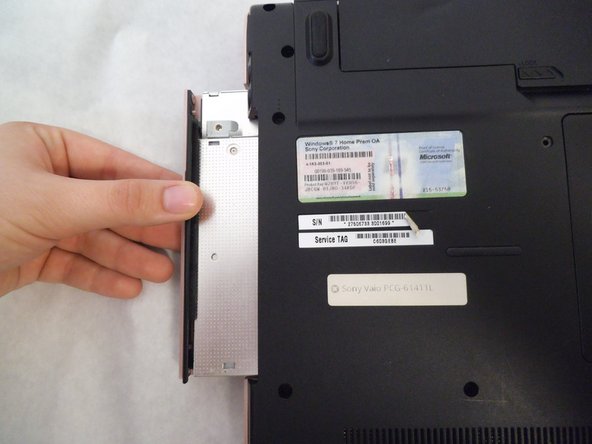
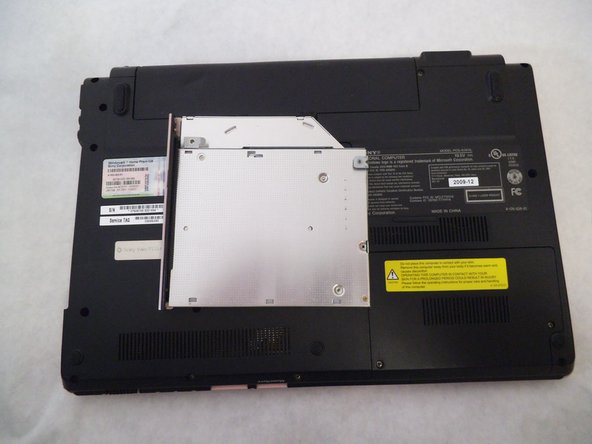
    • Grab the center of the drive and pull away from the computer. It should slide right out.

    • The plastic face plate may come off, this is okay, just push it back into place on the drive

결론

To reassemble your device, follow these instructions in reverse order.

Nicholas Corcoran

회원 가입일: 03/08/17

401 평판

안내서 4개 작성하였습니다

UMass Dartmouth, Team S2-G5, Isaacson Spring 2017 UMass Dartmouth, Team S2-G5, Isaacson Spring 2017 회원

UMASSD-ISAACSON-S17S2G5

2 회원들

안내서 4개 작성하였습니다

댓글 0개

댓글 쓰기

조회 통계:

24 시간 전: 0

7일 전: 0

30일 전: 7

전체 시간: 203