주요 콘텐츠로 건너뛰기

Sony Walkman NWZ-E438 Device Circuit Board Replacement

필요한 것

  1. Sony Walkman NWZ-E438 Device Circuit Board Replacement, Disassembling Sony Walkman NWZ-E438: 1 단계, 이미지 1/1
    • Unscrew the two screws on the back of the device using a Phillips PH000 screwdriver.

    • Keep the Phillips PH000 screwdriver aside for further steps in the guide. It will be the only screwdriver needed for this replacement.

  2. Sony Walkman NWZ-E438 Device Circuit Board Replacement: 2 단계, 이미지 1/1
    • Use a small prying tool to carefully pry open the back of the device.

  3. Sony Walkman NWZ-E438 Device Circuit Board Replacement, Circuit Board: 3 단계, 이미지 1/3 Sony Walkman NWZ-E438 Device Circuit Board Replacement, Circuit Board: 3 단계, 이미지 2/3 Sony Walkman NWZ-E438 Device Circuit Board Replacement, Circuit Board: 3 단계, 이미지 3/3
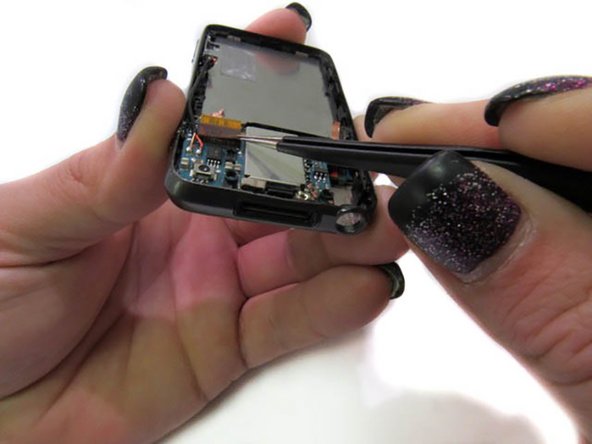
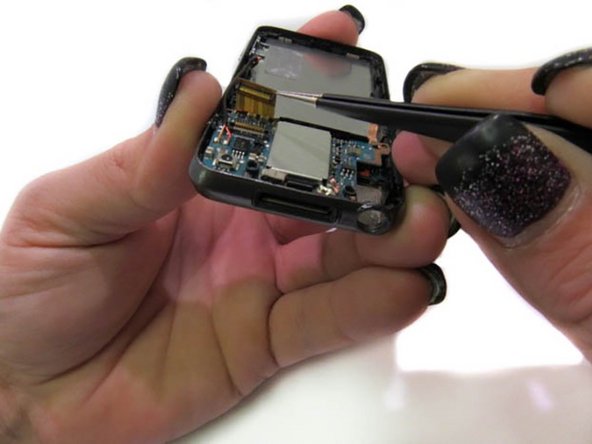
    • First, you must remove the black tape on the circuit board.

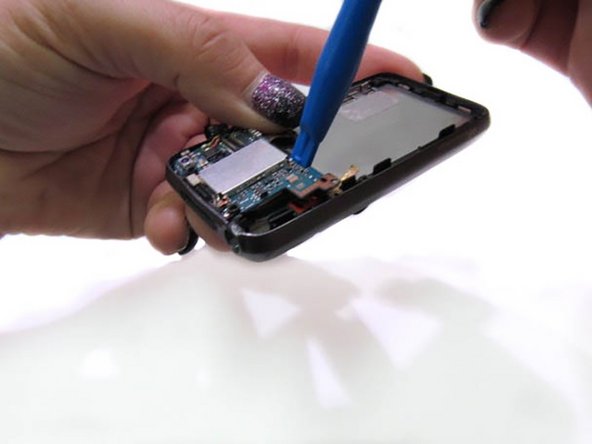
    • Next, pull up on the red and gold band until it detaches from the chip.

  4. Sony Walkman NWZ-E438 Device Circuit Board Replacement: 4 단계, 이미지 1/2 Sony Walkman NWZ-E438 Device Circuit Board Replacement: 4 단계, 이미지 2/2
    • Using a small plastic prying tool, slip the end under the device circuit board and slowly lift it.

    • Once the circuit board is lifted, carefully remove the chip with tweezers.

    • The circuit board will still be connected to the device by a wire.

  5. Sony Walkman NWZ-E438 Device Circuit Board Replacement: 5 단계, 이미지 1/1
    • Using a soldering iron, carefully heat the metal connecting the wires from the device to the circuit board.

    • You will need the soldering iron to reattach those wires once you've replaced the circuit board.

  6. Sony Walkman NWZ-E438 Device Circuit Board Replacement: 6 단계, 이미지 1/1
    • Carefully remove the circuit board from the device.

결론

For reassembling your device, follow the instructions in reverse.

Cheryl Zinn

회원 가입일: 10/08/15

525 평판

안내서 5개 작성하였습니다

댓글 0개

댓글 쓰기

조회 통계:

24 시간 전: 0

7일 전: 1

30일 전: 1

전체 시간: 515