주요 콘텐츠로 건너뛰기

Sony Xperia Z5 Compact Buttons Replacement

필요한 것

  1. Sony Xperia Z5 Compact Buttons Replacement, Battery: 1 단계, 이미지 1/2 Sony Xperia Z5 Compact Buttons Replacement, Battery: 1 단계, 이미지 2/2
    • Power off and remove SIM card tray.

  2. Sony Xperia Z5 Compact Buttons Replacement: 2 단계, 이미지 1/3 Sony Xperia Z5 Compact Buttons Replacement: 2 단계, 이미지 2/3 Sony Xperia Z5 Compact Buttons Replacement: 2 단계, 이미지 3/3
    • Heat up the back cover to soften the adhesive.

    • Place the suction cup to open a gap from top side, then insert guitar picks and slide it to cut the adhesive underneath.

    • Remove back cover.

  3. Sony Xperia Z5 Compact Buttons Replacement: 3 단계, 이미지 1/2 Sony Xperia Z5 Compact Buttons Replacement: 3 단계, 이미지 2/2
    • Twist off 10 Phillips screws all.

    • Loosen NFC clip and flashlight clip.

  4. Sony Xperia Z5 Compact Buttons Replacement: 4 단계, 이미지 1/3 Sony Xperia Z5 Compact Buttons Replacement: 4 단계, 이미지 2/3 Sony Xperia Z5 Compact Buttons Replacement: 4 단계, 이미지 3/3
    • Remove the plastic bracket.

    • Pry up and remove back frame.

  5. Sony Xperia Z5 Compact Buttons Replacement: 5 단계, 이미지 1/3 Sony Xperia Z5 Compact Buttons Replacement: 5 단계, 이미지 2/3 Sony Xperia Z5 Compact Buttons Replacement: 5 단계, 이미지 3/3
    • Remove front camera.

  6. Sony Xperia Z5 Compact Buttons Replacement: 6 단계, 이미지 1/3 Sony Xperia Z5 Compact Buttons Replacement: 6 단계, 이미지 2/3 Sony Xperia Z5 Compact Buttons Replacement: 6 단계, 이미지 3/3
    • Remove rear camera.

  7. Sony Xperia Z5 Compact Buttons Replacement: 7 단계, 이미지 1/3 Sony Xperia Z5 Compact Buttons Replacement: 7 단계, 이미지 2/3 Sony Xperia Z5 Compact Buttons Replacement: 7 단계, 이미지 3/3
    • Remove loudspeaker.

  8. Sony Xperia Z5 Compact Buttons Replacement: 8 단계, 이미지 1/3 Sony Xperia Z5 Compact Buttons Replacement: 8 단계, 이미지 2/3 Sony Xperia Z5 Compact Buttons Replacement: 8 단계, 이미지 3/3
    • Release charging port connector.

    • Remove plastic protective bar.

    • Pry up motherboard assembly from this side. There are three flex connectors connecting the motherboard underneath. So pry up the motherboard assembly gently.

  9. Sony Xperia Z5 Compact Buttons Replacement: 9 단계, 이미지 1/3 Sony Xperia Z5 Compact Buttons Replacement: 9 단계, 이미지 2/3 Sony Xperia Z5 Compact Buttons Replacement: 9 단계, 이미지 3/3
    • Push audio jack out of the slot, no adhesive underneath.

    • Release LCD flex connector and main flex connector. Use a small flat tool to flip up the white edge of the connector to release tension on the end of the flex cable. Then the flex cable should slide out without any resistance.

    • Separate motherboard assembly from middle housing.

  10. Sony Xperia Z5 Compact Buttons Replacement: 10 단계, 이미지 1/2 Sony Xperia Z5 Compact Buttons Replacement: 10 단계, 이미지 2/2
    • Take away NFC antenna on battery.

    • Be aware that the NFC antenna is held by an adhesive and made of thin plastic. Remove it very carefully.

  11. Sony Xperia Z5 Compact Buttons Replacement: 11 단계, 이미지 1/3 Sony Xperia Z5 Compact Buttons Replacement: 11 단계, 이미지 2/3 Sony Xperia Z5 Compact Buttons Replacement: 11 단계, 이미지 3/3
    • Release battery connector.

    • Pull straight out on the black ends of the battery adhesive strips until they come off.

    • Pry up and remove battery.

  12. Sony Xperia Z5 Compact Buttons Replacement: 12 단계, 이미지 1/2 Sony Xperia Z5 Compact Buttons Replacement: 12 단계, 이미지 2/2
    • Place the new battery adhesive strips on the motherboard

    • Press the new battery in place

    • Follow all the steps in reverse to reassemble your phone

  13. Sony Xperia Z5 Compact Buttons Replacement, Buttons: 13 단계, 이미지 1/2 Sony Xperia Z5 Compact Buttons Replacement, Buttons: 13 단계, 이미지 2/2
    • Use the tweezers to push the buttons from the outside to the inside of the phone.

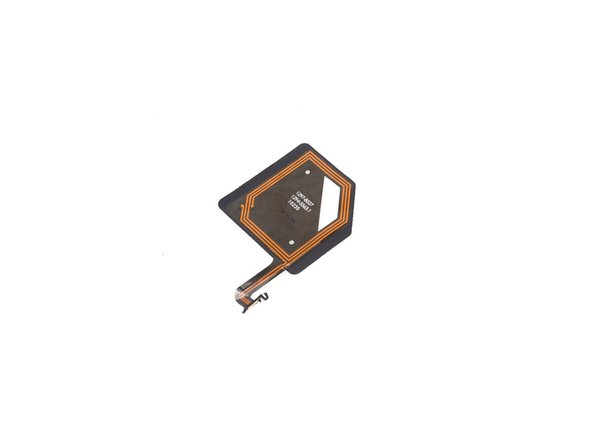
    • Use the tweezers to gently remove from the connector.

결론

To reassemble your device, follow these instructions in reverse order.

Grant Conner

회원 가입일: 02/20/20

280 평판

안내서 3개 작성하였습니다

댓글 0개

댓글 쓰기

조회 통계:

24 시간 전: 1

7일 전: 1

30일 전: 7

전체 시간: 358