주요 콘텐츠로 건너뛰기

Sony Xplod CDX-MP30 LCD Replacement

필요한 것

  1. Sony Xplod CDX-MP30 LCD Replacement, Front Panel: 1 단계, 이미지 1/3 Sony Xplod CDX-MP30 LCD Replacement, Front Panel: 1 단계, 이미지 2/3 Sony Xplod CDX-MP30 LCD Replacement, Front Panel: 1 단계, 이미지 3/3
    • Press down the release button on the bottom left corner of the face plate.

    • Then remove the face plate carefully.

  2. Sony Xplod CDX-MP30 LCD Replacement, LCD: 2 단계, 이미지 1/1
    • Unscrew the four (length - 11.11mm) phillips-head screws on the front screen.

  3. Sony Xplod CDX-MP30 LCD Replacement: 3 단계, 이미지 1/3 Sony Xplod CDX-MP30 LCD Replacement: 3 단계, 이미지 2/3 Sony Xplod CDX-MP30 LCD Replacement: 3 단계, 이미지 3/3
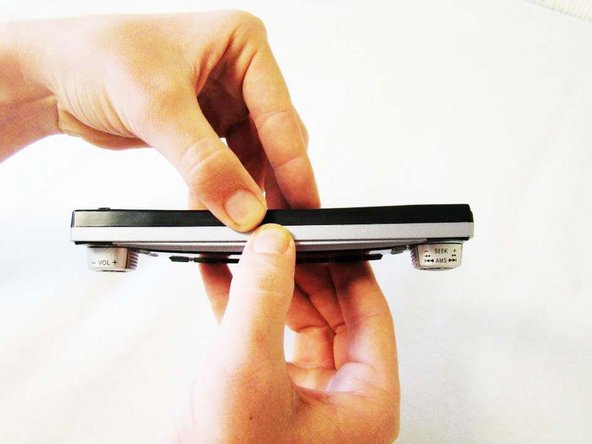
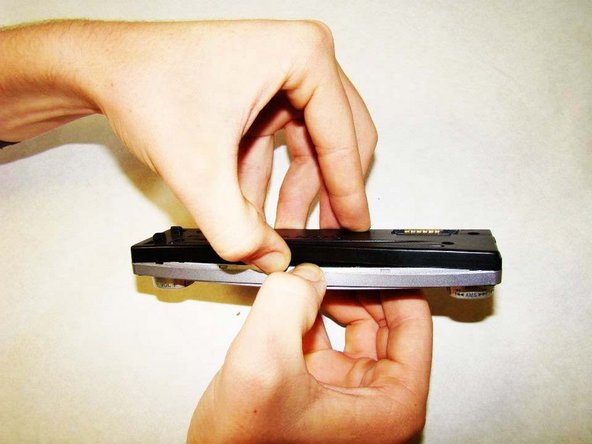
    • Use two fingers to create a small gap on the top of the faceplate, as indicated in the picture.

  4. Sony Xplod CDX-MP30 LCD Replacement: 4 단계, 이미지 1/3 Sony Xplod CDX-MP30 LCD Replacement: 4 단계, 이미지 2/3 Sony Xplod CDX-MP30 LCD Replacement: 4 단계, 이미지 3/3
    이 단계에 사용된 도구:
    Heavy-Duty Spudger
    $4.99
    구매
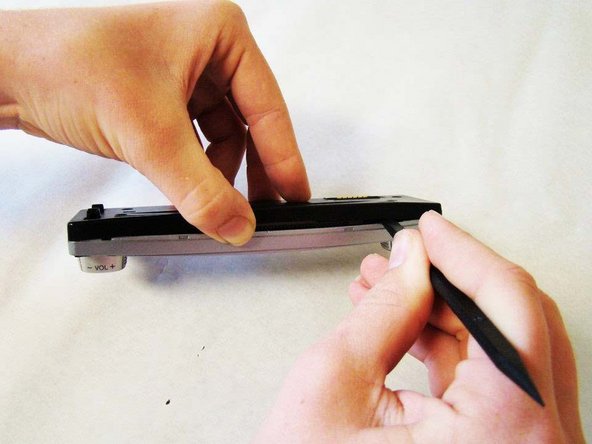
    • Insert the flat end of the Heavy-duty Spudger into the opening you created.

    • Slide it to the right carefully, until you feel the screen pop off.

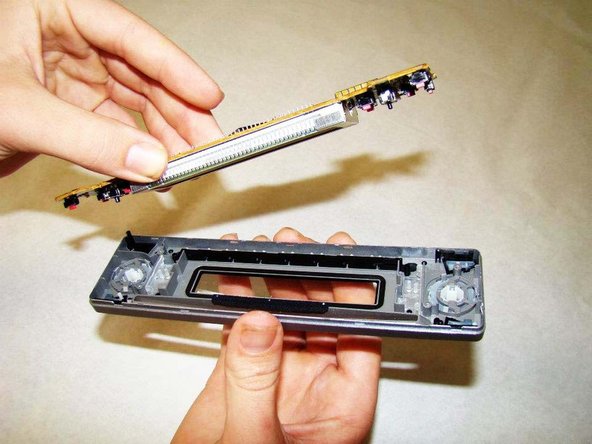
    • Make sure you keep the face of the screen pointed down as you carefully lift off the freed black portion of the screen - as shown in the picture.

  5. Sony Xplod CDX-MP30 LCD Replacement: 5 단계, 이미지 1/2 Sony Xplod CDX-MP30 LCD Replacement: 5 단계, 이미지 2/2
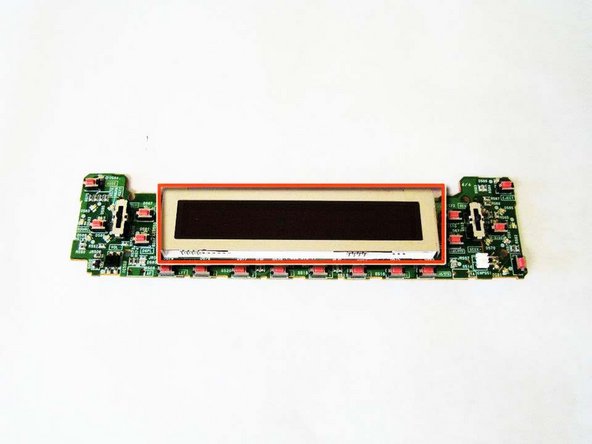
    • Gently grab the Front Motherboard - as indicated in the picture - and lift it from the rest of the screen.

  6. Sony Xplod CDX-MP30 LCD Replacement: 6 단계, 이미지 1/1
결론

To reassemble your device, follow these instructions in reverse order.

Kyle

회원 가입일: 10/10/11

114 평판

안내서 2개 작성하였습니다

Cal Poly, Team 5-35, Amido Fall 2011 Cal Poly, Team 5-35, Amido Fall 2011 회원

CPSU-AMIDO-F11S5G35

4 회원들

안내서 8개 작성하였습니다

댓글 0개

댓글 쓰기

조회 통계:

24 시간 전: 0

7일 전: 1

30일 전: 3

전체 시간: 2,320