주요 콘텐츠로 건너뛰기

Sonyo pro extraX multiverse projector power supply Replacement

필요한 것

  1. Sonyo pro extraX multiverse projector power supply Replacement, Bottom Panel: 1 단계, 이미지 1/3 Sonyo pro extraX multiverse projector power supply Replacement, Bottom Panel: 1 단계, 이미지 2/3 Sonyo pro extraX multiverse projector power supply Replacement, Bottom Panel: 1 단계, 이미지 3/3
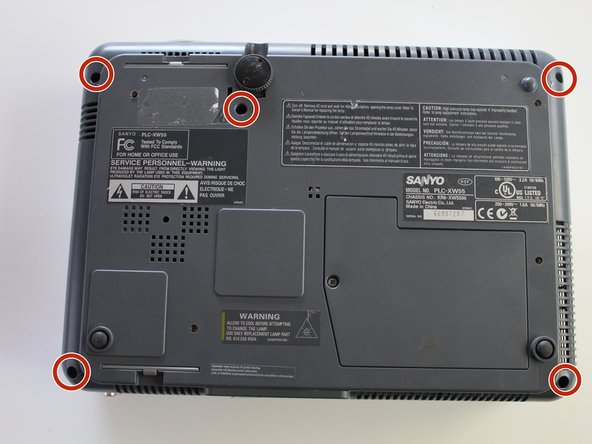
    • Place the projector upside-down to access the screws on the bottom.

    • Remove five 9mm long screws with a Phillips 1 screwdriver.

  2. Sonyo pro extraX multiverse projector power supply Replacement: 2 단계, 이미지 1/1
    • Turn the projector on its side.

    • Remove one 9mm Phillips 1 screw

  3. Sonyo pro extraX multiverse projector power supply Replacement: 3 단계, 이미지 1/2 Sonyo pro extraX multiverse projector power supply Replacement: 3 단계, 이미지 2/2
    • Place the projector right side up and lift the top panel up and put it to the side.

  4. Sonyo pro extraX multiverse projector power supply Replacement: 4 단계, 이미지 1/3 Sonyo pro extraX multiverse projector power supply Replacement: 4 단계, 이미지 2/3 Sonyo pro extraX multiverse projector power supply Replacement: 4 단계, 이미지 3/3
    • Locate the metal panel on the right hand side.

    • Remove two 7mm screws

  5. Sonyo pro extraX multiverse projector power supply Replacement: 5 단계, 이미지 1/3 Sonyo pro extraX multiverse projector power supply Replacement: 5 단계, 이미지 2/3 Sonyo pro extraX multiverse projector power supply Replacement: 5 단계, 이미지 3/3
    • Lift the panel up slightly and forward to remove it completely.

  6. Sonyo pro extraX multiverse projector power supply Replacement, Motherboard: 6 단계, 이미지 1/1
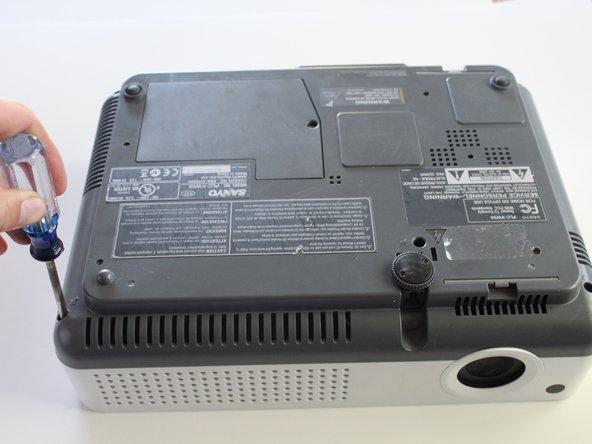
    • Remove five 9mm screws with a Phillips 1 screwdriver

    • Remove one 11mm screws with a Phillips one screwdriver

  7. Sonyo pro extraX multiverse projector power supply Replacement: 7 단계, 이미지 1/1
    • Remove two 5mm screws with a Phillips 2 screwdriver

  8. Sonyo pro extraX multiverse projector power supply Replacement: 8 단계, 이미지 1/1
    • Remove all clips from mother board.

    • There are two additional clips underneath the mother board that need to be disconnected as well.

  9. Sonyo pro extraX multiverse projector power supply Replacement, ribbon cables: 9 단계, 이미지 1/3 Sonyo pro extraX multiverse projector power supply Replacement, ribbon cables: 9 단계, 이미지 2/3 Sonyo pro extraX multiverse projector power supply Replacement, ribbon cables: 9 단계, 이미지 3/3
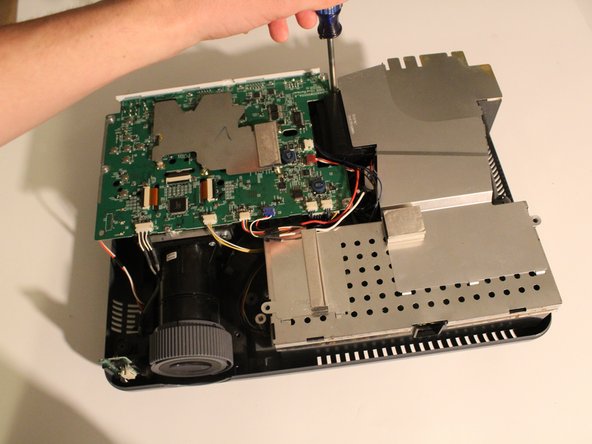
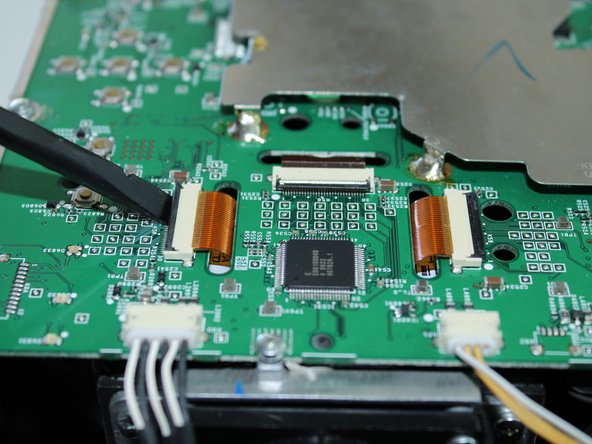
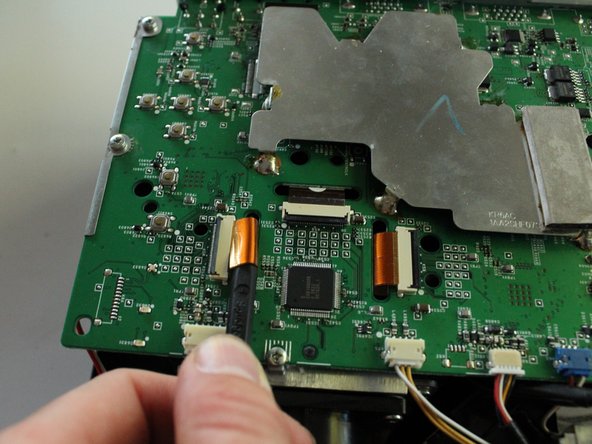
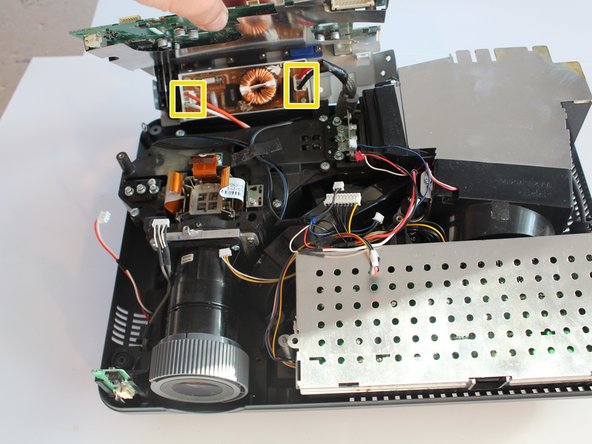
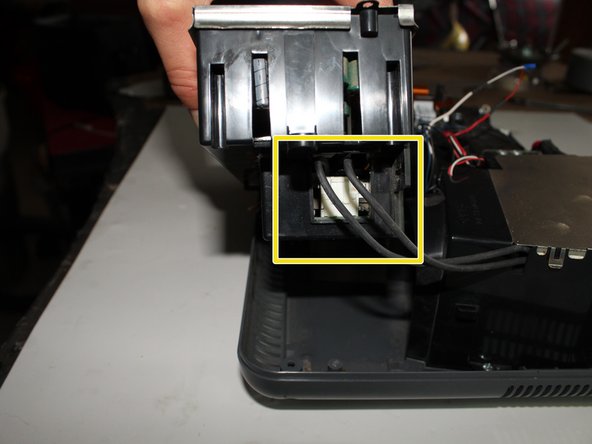
    • To remove the ribbon cables, lift up on the black hinge with a fingernail or the tip of your spudger.

    • Now, use a spudger or a barbecue skewer to lift the cable out.
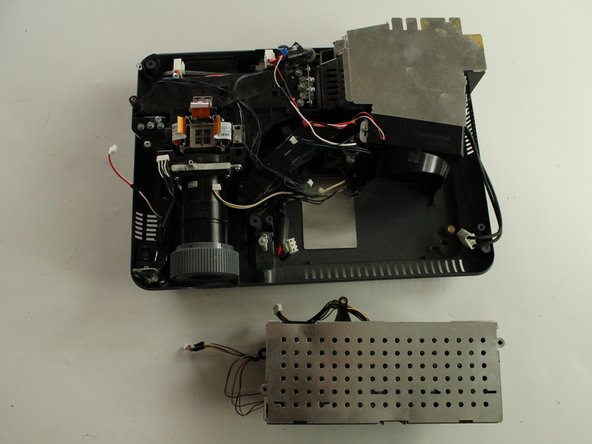
  10. Sonyo pro extraX multiverse projector power supply Replacement: 10 단계, 이미지 1/3 Sonyo pro extraX multiverse projector power supply Replacement: 10 단계, 이미지 2/3 Sonyo pro extraX multiverse projector power supply Replacement: 10 단계, 이미지 3/3
    • Lift the board up slowly, making sure there are no snagged cables.

    • Unplug the two power cables coming into the board.

    • Remove the mother board from the device.

  11. Sonyo pro extraX multiverse projector power supply Replacement: 11 단계, 이미지 1/2 Sonyo pro extraX multiverse projector power supply Replacement: 11 단계, 이미지 2/2
    • Remove two clips by pinching and pulling up on the connector.

  12. Sonyo pro extraX multiverse projector power supply Replacement: 12 단계, 이미지 1/2 Sonyo pro extraX multiverse projector power supply Replacement: 12 단계, 이미지 2/2
    • You can now remove the power supply.

결론

To reassemble your device, follow these instructions in reverse order.

Matt Block

회원 가입일: 11/30/17

286 평판

안내서 2개 작성하였습니다

댓글 0개

댓글 쓰기

조회 통계:

24 시간 전: 0

7일 전: 0

30일 전: 0

전체 시간: 70