주요 콘텐츠로 건너뛰기

Sprint Sanyo RL-4920 Speaker Replacement

필요한 것

  1. Sprint Sanyo RL-4920 Speaker Replacement, Back of Phone: 1 단계, 이미지 1/1
    • Flip the phone over so that the screen is facing down.

  2. Sprint Sanyo RL-4920 Speaker Replacement, Remove Battery Pack: 2 단계, 이미지 1/2 Sprint Sanyo RL-4920 Speaker Replacement, Remove Battery Pack: 2 단계, 이미지 2/2
    • Push the gray lever up towards the top of the phone.

    • Pull up on the battery pack and completely separate it from the phone.

  3. Sprint Sanyo RL-4920 Speaker Replacement, Screws: 3 단계, 이미지 1/2 Sprint Sanyo RL-4920 Speaker Replacement, Screws: 3 단계, 이미지 2/2
    • Locate the five screws around the back casing.

    • Use a three-prong screw bit to remove all five screws.

  4. Sprint Sanyo RL-4920 Speaker Replacement, Separate Cases: 4 단계, 이미지 1/1
    • Use the plastic opening tool and slide it around the phone to pull apart the front and back casing.

  5. Sprint Sanyo RL-4920 Speaker Replacement, Separate Cases: 5 단계, 이미지 1/1
    • Separate the two cases.

  6. Sprint Sanyo RL-4920 Speaker Replacement, The Front Case: 6 단계, 이미지 1/1
    • Use the plastic opening tool to remove the motherboard from the front case.

  7. Sprint Sanyo RL-4920 Speaker Replacement, Screws: 7 단계, 이미지 1/2 Sprint Sanyo RL-4920 Speaker Replacement, Screws: 7 단계, 이미지 2/2
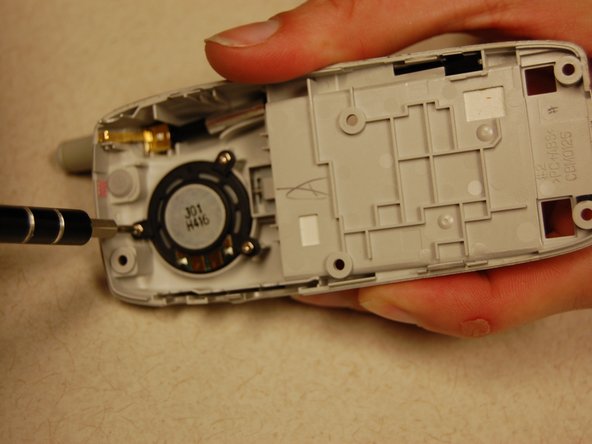
    • Locate the three screws securing the speaker.

    • Use a Phillips-head screw bit to unscrew the screws

  8. Sprint Sanyo RL-4920 Speaker Replacement, Replace Speaker: 8 단계, 이미지 1/1
    • Remove the speaker.

    • Replace with new speaker.

    • Secure new speaker with screws and reassemble phone.

결론

To reassemble your device, follow these instructions in reverse order.

Austin Shores

회원 가입일: 10/18/13

301 평판

안내서 3개 작성하였습니다

Clemson, Team 13-5, Benson Fall 2013 Clemson, Team 13-5, Benson Fall 2013 회원

CLEM-BENSON-F13S13G5

3 회원들

안내서 12개 작성하였습니다

댓글 0개

댓글 쓰기

조회 통계:

24 시간 전: 0

7일 전: 0

30일 전: 1

전체 시간: 153