소개
This replacement is necessary if either the camera or display screen is faulty, since the two components cannot easily be separated. Even replacing the entire assembly is an extremely tedious task and requires quite a bit of meticulous soldering and de-soldering. It is not recommended for you to attempt this replacement unless you are highly skilled with a soldering iron. Take a look at the Device Troubleshooting Page before you begin to be sure that you have diagnosed the problem correctly.
필요한 것
-
-
Remove the six silver 11.4 mm Phillips #0 screws that hold the device shell in place.
-
Pry open the device shell using the plastic opening tools if necessary. To do this, locate the groves running along the side of the entire device and wedge it open.
-
-
-
Use your fingers to peel off the foam pad that covers the main circuit board.
-
-
-
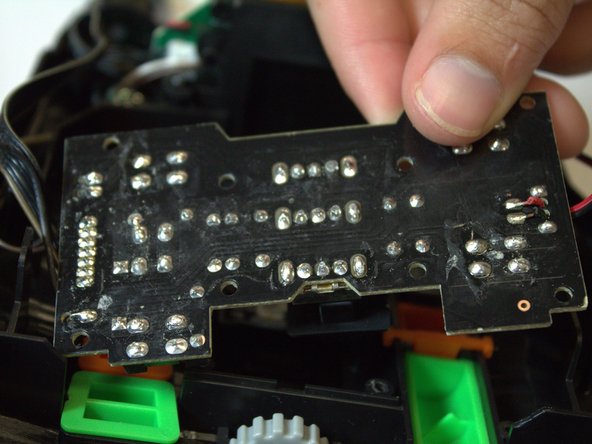
Remove the eight black 7.2 mm Phillips #0 screws from the top of the circuit board and lift it out of its place.
-
-
-
-
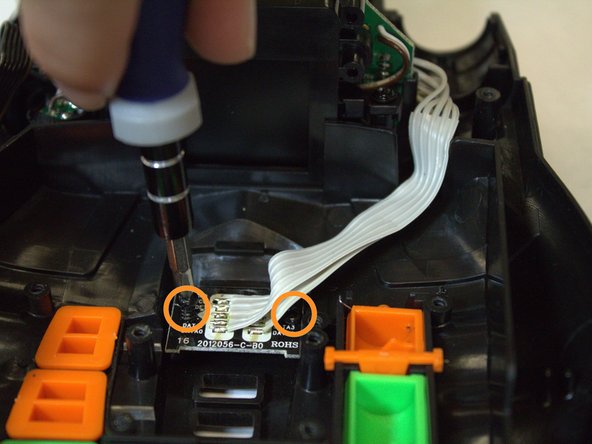
Remove the one black 7.2 mm Phillips #0 screw from the plastic piece that holds down the microSD card reader wires.
-
Remove the two black 7.2 mm Phillips #0 screws that hold the microSD card reader in place.
-
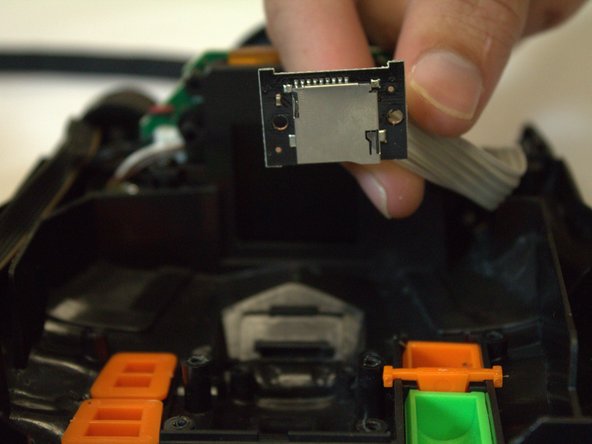
You should now be able to lift the microSD card reader out of place.
-
-
-
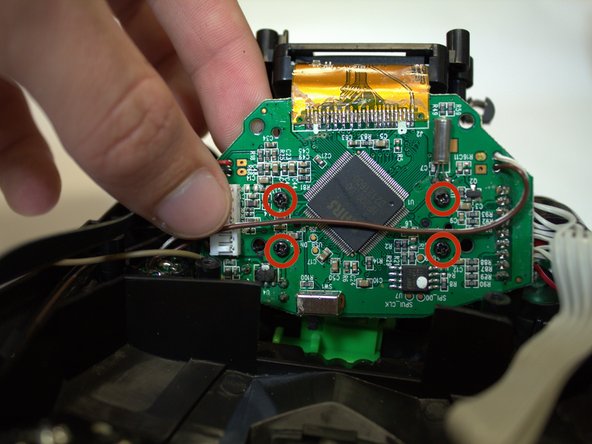
Remove the two black Phillips #0 screws that hold down the camera & display screen assembly.
-
Pull the camera & display screen assembly up from its slot in the device.
-
-
-
Remove the four black 7.2 mm Phillips #0 screws that hold the screen assembly in place.
-
-
-
Turn the device around to the other side and lift up the screen assembly.
-
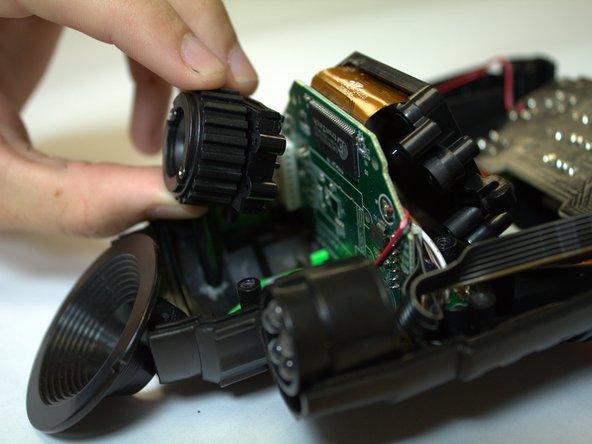
Remove the four black 7.2 mm Phillips #00 screws that hold the lens & filter assembly in place.
-
Pull the lens & filter assembly away from the circuit board.
-
-
-
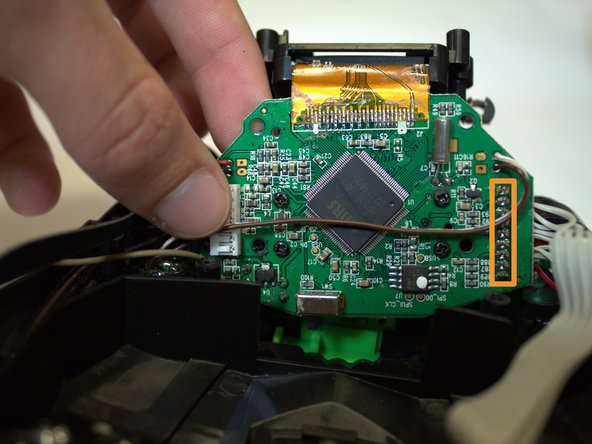
Using the soldering iron, de-solder the various wires from the front and back of the circuit board.
-
There are three pairs of wires on the front side, along with a set of 7 leads for the main circuit board connector.
-
On the back side, there is a set of 9 leads for the microSD card connector.
-


To reassemble your device, follow these instructions in reverse order.
To reassemble your device, follow these instructions in reverse order.
다른 2명이 해당 안내서를 완성하였습니다.
팀

USF Tampa, Team 4-5, Brown Fall 2014 USF Tampa, Team 4-5, Brown Fall 2014 회원
USFT-BROWN-F14S4G5
3 회원들
안내서 6개 작성하였습니다
댓글 2개
Boa tarde , na verdade não um comentario, meu spy ney esta com defeito( LCD display)gostaria quem pode me ajudar a me fornecer outro LCD com a placa, nome da loja, site, para exportar pro Brasil.
ribeiro928 - 답글
I’ve just bought one of these for £3, wondered if it’d be too risky to experiment with if I was to circuit bend it? I create visuals & if I added a couple of potentiometers to it, I’d be interested to see if I could get any wild effects from it. It’d be great if I could achieve it with this as I’d hopefully be able to save the videos too in order to put into my animations. Do you think I should avoid it, or has anyone attempted circuit bending one of these? Cheers