소개
Use this guide to replace or upgrade the SSD in your Steam Deck OLED. The Steam Deck OLED's SSD is a single-sided M.2 2230.
Remember to follow general electrostatic discharge (ESD) safety procedures while repairing your device.
These steps only describe how to physically remove and replace your SSD. You will need additional software tools and procedures to install an OS and get the replacement SSD to function as intended.
Follow Valve's Steam Deck recovery instructions to recover, repair, or re-image your Steam Deck's SSD with SteamOS. For installing Windows, official resources can be found here.
필요한 것
-
-
Use a T6 Torx driver to remove the eight 5.8 mm‑long screws securing the back cover.
-
-
-
Insert an opening pick at an upward angle between the back cover and the front shell near one of the triggers.
-
Slide your pick along the edge of the handle to release the clips securing it to the front shell.
-
-
-
Reinsert your pick and slide it along the top and bottom edges until the back cover feels loose.
-
-
-
Grip the unclipped handle and pull it away from the front shell to release the remaining clips.
-
Remove the back cover.
-
-
-
-
Grip the battery cable pull tab, located to the left of the battery.
-
Firmly pull the battery cable straight away from the motherboard shield (toward the battery) to disconnect it.
-
-
-
Use a spudger to flip up the small white locking flap on the right button board interconnect cable ZIF connector.
-
Use tweezers or your fingers to grip the cable's pull tab and slide it straight out of its socket to disconnect it.
-
-
-
Insert an opening pick between the interconnect cable and the motherboard shield.
-
Slide your pick along the shield to separate the cable.
-
-
-
Use your T6 Torx driver to remove the two 3.8 mm‑long screws securing the top left and bottom left corners of the motherboard shield.
-
-
-
If the speaker cable is taped to the bottom edge of the motherboard shield, gently peel it off.
-
Remove the motherboard shield.
-
-
-
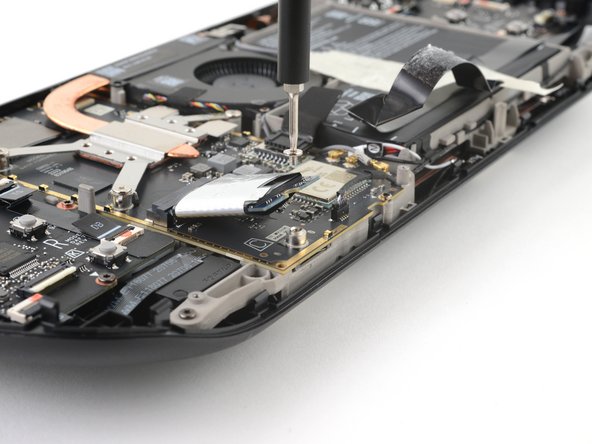
Use your T6 Torx driver to remove the 3.3 mm‑long screw securing the SSD.
-
-
-
Grip the end of the SSD and pull it away from its M.2 board connector to remove it.
-
Remove the SSD.
-
-
-
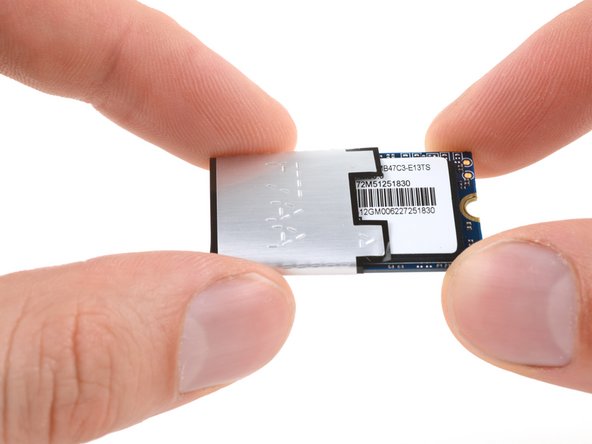
Slide the shielding off the SSD.
-
If the shielding feels stuck, peel the shielding off and remove it. Take care to keep it in the best condition possible if you want to reuse it.
-
Only the SSD remains.
-


To reassemble your device, follow these instructions in reverse order.
To recover, repair, or re-image your Steam Deck OLED's SSD with SteamOS, follow Valve's Steam Deck recovery instructions.
Take your e-waste to an R2 or e-Stewards certified recycler.
Repair didn’t go as planned? Try some basic troubleshooting, or ask our Steam Deck OLED answers community for help.
다른 9명이 해당 안내서를 완성하였습니다.


댓글 3개
Hardest part is unclipping the clips XD
I have completed this but there are ways this could be done better and safely. I have left comments under each step. Step 6 to disconnect the battery should be after Step 10. In my case, the connector did not come out and the pull tab nearly separated creating a risk for damage if I had proceeded further. Removing the shield gives much better access so you can wiggle the connector out using your nail..
Step 8 is to separate the cable adhesive. Every build may have different amount of adhesive applied making this a risky venture. In trying to separate the cable, a lot of force was needed in my deck which could have damaged the cable. A guide on YouTube was to simply work around this. I wish I had seen it prior to have completely avoided this risk.
All in all, I will say a version 2 of this guide is needed.
Two things that could be helpful for anyone attempting this :
1. If it's your first time opening a deck, the hardest part is to open up the shell. After removing the screws You just need the guitar pick plastic thing. Taking your time is key and will make it way less likely to scratch the case or break a tab as you'll apply just enough force to unclip.
2. If you've already opened a regular deck and it's your first OLED, in some ways it's easier but in others a bit harder: when I attempted step 6 the battery connector wouldn't budge so I just left it plugged (the battery was almost empty and the deck was in battery storage mode, though). I did step 7 but skipped step 8 and simply folded the whole cable + shield part over the battery while replacing the SSD.
On reassembly, no point in tightening the screws too much, it increases the risk of stripping the screw or breaking the screw threads.
Good luck! (and DON'T FORGET TO REMOVE THE SD CARD BEFORE YOU START!)