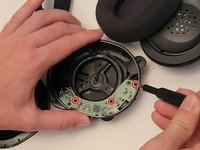
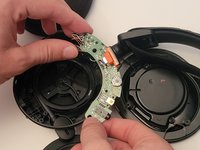
주요 콘텐츠로 건너뛰기

SteelSeries Arctis Pro Microphone Cable Replacement

필요한 것

  1. SteelSeries Arctis Pro Microphone Cable Replacement, Microphone Cable: 1 단계, 이미지 1/2 SteelSeries Arctis Pro Microphone Cable Replacement, Microphone Cable: 1 단계, 이미지 2/2
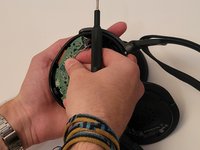
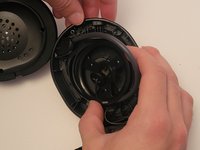
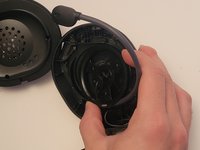
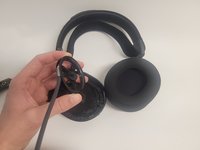
    • Remove ear cushion by pulling the cushion up and towards yourself.

    • Repeat this motion around the cushion until it comes free.

  2. SteelSeries Arctis Pro Microphone Cable Replacement: 2 단계, 이미지 1/2 SteelSeries Arctis Pro Microphone Cable Replacement: 2 단계, 이미지 2/2
    • Use a Phillips #0 screwdriver to remove the 3 case screws.

    • Lift the driver assembly away from the rest of the housing.

  3. SteelSeries Arctis Pro Microphone Cable Replacement: 3 단계, 이미지 1/3 SteelSeries Arctis Pro Microphone Cable Replacement: 3 단계, 이미지 2/3 SteelSeries Arctis Pro Microphone Cable Replacement: 3 단계, 이미지 3/3
    • Use a Phillips #0 screwdriver to remove the three 5 mm screws.

    • Push the headset volume dial in-words towards the housing while simultaneously pulling the board towards yourself.

  4. SteelSeries Arctis Pro Microphone Cable Replacement: 4 단계, 이미지 1/1
    • De-solder the six connections on the side of the main board.

  5. SteelSeries Arctis Pro Microphone Cable Replacement: 5 단계, 이미지 1/1
    • Use a Phillips #0 screwdriver to remove the two 5 mm screws that secure the microphone holder.

  6. SteelSeries Arctis Pro Microphone Cable Replacement: 6 단계, 이미지 1/3 SteelSeries Arctis Pro Microphone Cable Replacement: 6 단계, 이미지 2/3 SteelSeries Arctis Pro Microphone Cable Replacement: 6 단계, 이미지 3/3
    • Pull the microphone assembly and cable out of the housing and out towards you until it comes free.

결론

To reassemble your device, follow these instructions in reverse order.

다른 한 분이 해당 안내서를 완성하였습니다.

Matthew Hockey

회원 가입일: 09/16/22

516 평판

안내서 4개 작성하였습니다

댓글 0개

댓글 쓰기

조회 통계:

24 시간 전: 2

7일 전: 14

30일 전: 67

전체 시간: 1,147