주요 콘텐츠로 건너뛰기

Sunbeam Snow Cone Maker Dasher Replacement

필요한 것

  1. Sunbeam Snow Cone Maker Dasher Replacement, Dasher: 1 단계, 이미지 1/1
    • Push the button on the back to release the lid. (Missing on this example device.)

    • In the photo on the device page it is red.

  2. Sunbeam Snow Cone Maker Dasher Replacement: 2 단계, 이미지 1/2 Sunbeam Snow Cone Maker Dasher Replacement: 2 단계, 이미지 2/2
    • Unscrew the dasher by holding it in the middle and turning clockwise.

    • You will have to spin it quite a bit.

    • Remove the dasher.

    • Alternately, you can continue to step 3 to further disassemble the dasher components.

  3. Sunbeam Snow Cone Maker Dasher Replacement: 3 단계, 이미지 1/2 Sunbeam Snow Cone Maker Dasher Replacement: 3 단계, 이미지 2/2
    • To take the dasher apart, remove the three 5.5 mm Phillips #00 screws embedded in the plastic. **The 3rd screw is behind the hand in the picture

    • Carefully pull the two pieces apart.

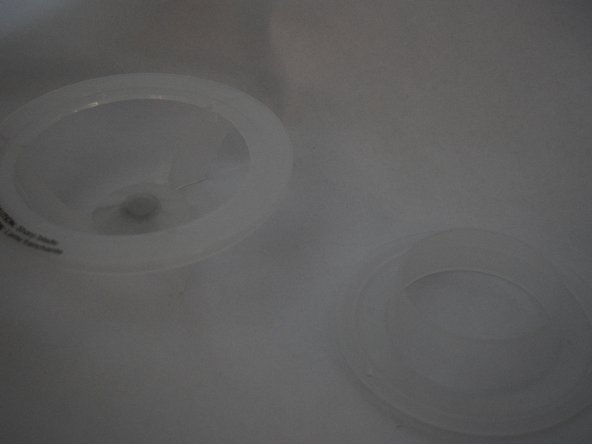
    • When you've finished taking apart the dasher, you should have two parts that are shown in the second picture in this step.

결론

To reassemble your device, follow these instructions in reverse order.

Thomas Falcon

회원 가입일: 03/24/15

107 평판

안내서 1개 작성함

University of Alabama, Team 1-5, Naidoo Spring 2015 University of Alabama, Team 1-5, Naidoo Spring 2015 회원

UA-NAIDOO-S15S1G5

4 회원들

안내서 2개 작성하였습니다

댓글 0개

댓글 쓰기

조회 통계:

24 시간 전: 0

7일 전: 2

30일 전: 8

전체 시간: 798