주요 콘텐츠로 건너뛰기

Sungale CyberUs Screen Replacement

필요한 것

  1. Sungale CyberUs Screen Replacement, Screen: 1 단계, 이미지 1/1
    • Make sure to have the device turned off to prevent any minor electric shock.

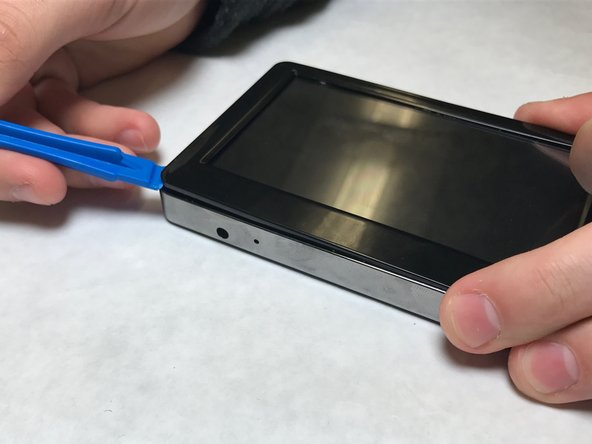
    • Hold the device so the left side is facing towards you (like in the picture shown) so the two 4mm PH001 screws are exposed and easier to access.

  2. Sungale CyberUs Screen Replacement: 2 단계, 이미지 1/1
    • Remove both 4mm PH001 screws from the side panel.

  3. Sungale CyberUs Screen Replacement: 3 단계, 이미지 1/2 Sungale CyberUs Screen Replacement: 3 단계, 이미지 2/2
    • Carefully pry up one of the top corners of the screen with a plastic spudger (prying tool). Slide the tool along the edges to release it from the housing.

    • The screen may make some cracking noises as you pry it from the casing. This is expected.

    • The screen is still connected to the motherboard. Use force with caution.

  4. Sungale CyberUs Screen Replacement: 4 단계, 이미지 1/1
    • Gently turn screen over, to the side, to reveal the ZIF connector attached to the motherboard.

  5. Sungale CyberUs Screen Replacement: 5 단계, 이미지 1/1
    • Gently using tweezers, flip the black clip up. Pull the ZIF connector out.

    • You screen is still not completely detached from the device.

  6. Sungale CyberUs Screen Replacement: 6 단계, 이미지 1/2 Sungale CyberUs Screen Replacement: 6 단계, 이미지 2/2
    • Using the prying tool, slide the black clip out. Pull the ZIF connector out and to the left, the screen is now detached from the motherboard.

결론

To reassemble your device, follow these instructions in reverse order.

다른 한 분이 해당 안내서를 완성하였습니다.

Carolina Cardona

회원 가입일: 09/28/16

62 평판

안내서 1개 작성함

IUPUI, Team 1-4, Harley Fall 2016 IUPUI, Team 1-4, Harley Fall 2016 회원

IUPUI-HARLEY-F16S1G4

3 회원들

안내서 8개 작성하였습니다

댓글 0개

댓글 쓰기

조회 통계:

24 시간 전: 0

7일 전: 0

30일 전: 1

전체 시간: 118