소개
This guide will have you remove the upper case using a gamebit screwdriver and then in order to reveal the ribbon to the system from the controller port you will have to remove the reset button. This process will require only the gamebit.
필요한 것
-
-
Remove the six screws located on the underside of the system using the Gamebit 4.5mm screwdriver.
 FixBot에 문의하기
-
-
-
Carefully flip the unit back over.
-
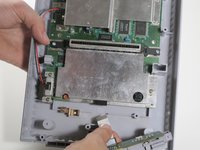
Locate the seam. Lift and separate the upper half of the case from the lower half of the case.
-
-
-
-
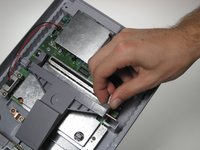
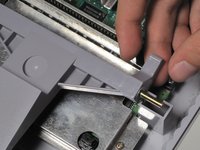
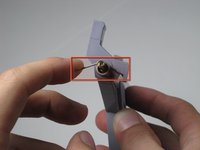
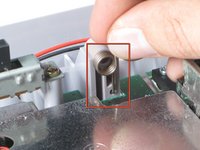
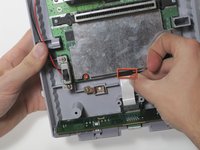
Lift the controller ports out of the housing, this should be done without much force. Take note of the location of the ribbon cable connection.
-


To reassemble your device, follow these instructions in reverse order.
다른 18명이 해당 안내서를 완성하였습니다.
팀

Cal Poly, Team 4-47, Amido Fall 2010 Cal Poly, Team 4-47, Amido Fall 2010 회원
CPSU-AMIDO-F10S4G47
4 회원들
안내서 25개를 작성함
3가이드 댓글
I did a complete teardown of my 26 year old super Nintendo because I had to fix the AV jack. the hardest part was the de soldering. however upon putting it back together I could get the games to play, however it was in black and white…or even a grayish hue…and the controllers didn't work. shortly after the ribbon connecting the controller input to the system snapped on one end. do you think this was the issue, and where do I find a new one? Thanks.
This isn’t complete. How about taking the face plate off?
Find don’t look like screws they look like rivets