필요한 것
-
-
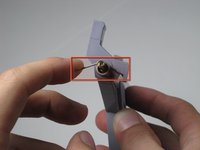
Remove the six screws located on the underside of the system using the Gamebit 4.5mm screwdriver.
-
-
-
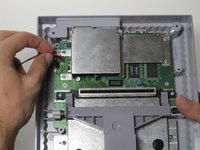
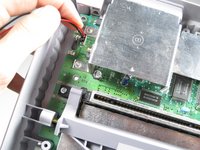
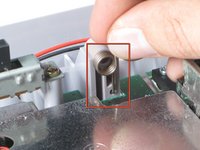
Remove the two 11.7 mm Phillips #2 screws connecting the power switch to the motherboard.
-
-
-
-
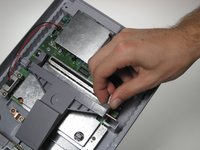
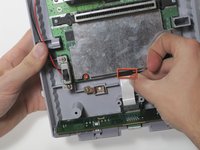
Lift the controller ports out of the housing, this should be done without much force. Take note of the location of the ribbon cable connection.
-
-
-
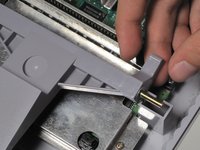
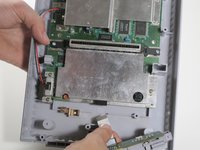
Remove the two Phillips two 11.6mm screws that connect the front shield to the motherboard.
-


To reassemble your device, follow these instructions in reverse order.
다른 47명이 해당 안내서를 완성하였습니다.
팀

Cal Poly, Team 4-47, Amido Fall 2010 Cal Poly, Team 4-47, Amido Fall 2010 회원
CPSU-AMIDO-F10S4G47
4 회원들
안내서 25개를 작성함
4가이드 댓글
There are several versions of the Super Nintendo. Steps for my version are a bit different.
joshenders - 답글 공유
This seems to be a newer super nintendo. If you have one of the older ones, there will be a bit more screws but still basically the same steps.
It’s possible they may be referring to the European/Japanese version of the Super Nintendo/Super Famicom. Either that, or it’s one of the weird, misshapen “reskins”.
Rupin Soland - 답글 공유