주요 콘텐츠로 건너뛰기

Swann Doorphone Video Intercom Microphone Replacement

필요한 것

  1. Swann Doorphone Video Intercom Microphone Replacement, Microphone: 1 단계, 이미지 1/3 Swann Doorphone Video Intercom Microphone Replacement, Microphone: 1 단계, 이미지 2/3 Swann Doorphone Video Intercom Microphone Replacement, Microphone: 1 단계, 이미지 3/3
    • Flip the monitor of the Swann Doorphone Video Intercom over so that the underside is facing up.

    • Remove the six 2 mm corner screws from the back plate of the monitor using the JIS #0 screwdriver.

  2. Swann Doorphone Video Intercom Microphone Replacement: 2 단계, 이미지 1/2 Swann Doorphone Video Intercom Microphone Replacement: 2 단계, 이미지 2/2
    • Once the screws are removed, grip the black back plate of the monitor and remove from the monitor.

    • The back plate will still be connected to the monitor with a cord of wires that should not be removed.

  3. Swann Doorphone Video Intercom Microphone Replacement: 3 단계, 이미지 1/3 Swann Doorphone Video Intercom Microphone Replacement: 3 단계, 이미지 2/3 Swann Doorphone Video Intercom Microphone Replacement: 3 단계, 이미지 3/3
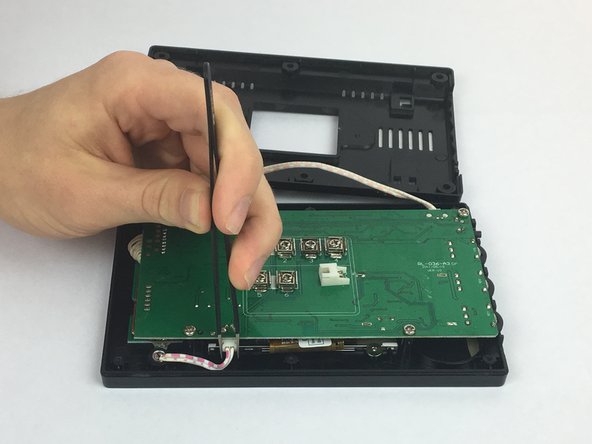
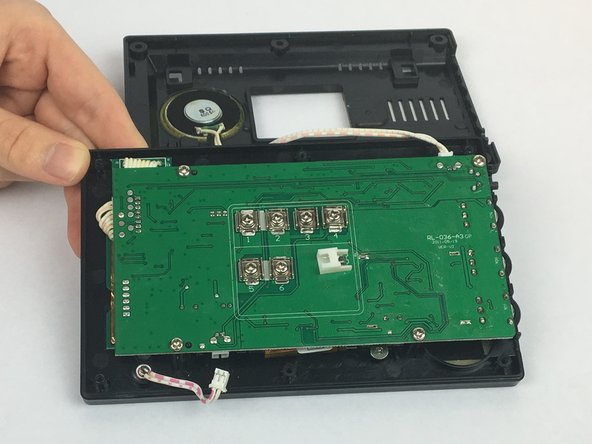
    • Using the precision tweezers, grab the sides of the white connector at the bottom of the green board.

    • Pull the white connector towards you to disconnect the board.

  4. Swann Doorphone Video Intercom Microphone Replacement: 4 단계, 이미지 1/3 Swann Doorphone Video Intercom Microphone Replacement: 4 단계, 이미지 2/3 Swann Doorphone Video Intercom Microphone Replacement: 4 단계, 이미지 3/3
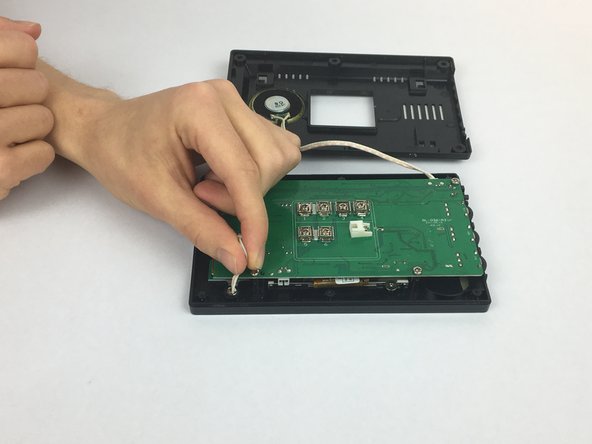
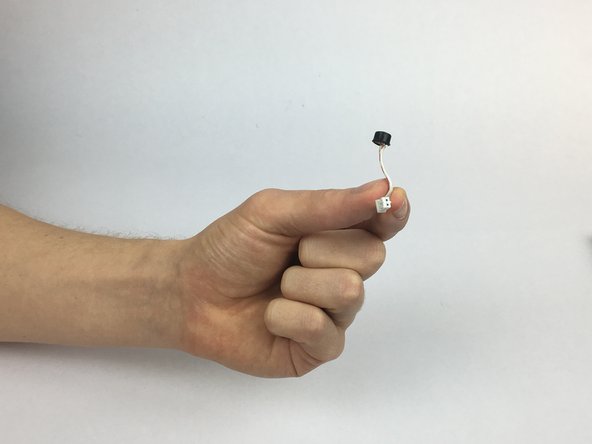
    • Grip the other end of the white connector cable towards the base of the black microphone.

    • Pull gently towards your body to remove the microphone.

결론

To reassemble your device, follow these instructions in reverse order.

Emily Stenke

회원 가입일: 02/14/18

555 평판

안내서 4개 작성하였습니다

USF Tampa, Team S2-G4, Eyestone Spring 2018 USF Tampa, Team S2-G4, Eyestone Spring 2018 회원

USFT-EYESTONE-S18S2G4

4 회원들

안내서 5개 작성하였습니다

댓글 0개

댓글 쓰기

조회 통계:

24 시간 전: 1

7일 전: 1

30일 전: 4

전체 시간: 342