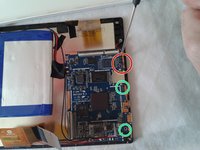
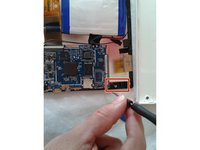
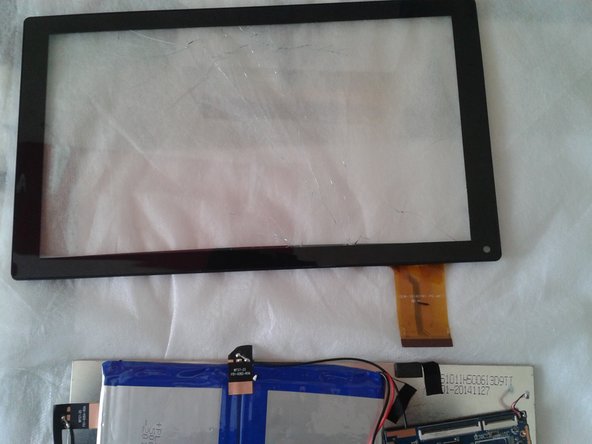
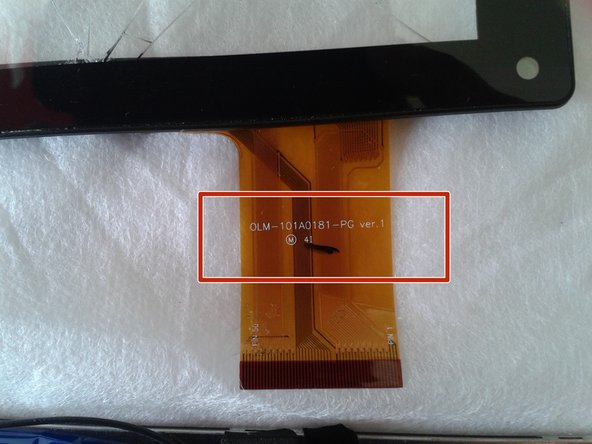
주요 콘텐츠로 건너뛰기

Tablet Chuwe 10.1 Touch Screen Replacement

필요한 것

  1. Tablet Chuwe 10.1 Touch Screen Replacement, Touch Screen: 1 단계, 이미지 2개 중 1개 Tablet Chuwe 10.1 Touch Screen Replacement, Touch Screen: 1 단계, 이미지 2개 중 2개
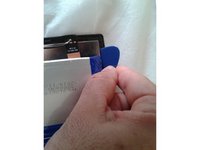
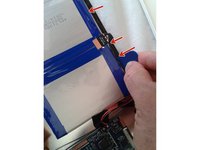
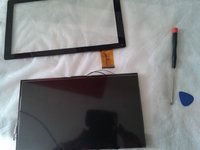
    • We must use a plastic guitar pick or in the case that you do not have one, a plastic card can do us helpful (credit card)

  2. Tablet Chuwe 10.1 Touch Screen Replacement: 2 단계, 이미지 3개 중 1개 Tablet Chuwe 10.1 Touch Screen Replacement: 2 단계, 이미지 3개 중 2개 Tablet Chuwe 10.1 Touch Screen Replacement: 2 단계, 이미지 3개 중 3개
    • Slowly, insert the pick pressing it and swinging it along the perimeter of the tablet's body

  3. Tablet Chuwe 10.1 Touch Screen Replacement: 3 단계, 이미지 1개 중 1개
    • Carefully loosen with your fingers the back and place the tablet face down on a flat and clean surface tablet

  4. Tablet Chuwe 10.1 Touch Screen Replacement: 4 단계, 이미지 1개 중 1개
    • the speaker is screwed next to the touch chassis, we must release the screw and place it in a visible place, the speaker will remain with adhesive tape next to the battery

  5. Tablet Chuwe 10.1 Touch Screen Replacement: 5 단계, 이미지 1개 중 1개
    • With the help of the pua or the fingers, we must release the data FLEX from the connection, making a small upward pressure

  6. Tablet Chuwe 10.1 Touch Screen Replacement: 6 단계, 이미지 1개 중 1개
    • Careful! The FLEX cable that joins the front and rear camera, will be completely loose, we must place it in a clean place for later assembly.

  7. Tablet Chuwe 10.1 Touch Screen Replacement: 7 단계, 이미지 1개 중 1개
    • we will have a third FLEX on the motherboard, we must do the same method to press up on the connector until it is released, carefully these FLEX are easy to break.

  8. Tablet Chuwe 10.1 Touch Screen Replacement: 8 단계, 이미지 2개 중 1개 Tablet Chuwe 10.1 Touch Screen Replacement: 8 단계, 이미지 2개 중 2개
    • now with the help of a Phillips screwdriver, we must release the three screws that hold the base plate of the touch screen chassis, and the sensor with positive and negative cables, we can help with the fingers in a smooth way.

  9. Tablet Chuwe 10.1 Touch Screen Replacement: 9 단계, 이미지 2개 중 1개 Tablet Chuwe 10.1 Touch Screen Replacement: 9 단계, 이미지 2개 중 2개
    • carefully, we already have the loose base plate of the touch chassis, we look at the various grips that connect the touch screen with the LCD and with the tine and small balancing we are doing pressure to separate touch and LCD screen.

  10. Tablet Chuwe 10.1 Touch Screen Replacement: 10 단계, 이미지 3개 중 1개 Tablet Chuwe 10.1 Touch Screen Replacement: 10 단계, 이미지 3개 중 2개 Tablet Chuwe 10.1 Touch Screen Replacement: 10 단계, 이미지 3개 중 3개
    • Following these steps we have loosen our LCD screen and the carcass of the touch screen, now we must look for the reference number that appears on the FLEX cable of the touch screen so we can order a new one

결론

In order to reassemble your device, follow these instructions in reverse order

다른 17명이 해당 안내서를 완성하였습니다.

다음 번역가들에게 특별히 감사 드립니다:

es en

100%

이 번역인들은 저희가 세상을 수리하는 데 도움을 주고 있어요! 기여하시겠습니까?
번역 시작하기 ›

작성자

2다른 기여자 명과 함께

Fran Ruiz

회원 가입일: 11/14/15

569 평판

안내서 1개를 작성함

4가이드 댓글

No mention of the adhesive needed to reattach the screen.

Jan - 답글

garcias por la ayuda

jorge alejandro - 답글

donde encontrar la referencia de la pantalla táctil

Pedro Salinas Trigueros - 답글

he encontrado la referencia FF-08 pero la busco por Internet y no la encuentro. Por favor, una ayuda, se lo agradeceré mucho. Gracias

Pedro Salinas Trigueros - 답글

댓글 쓰기

조회 통계:

지난 24시간: 2

지난 7일: 14

지난 30일: 86

전체 시간: 5,126