주요 콘텐츠로 건너뛰기

Taking in the Waistband of a Skirt

필요한 것

  1. Taking in the Waistband of a Skirt, Waistband: 1 단계, 이미지 1/2 Taking in the Waistband of a Skirt, Waistband: 1 단계, 이미지 2/2
    • Try on the skirt to see how big it is.

    • Gather the excess fabric at one of the side seams.

  2. Taking in the Waistband of a Skirt: 2 단계, 이미지 1/3 Taking in the Waistband of a Skirt: 2 단계, 이미지 2/3 Taking in the Waistband of a Skirt: 2 단계, 이미지 3/3
    • Use a measuring tape to measure the excess fabric.

    • With straight pins, mark the length of your measurement on either side of the side seam.

  3. Taking in the Waistband of a Skirt: 3 단계, 이미지 1/3 Taking in the Waistband of a Skirt: 3 단계, 이미지 2/3 Taking in the Waistband of a Skirt: 3 단계, 이미지 3/3
    • Use a seam ripper to separate the waistband from the lining in the area between your straight pins. You should also remove the seam an inch past the pins on either side.

    • If you've never used a seam ripper before, read this guide.

    • Red arrows indicate the length of the measurement. Orange arrows indicate the length of seam ripped.

  4. Taking in the Waistband of a Skirt: 4 단계, 이미지 1/2 Taking in the Waistband of a Skirt: 4 단계, 이미지 2/2
    • Use your seam ripper to separate the waistband from the skirt.

    • As before, stop approximately one inch past your straight pins.

  5. Taking in the Waistband of a Skirt: 5 단계, 이미지 1/2 Taking in the Waistband of a Skirt: 5 단계, 이미지 2/2
    • Remove the stitches from the top of the waistband, about one inch past your measurement on either side.

  6. Taking in the Waistband of a Skirt: 6 단계, 이미지 1/3 Taking in the Waistband of a Skirt: 6 단계, 이미지 2/3 Taking in the Waistband of a Skirt: 6 단계, 이미지 3/3
    • Flip the outer waistband inside out.

    • Pinch the waistband at the side seam with the right sides of the fabric facing together.

  7. Taking in the Waistband of a Skirt: 7 단계, 이미지 1/3 Taking in the Waistband of a Skirt: 7 단계, 이미지 2/3 Taking in the Waistband of a Skirt: 7 단계, 이미지 3/3
    • On the waistband, use a straight pin to mark the length of your original measurement from the side seam.

    • Sew across the waistband at the location you pinned.

    • Make sure to remove the pin before sewing and back stitch at the beginning and end so the stitches don't unravel.

    • Trim the excess fabric with fabric scissors or a rotary cutter.

  8. Taking in the Waistband of a Skirt: 8 단계, 이미지 1/1
    • Repeat steps 6 and 7 on the inner waistband.

    • Make sure the two waistbands are the same length before you sew the inner one shorter.

  9. Taking in the Waistband of a Skirt: 9 단계, 이미지 1/2 Taking in the Waistband of a Skirt: 9 단계, 이미지 2/2
    • Press the seam allowance on the new side seam flat and fold the top and bottom down.

    • Align the top edges of the inner and outer waistbands with the wrong sides facing together. Use straight pins to hold the fabric in place.

    • Stitch across the top of the waistband, right next to the edge. Make sure to begin where the original stitching ends to avoid leaving holes in the waistband.

  10. Taking in the Waistband of a Skirt: 10 단계, 이미지 1/2 Taking in the Waistband of a Skirt: 10 단계, 이미지 2/2
    • Turn the skirt inside out.

    • Pin the pleats of the skirt to the waistband so the skirt and the waistband are the same length.

    • Try to follow the location of the original pleats, but make them deeper to account for the excess fabric.

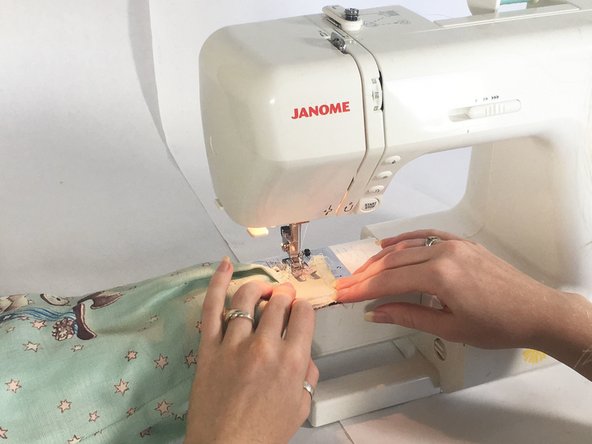
    • Stitch the skirt and waistband together.

  11. Taking in the Waistband of a Skirt: 11 단계, 이미지 1/3 Taking in the Waistband of a Skirt: 11 단계, 이미지 2/3 Taking in the Waistband of a Skirt: 11 단계, 이미지 3/3
    • Mark where the new side seam on the waistband matches up with the side seam of the lining.

    • Stitch from that point to the seam line on the lining, forming a slight curve.

    • Trim the excess fabric.

  12. Taking in the Waistband of a Skirt: 12 단계, 이미지 1/3 Taking in the Waistband of a Skirt: 12 단계, 이미지 2/3 Taking in the Waistband of a Skirt: 12 단계, 이미지 3/3
    • With right sides together, match the side seam of the lining to the side seam of the waistband and secure with straight pins.

    • Stitch the lining to the inner waistband.

    • Turn the skirt right side out.

    • Top stitch along the bottom edge of the outer waistband to secure it to the inner waistband.

    • Make sure the seam allowance between the lining and the inner waistband is on the waistband side of the seam so the top stitching will secure it.

  13. Taking in the Waistband of a Skirt: 13 단계, 이미지 1/3 Taking in the Waistband of a Skirt: 13 단계, 이미지 2/3 Taking in the Waistband of a Skirt: 13 단계, 이미지 3/3
    • Stitch both waistbands together, following the side seam from the outside.

결론

Your skirt is now finished! Wear it with pride.

다른 한 분이 해당 안내서를 완성하였습니다.

Sky Carlos

회원 가입일: 04/28/17

111 평판

안내서 1개 작성함

UC Davis, Team S3-G6, Coad Spring 2017 UC Davis, Team S3-G6, Coad Spring 2017 회원

UCD-COAD-S17S3G6

3 회원들

안내서 2개 작성하였습니다

댓글 0개

댓글 쓰기

조회 통계:

24 시간 전: 9

7일 전: 81

30일 전: 362

전체 시간: 54,435