이 버전에는 잘못된 편집 사항이 있을 수 있습니다. 최신 확인된 스냅샷으로 전환하십시오.
필요한 것
-
이 단계는 번역되지 않았습니다. 번역을 도와주십시오
-
Wedge a spudger in between the front and back panel.
-
Apply leverage downwards to the spudger in order to remove the back panel.
-
-
이 단계는 번역되지 않았습니다. 번역을 도와주십시오
-
Slide the battery out from under the brown wire-tape.
-
Be careful of the wires still connected to the other end of the battery. Do not pull or damage may occur.
-
-
이 단계는 번역되지 않았습니다. 번역을 도와주십시오
-
Slowly pull the white plug from its receptor. Grasp its sides firmly with a pair of tweezers and gently wiggle from side to side.
-
-
-
이 단계는 번역되지 않았습니다. 번역을 도와주십시오
-
Disconnect 2 brown wire-tape ends from each end of the motherboard. Gently pull straight out with tweezers.
-
-
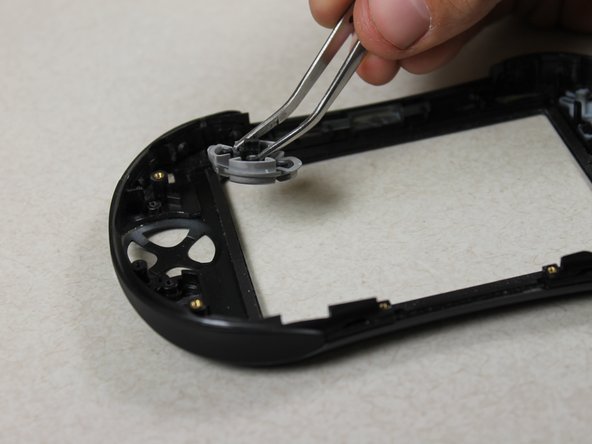
이 단계는 번역되지 않았습니다. 번역을 도와주십시오
-
Grasp the upper left edge of the motherboard and slide diagonally up and left away from the auxiliary port entrance.
-
-
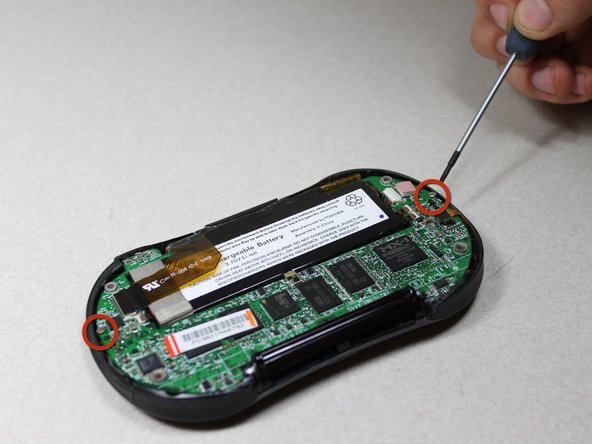
이 단계는 번역되지 않았습니다. 번역을 도와주십시오
-
Unscrew the 2 silver Philips #00 screws from both sides of the directional pad component on the front casing.
-


다른 한 분이 해당 안내서를 완성하였습니다.
팀

Cal Poly, Team 10-33, Amido Winter 2012 Cal Poly, Team 10-33, Amido Winter 2012 회원
CPSU-AMIDO-W12S10G33
4 회원들
안내서 10개 작성하였습니다