주요 콘텐츠로 건너뛰기

이 버전에는 잘못된 편집 사항이 있을 수 있습니다. 최신 확인된 스냅샷으로 전환하십시오.

필요한 것

  1. 이 단계는 번역되지 않았습니다. 번역을 도와주십시오

    : 1 단계, 이미지 1/3 : 1 단계, 이미지 2/3 : 1 단계, 이미지 3/3
    • With a Y000 screwdriver, loosen the four 1mm Phillips head screws and set them aside.

  2. 이 단계는 번역되지 않았습니다. 번역을 도와주십시오

    : 2 단계, 이미지 1/3 : 2 단계, 이미지 2/3 : 2 단계, 이미지 3/3
    • With an iFixit opening tool, pry apart a total of 3 notches on the top and bottom of the calculator.

  3. 이 단계는 번역되지 않았습니다. 번역을 도와주십시오

    : 3 단계, 이미지 1/3 : 3 단계, 이미지 2/3 : 3 단계, 이미지 3/3
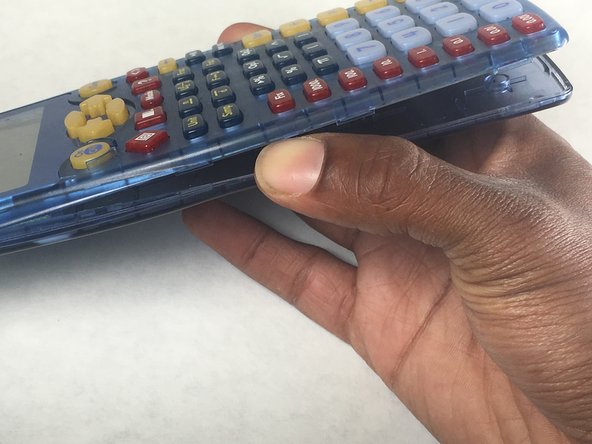
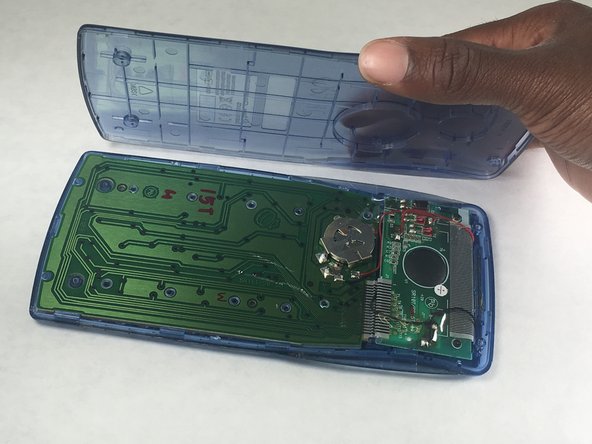
    • Separate the two panels to reveal the calculator's green circuit board.

  4. 이 단계는 번역되지 않았습니다. 번역을 도와주십시오

    : 4 단계, 이미지 1/2 : 4 단계, 이미지 2/2
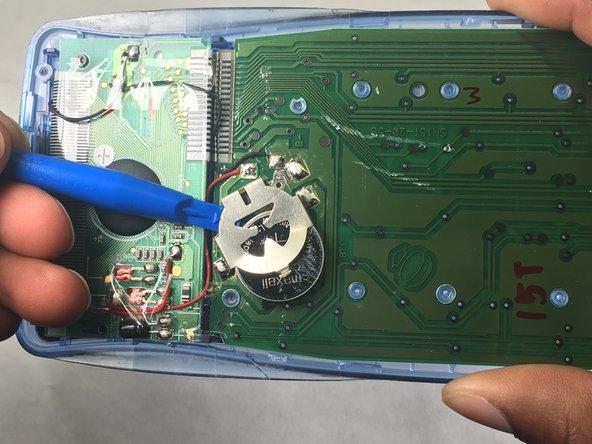
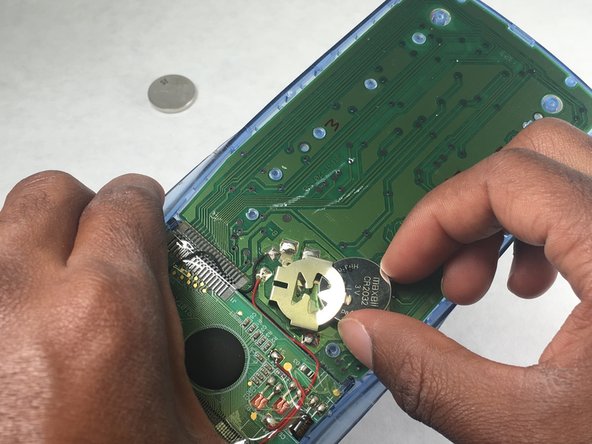
    • Using the iFixit opening tool , slide underneath the battery cover until the battery comes out.

  5. 이 단계는 번역되지 않았습니다. 번역을 도와주십시오

    : 5 단계, 이미지 1/3 : 5 단계, 이미지 2/3 : 5 단계, 이미지 3/3
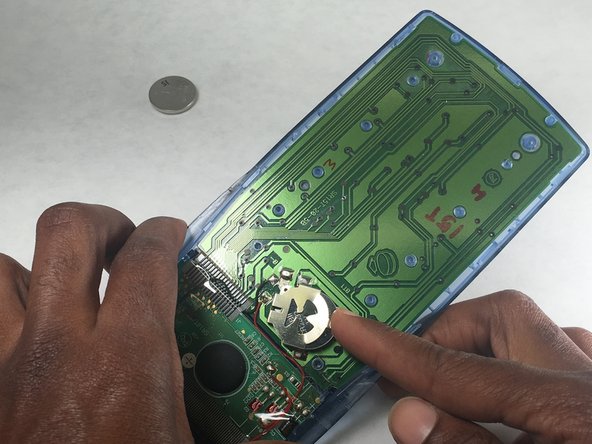
    • Remove the old battery and insert the new battery.

    • Properly dispose or recycle the old battery.

결승점

다른 3명이 해당 안내서를 완성하였습니다.

kayla neal

회원 가입일: 10/06/16

173 평판

안내서 1개 작성함

University of Memphis, Team 4-1, Baddour Fall 2016 University of Memphis, Team 4-1, Baddour Fall 2016 회원

UM-BADDOUR-F16S4G1

2 회원들

안내서 1개 작성하였습니다

댓글 0개

댓글 쓰기

조회 통계:

24 시간 전: 0

7일 전: 0

30일 전: 13

전체 시간: 2,556