이 버전에는 잘못된 편집 사항이 있을 수 있습니다. 최신 확인된 스냅샷으로 전환하십시오.
필요한 것
-
이 단계는 번역되지 않았습니다. 번역을 도와주십시오
-
Grab the back of the calculator with one hand and the cover with the other.
-
Pull the cover off from one of the sides for easy removal.
-
-
이 단계는 번역되지 않았습니다. 번역을 도와주십시오
-
Orientate the calculator with the top facing towards you.
-
Slide the locking tab,found on the top part of the calculator, to the unlock position.
-
-
이 단계는 번역되지 않았습니다. 번역을 도와주십시오
-
"Locking Tab"
-
To remove the back cover, slide the cover away from the locking tab towards the bottom of the calculator until the cover no longer slides.
-
Then with the front of the calculator facing down, pull up on the back cover.
-
The calculator should now be orientated with the front facing down, as shown in picture 2.
-
-
-
이 단계는 번역되지 않았습니다. 번역을 도와주십시오
-
Using a #00 Philip Screwdriver remove the 19mm screw located near the center of the back of the calculator on the panel with words "Test Access"
-
-
이 단계는 번역되지 않았습니다. 번역을 도와주십시오
-
The backup battery can now be seen underneath a small metal cover held by a screw.
-
Using the same screwdriver, unscrew the 4.6mm screw located under the panel and left of the backup battery.
-
-
이 단계는 번역되지 않았습니다. 번역을 도와주십시오
-
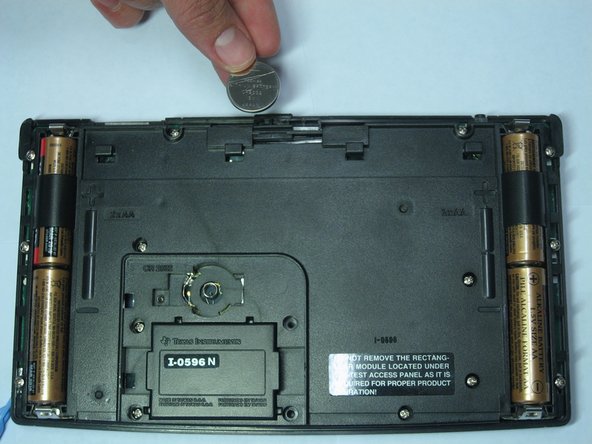
Use an Ipod Opening Tool or a similar tool to pull up on the right side of the backup battery.
-
The battery should pop out of position.
-
-
이 단계는 번역되지 않았습니다. 번역을 도와주십시오
-
After the battery has been tilted out of its socket, simply remove it with your hands.
-


다른 2명이 해당 안내서를 완성하였습니다.
팀

Cal Poly, Team 15-51, Garner Spring 2010 Cal Poly, Team 15-51, Garner Spring 2010 회원
CPSU-GARNER-S10S15G51
5 회원들
안내서 9개 작성하였습니다