이 버전에는 잘못된 편집 사항이 있을 수 있습니다. 최신 확인된 스냅샷으로 전환하십시오.
필요한 것
-
이 단계는 번역되지 않았습니다. 번역을 도와주십시오
-
Grab the back of the calculator with one hand and the cover with the other.
-
Pull the cover off from one of the sides for easy removal.
-
-
이 단계는 번역되지 않았습니다. 번역을 도와주십시오
-
Orientate the calculator with the top facing towards you.
-
Slide the locking tab,found on the top part of the calculator, to the unlock position.
-
-
이 단계는 번역되지 않았습니다. 번역을 도와주십시오
-
"Locking Tab"
-
To remove the back cover, slide the cover away from the locking tab towards the bottom of the calculator until the cover no longer slides.
-
Then with the front of the calculator facing down, pull up on the back cover.
-
The calculator should now be orientated with the front facing down, as shown in picture 2.
-
-
이 단계는 번역되지 않았습니다. 번역을 도와주십시오
-
Remove the bottom batteries by pressing the battery towards you while pulling it out from the far end.
-
After the bottom battery has been removed push or slide the other(top) battery towards you until it is fully exposed in the battery slot.
-
Now simply remove the battery.
-
-
이 단계는 번역되지 않았습니다. 번역을 도와주십시오
-
Using a Philips Screwdriver #00 unscrew the twelve 11.8mm screws shown in the picture and located on the back of the calculator.
-
-
이 단계는 번역되지 않았습니다. 번역을 도와주십시오
-
Unscrew the 19mm screw located near center of the back of the calculator.
-
Remove the panel being held by the screw.
-
-
-
이 단계는 번역되지 않았습니다. 번역을 도와주십시오
-
Using the same Phillips screwdriver, unscrew the remaining three 11.8mm screws.
-
-
이 단계는 번역되지 않았습니다. 번역을 도와주십시오
-
Using the Ipod Opening Tool pull up on both sides of the rectangular module while keeping the rest of the calculator flat on a surface face down
-
-
이 단계는 번역되지 않았습니다. 번역을 도와주십시오
-
Now pull up on the back cover of the calculator while holding the rest of it flat on a surface.
-
-
이 단계는 번역되지 않았습니다. 번역을 도와주십시오
-
Pull the motherboard up while holding the rest of the calculator firmly in place
-
The motherboard has now separated from the rest of the calculator
-
-
이 단계는 번역되지 않았습니다. 번역을 도와주십시오
-
Using a #00 Philip Screwdriver remove the screw located on the left side of a spring-like object located near the center of the motherboard.
-
-
이 단계는 번역되지 않았습니다. 번역을 도와주십시오
-
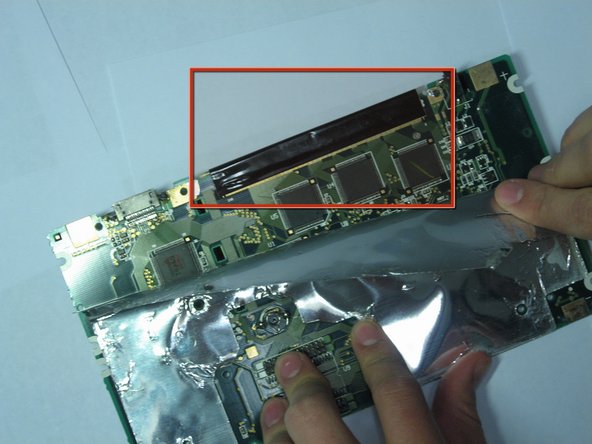
Lift up on the material covering the motherboard starting from the upper right corner. Peel foil back only about half way down.
-
-
이 단계는 번역되지 않았습니다. 번역을 도와주십시오
-
Now slowly lift up the black tape located at the top of the calculator.
-
-
이 단계는 번역되지 않았습니다. 번역을 도와주십시오
-
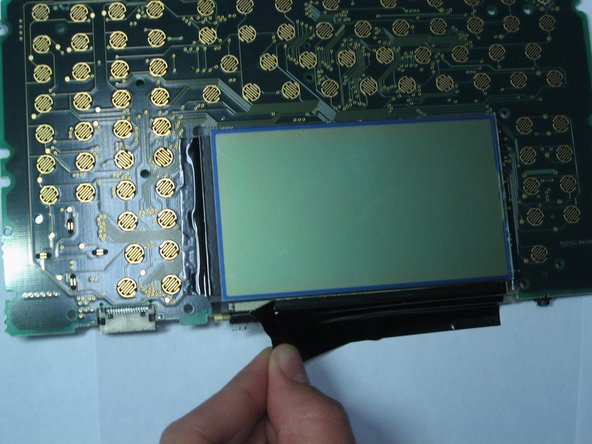
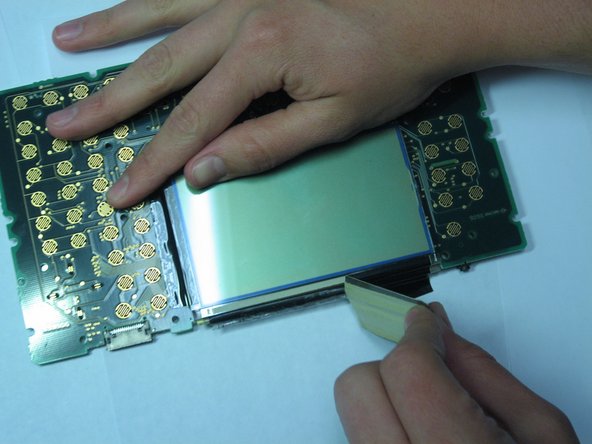
Tilt the calculator up from the front so that you can see the LCD screen
-
Finish removing the black tape on this side of the motherboard.
-


다른 한 분이 해당 안내서를 완성하였습니다.
팀

Cal Poly, Team 15-51, Garner Spring 2010 Cal Poly, Team 15-51, Garner Spring 2010 회원
CPSU-GARNER-S10S15G51
5 회원들
안내서 9개 작성하였습니다