소개
My ThermoWorks Thermapen Mk4 has always been a bit touchy to turn on or stay on. Finally stopped working a little over two years in, just in time for the warranty to expire. $35 to fix it or $35 towards a new one, upgrading to a One was tempting, but I took it apart instead. Found grease on the power contact was causing it not to work.
This is a fairly straight forward repair, just need to be careful of the wires going to the probe.
필요한 것
-
-
Remove the stickers, heating with a hair dryer will make it easier. Then remove the bottom and take the battery out. Remove all of the screws on the back.
-
-
-
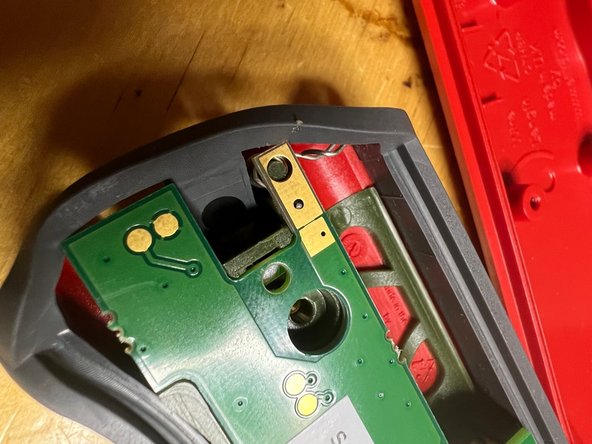
Carefully open the pen, it has a tiny wire and the power actuator lever (the white lever in the top part of the picture), can get off its pin easily.
-
You can test at this point by inserting a battery and shorting the two pads circled in the second picture with your tweezers.
-
-
-
-
Remove the two screws holding the circuit board and carefully place it in the other half. The LCD is delicate.
-
-
-
Remove the two power switch contacts. They both slide straight up, a very sharp pair of tweezers is good for this. Clean the parts with alcohol and some Deoxit if you have it and slide them back in.
-
-
-
Replace the board and make sure the battery spring makes it in to the hole on the board. There is a notch in the plastic where it should land but it can take some poking to get it seated.
-
-
-
Carefully lift the probe, the wire is wrapped around the hub inside. Remove the grease from both sides and apply a thin coating of Super Lube O-Ring lubricant. When putting the probe back down make sure the wire is not pinched and wraps around the hub like it was.
-
Verify the wire is seated properly by opening the probe while holding it down and make sure the wire is not pulled. It should be routed behind the screw post as shown.
-
Put the two halves back together making sure to not pinch the wire.
-


The action on the probe is much better than it ever has been. ThermoWorks has a document about testing and calibrating if required.
The action on the probe is much better than it ever has been. ThermoWorks has a document about testing and calibrating if required.
다른 2명이 해당 안내서를 완성하였습니다.
댓글 한 개
This was really helpful in identifying why the Thermapen wasn't powering on when opened. I used the iFixit you're toolset (tweezers and screwdriver, specifically), which really helped. Especially with the back stickers.