주요 콘텐츠로 건너뛰기

필요한 것

  1. 이 단계는 번역되지 않았습니다. 번역을 도와주십시오

    : 1 단계, 이미지 1/3 : 1 단계, 이미지 2/3 : 1 단계, 이미지 3/3
    • Remove the ten Phillips screws using a Philips 00 screwdriver

  2. 이 단계는 번역되지 않았습니다. 번역을 도와주십시오

    : 2 단계, 이미지 1/2 : 2 단계, 이미지 2/2
    • Pry up the case carefully using a spudger.

    • Make sure to not push the spudger in too far, as this could result in internal damage

  3. 이 단계는 번역되지 않았습니다. 번역을 도와주십시오

    : 3 단계, 이미지 1/1
    • Lift off the cover, and you're done!

  4. 이 단계는 번역되지 않았습니다. 번역을 도와주십시오

    : 4 단계, 이미지 1/2 : 4 단계, 이미지 2/2
    • Carefully remove two Phillips screws with a Phillips 0 screwdriver

    • Static sensitive components!

  5. 이 단계는 번역되지 않았습니다. 번역을 도와주십시오

    : 5 단계, 이미지 1/2 : 5 단계, 이미지 2/2
    • Gently grab the plastic tab. Lift and pull the SSD assembly out of the computer

  6. 이 단계는 번역되지 않았습니다. 번역을 도와주십시오

    : 6 단계, 이미지 1/2 : 6 단계, 이미지 2/2
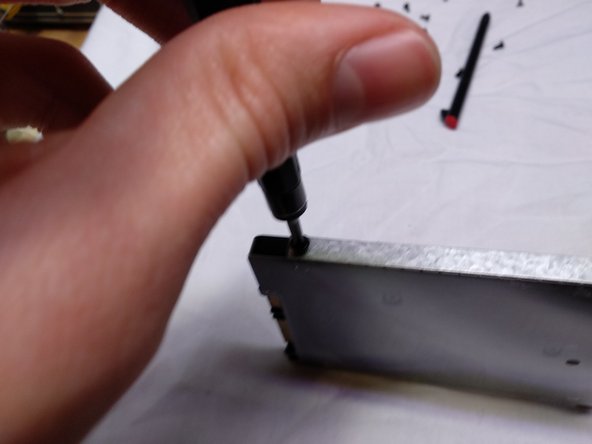
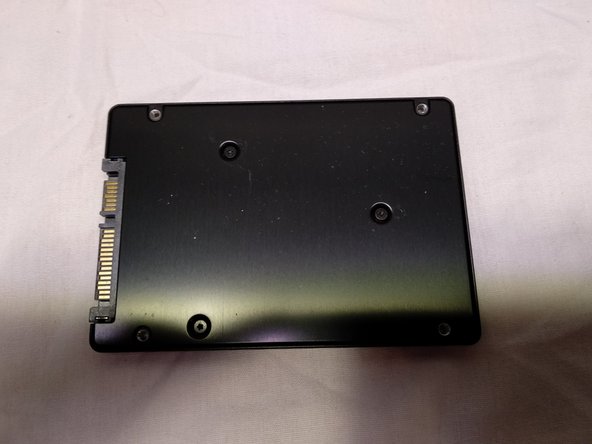
    • Remove the 4 identical Phillips screws with a Phillips 00 screw driver (they are on both sides).

  7. 이 단계는 번역되지 않았습니다. 번역을 도와주십시오

    : 7 단계, 이미지 1/2 : 7 단계, 이미지 2/2
    • Carefully remove the SSD enclosure.

    • Note: The SSD enclosure is made of thin metal. It can be easily deformed. Be careful when removing from the SSD.

결승점

다른 6명이 해당 안내서를 완성하였습니다.

[deleted]

회원 가입일: 03/18/18

1,324 평판

안내서 3개 작성하였습니다

댓글 한 개

Almost perfect instructions. I do recommend removing the active pen first. Also it's a good idea to remind people that the active pen holder is screwed to the case cover from the inside and will come out as part of the cover.

Dani Deitch - 답글

댓글 쓰기

조회 통계:

24 시간 전: 1

7일 전: 5

30일 전: 19

전체 시간: 4,900