소개
I've had my laptop for +2 years now, and after a hot British summer noticed my laptop was getting very hot underneath.
After installing "SpeedFan" I noticed I was reaching CPU temps above 60 degrees celsius while idling.
I reviewed a few guides:
https://www.youtube.com/watch?v=y2_Vj288...
https://www.youtube.com/watch?v=aD3AGwHK...
https://www.youtube.com/watch?v=5mhPRpdj...
https://www.youtube.com/watch?v=Pn2ZNOyG...
And went to work!
I've taken some photos while I went about it, and have shared them in this guide.
Much thanks to my wife who provided a helping hand with cleaning the fan blades.
필요한 것
-
-
Screws are attached to the panel
-
After loosening the screws you can start to separate the lower panel from the upper. I found it easiest to start at the back in between the two hinges, and moving to the sides.
-
-
-
Disconnect the plug from the socket (rectangle)
-
If you wist to remove the battery completely you can unscrew and lift it out from the case.
-
-
-
-
Use alcohol spray, with swabs or lint-free coffee filters, in order to clean out dust in the air vents.
-
If you're just cleaning the fan you can attempt to clean that while it's fixed to the board, I didn't do this myself though.
-
You can see the fan connection with the motherboard highlighted in the rectangle.
-
-
-
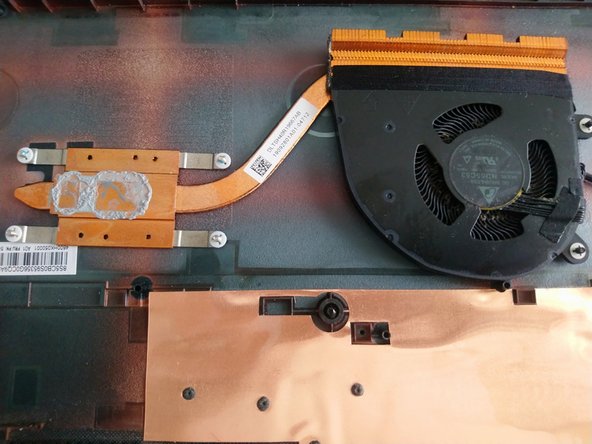
To remove the fan and heat sink/pipe, remove the screws, & disconnect fan connection from board, then lift out from case.
-
-
-
Clean the old paste away from the chips and the heatsink using the alcohol and cotton swabs and then apply your new thermal paste so it will cover the metal surface of the chips.
-
Place the Heatsink and Fan back into the case carefully, ensuring the paste will get distributed evenly underneath as you tighten the screws again.
-
-
-
Hopefully this helps, I'm averaging between 30 & 40 degrees C now.
-
I recommend making sure you've washed your hands of any potential old thermal paste that might've been picked up while cleaning.
-


To reassemble your device, follow these instructions in reverse order.
To reassemble your device, follow these instructions in reverse order.
다른 3명이 해당 안내서를 완성하였습니다.

