주요 콘텐츠로 건너뛰기

이 안내서에는 최근 변경 사항이 더 있습니다. 최신 비검증 버전으로 전환하십시오.

TiVo Series 2 TCD540080 Power Supply Replacement

필요한 것

  1. TiVo Series 2 TCD540080 Power Supply Replacement, Removal of TiVo Series 2 TCD540080 Case: 1 단계, 이미지 1/1
    • Power down the TiVo and detach the power cable from the rear of the unit.

    • Wait 5 minutes for the unit to fully discharge before proceeding to the next step.

  2. TiVo Series 2 TCD540080 Power Supply Replacement: 2 단계, 이미지 1/1
    • Remove the five T10 screws from the rear of the case using the Torx screwdriver.

  3. TiVo Series 2 TCD540080 Power Supply Replacement: 3 단계, 이미지 1/2 TiVo Series 2 TCD540080 Power Supply Replacement: 3 단계, 이미지 2/2
    • Lift up and pull back the outer casing towards the rear of the unit.

  4. TiVo Series 2 TCD540080 Power Supply Replacement, Power Supply: 4 단계, 이미지 1/2 TiVo Series 2 TCD540080 Power Supply Replacement, Power Supply: 4 단계, 이미지 2/2
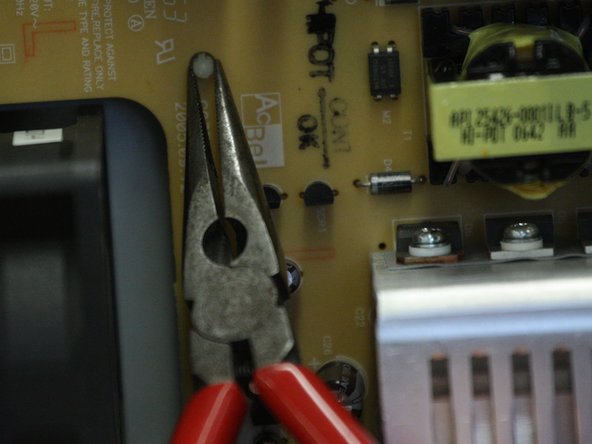
    • Carefully remove the ribbon cable from the power supply. Hold the ribbon on both sides and pull up.

  5. TiVo Series 2 TCD540080 Power Supply Replacement: 5 단계, 이미지 1/1
    • Disconnect the hard drive power cable. Firmly grip the white power connector and pull away from the hard drive.

    • Do not pull on the power cables when disconnecting power connector.

  6. TiVo Series 2 TCD540080 Power Supply Replacement: 6 단계, 이미지 1/1
    • Rotate the device 180 degrees and remove the two T10 screws from the power supply board.

  7. TiVo Series 2 TCD540080 Power Supply Replacement: 7 단계, 이미지 1/2 TiVo Series 2 TCD540080 Power Supply Replacement: 7 단계, 이미지 2/2
    • Remove the four plastic standoffs.

    • Use pliers to squeeze the plastic pieces on the head together. Carefully press down on the standoff and pull up on the power supply.

  8. TiVo Series 2 TCD540080 Power Supply Replacement: 8 단계, 이미지 1/2 TiVo Series 2 TCD540080 Power Supply Replacement: 8 단계, 이미지 2/2
    • Lift the power supply out of the unit.

    • Do not touch any circuit elements or capacitors on the power supply, as they may hold a charge after the unit has been shut off.

결론

To reassemble your device, follow these instructions in reverse order.

다른 2명이 해당 안내서를 완성하였습니다.

Svyatoslav Markeyev

회원 가입일: 04/16/10

135 평판

안내서 5개 작성하였습니다

Cal Poly, Team 33-79, Johann Spring 2010 Cal Poly, Team 33-79, Johann Spring 2010 회원

CPSU-JOHANN-S10S33G79

4 회원들

안내서 5개 작성하였습니다

댓글 0개

댓글 쓰기

조회 통계:

24 시간 전: 0

7일 전: 0

30일 전: 0

전체 시간: 5,160