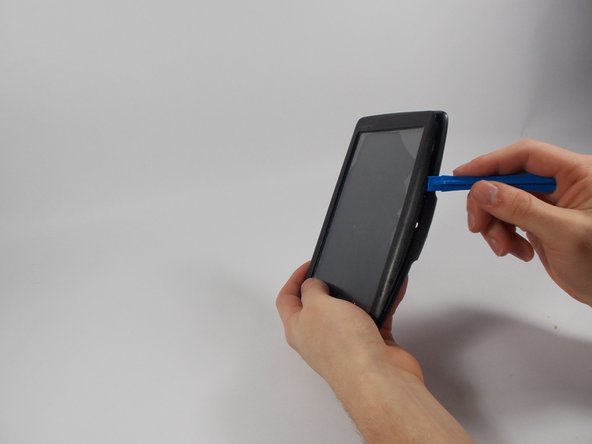
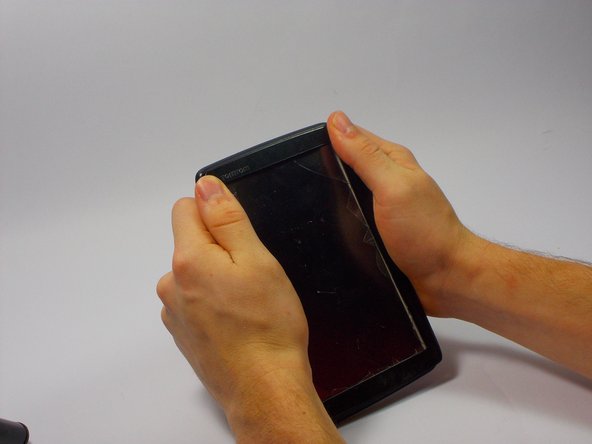
주요 콘텐츠로 건너뛰기

TomTom VIA 1605TM Speaker Replacement

필요한 것

  1. TomTom VIA 1605TM Speaker Replacement, Front Screen: 1 단계, 이미지 1/3 TomTom VIA 1605TM Speaker Replacement, Front Screen: 1 단계, 이미지 2/3 TomTom VIA 1605TM Speaker Replacement, Front Screen: 1 단계, 이미지 3/3
    • Locate the round suction cup on the back of the device.

    • Twist the suction cup clockwise or counterclockwise while pulling back away from the device closer to your body until removed.

    • When reassembling twist the suction cup but, push in as oppose to pulling out.

  2. TomTom VIA 1605TM Speaker Replacement: 2 단계, 이미지 1/1
    • Location of screw is where the suction cup was.

    • Insert 8mm Hex #T6 screw driver into screw.

    • Unscrew in counter clockwise direction.

    • When reassembling screw in the clockwise direction.

  3. TomTom VIA 1605TM Speaker Replacement: 3 단계, 이미지 1/2 TomTom VIA 1605TM Speaker Replacement: 3 단계, 이미지 2/2
    • Pry along the edges with the plastic opening tool to separate the back and front panel.

    • Try not to tear the screen open as you may break the part. Go about this gently but with enough force to remove the screen.

  4. TomTom VIA 1605TM Speaker Replacement: 4 단계, 이미지 1/3 TomTom VIA 1605TM Speaker Replacement: 4 단계, 이미지 2/3 TomTom VIA 1605TM Speaker Replacement: 4 단계, 이미지 3/3
    • Place the new front panel (with new screen) on to the back panel. Press firmly along the edges to attach.

    • Only do this step of placing the front panel on if you are completed. If there are still components needed replacing postpone this step until the end.

  5. TomTom VIA 1605TM Speaker Replacement, Speaker: 5 단계, 이미지 1/3 TomTom VIA 1605TM Speaker Replacement, Speaker: 5 단계, 이미지 2/3 TomTom VIA 1605TM Speaker Replacement, Speaker: 5 단계, 이미지 3/3
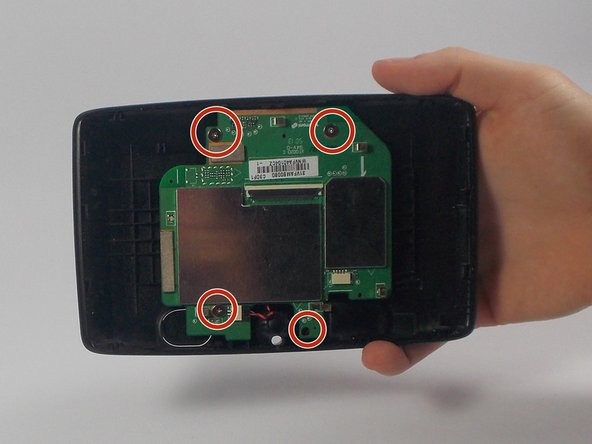
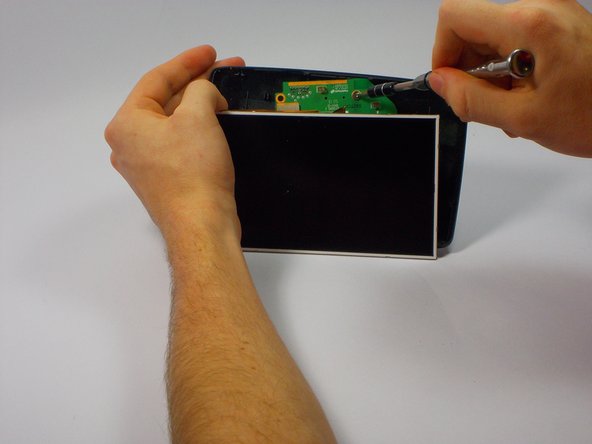
    • Keep the TOMTOM oriented so the curve is on the bottom. Locate the four 1mm Philips #J1 head screws attached to the motherboard behind the LCD Screen.

    • Unscrew each of these in a counter clockwise direction.

    • When reassembling screw back in a clockwise direction.

    • The second picture is to represent where the four screws are located. The LCD screen does not disconnect from the motherboard in this particular guide.

  6. TomTom VIA 1605TM Speaker Replacement: 6 단계, 이미지 1/3 TomTom VIA 1605TM Speaker Replacement: 6 단계, 이미지 2/3 TomTom VIA 1605TM Speaker Replacement: 6 단계, 이미지 3/3
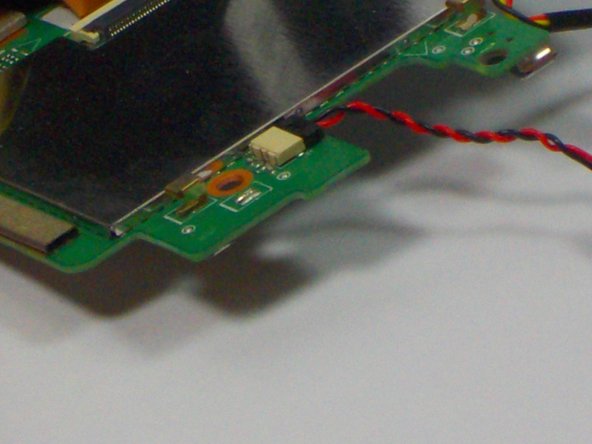
    • Remove speaker from slot on back panel by prying out of the rubber/plastic case with the plastic opening tool. If this does not work the metal spudger is okay for this step.

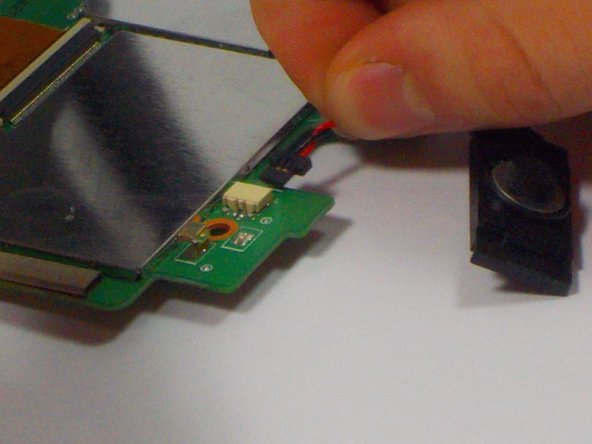
    • Remove the existing speaker from it's connection to the motherboard by pinching both sides of the connector.

    • Pull back away (in the opposite direction) from the connector.

    • When reassembling push back into connector. Do not need to pinch anything. The "click" sound insures solid connection.

결론

To reassemble your device, follow these instructions in reverse order.

Kevin MacAllister

회원 가입일: 10/19/15

139 평판

안내서 1개 작성함

UMass Dartmouth, Team 4-4, Catania Fall 2015 UMass Dartmouth, Team 4-4, Catania Fall 2015 회원

UMASSD-CATANIA-F15S4G4

4 회원들

안내서 5개 작성하였습니다

댓글 0개

댓글 쓰기

조회 통계:

24 시간 전: 0

7일 전: 0

30일 전: 0

전체 시간: 226