소개
I want to show you how to disassembly the body of Toolcraft ST-50D solder station.
필요한 것
-
-
I think you can disassembly other models of Toolcraft ST solder stations 50/80/100 analog or digital the same way.
-
-
-
There are two holes with screws on the bottom side (green circles on the picture) and the 2-nd pair of screws is under the two rubbery "legs" (red circles).
-
-
-
-
... by nails or by flat screwdriver and you will see the second pair of holes with screws.
-
-
-
... by Phillips #1 screwdriver and you can open the body of the solder station.
-


To reassemble your device, follow these instructions in reverse order.
To reassemble your device, follow these instructions in reverse order.
다른 한 분이 해당 안내서를 완성하였습니다.
댓글 4개
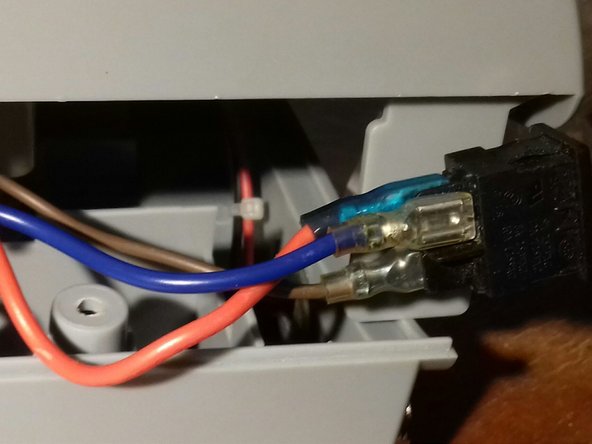
Hi! Unfortunately, I have stupidly pulled off the contact sockets of the switch when disassembling my station. But I did not notice how they were originally connected. Could you please take a look and maybe take a picture of how the contacts are connected to the switch? I thank you in advance.
Hi.
So I added a picture of cables connected to the switch. ON position of the switch is Up, the cables are from inside of the solder station.
Martin Kubica
Hello Martin, really appreciate your guide but do you have a photo of the back of the board with all the connections? I took it apart but did not take note of which connector the White, Blue and Red/Black wires went to. Its not clear on the photos above, would be hugely appreciated. Thanks!