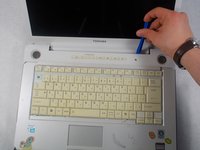
주요 콘텐츠로 건너뛰기

Toshiba Dynabook AX 53D Keyboard Replacement

필요한 것

  1. Toshiba Dynabook AX 53D Keyboard  Replacement, Battery: 1 단계, 이미지 1/1
    • Push apart the two spring loaded plastic tabs labeled #1 and #2.

    • Make sure to unplug any external power sources before working on the computer.

  2. Toshiba Dynabook AX 53D Keyboard  Replacement: 2 단계, 이미지 1/1
    • The battery is now easily removed by pulling up from the notched tab on the inside edge.

  3. Toshiba Dynabook AX 53D Keyboard  Replacement, Keyboard: 3 단계, 이미지 1/1
    • Using the #J1 bit, remove the 17 recessed 7.3 mm B6 screws from the underside of laptop and the 3.1 mm #J0 F3 screw inside the battery compartment.

  4. Toshiba Dynabook AX 53D Keyboard  Replacement: 4 단계, 이미지 1/2 Toshiba Dynabook AX 53D Keyboard  Replacement: 4 단계, 이미지 2/2
    • Run the blue plastic opening tool underneath the media bezel and gently pry from the front panel.

  5. Toshiba Dynabook AX 53D Keyboard  Replacement: 5 단계, 이미지 1/1
    • Using the #J0 bit, remove the two 3.1 mm screws securing the top of the keyboard.

  6. Toshiba Dynabook AX 53D Keyboard  Replacement: 6 단계, 이미지 1/2 Toshiba Dynabook AX 53D Keyboard  Replacement: 6 단계, 이미지 2/2
    • Pop out the black plastic tab on either side of the ribbon cable. Holding the cable on each side, detach from laptop.

결론

To reassemble your device, follow these instructions in reverse order.

Christopher

회원 가입일: 03/20/17

510 평판

안내서 5개 작성하였습니다

UMass Dartmouth, Team S2-G7, Isaacson Spring 2017 UMass Dartmouth, Team S2-G7, Isaacson Spring 2017 회원

UMASSD-ISAACSON-S17S2G7

3 회원들

안내서 15개 작성하였습니다

댓글 0개

댓글 쓰기

조회 통계:

24 시간 전: 1

7일 전: 5

30일 전: 10

전체 시간: 1,020