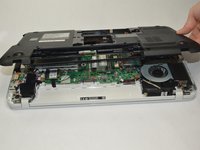
주요 콘텐츠로 건너뛰기

Toshiba Dynabook T552-58G Fan Replacement

필요한 것

  1. Toshiba Dynabook T552-58G Fan Replacement, Back Panel: 1 단계, 이미지 1/1
    • Turn the Toshiba Dynabook T552-58G so that the back panel is facing you.

  2. Toshiba Dynabook T552-58G Fan Replacement: 2 단계, 이미지 1/2 Toshiba Dynabook T552-58G Fan Replacement: 2 단계, 이미지 2/2
    • Remove the 10 screws located on the back panel of the Toshiba Dynabook T552-58G using a PH 0 screwdriver.

    • Each screw will be 5.3 mm long.

  3. Toshiba Dynabook T552-58G Fan Replacement: 3 단계, 이미지 1/3 Toshiba Dynabook T552-58G Fan Replacement: 3 단계, 이미지 2/3 Toshiba Dynabook T552-58G Fan Replacement: 3 단계, 이미지 3/3
    • Remove the black screw using the J0 screwdriver. This is located by the top right foot of the device.

    • This will allow removal of the hard drive cover.

    • This screw will not come out of the hard drive cover.

  4. Toshiba Dynabook T552-58G Fan Replacement: 4 단계, 이미지 1/1
    • Remove the single screw located below the hard drive using the J0 screwdriver. This screw is 5.3 mm long.

  5. Toshiba Dynabook T552-58G Fan Replacement: 5 단계, 이미지 1/3 Toshiba Dynabook T552-58G Fan Replacement: 5 단계, 이미지 2/3 Toshiba Dynabook T552-58G Fan Replacement: 5 단계, 이미지 3/3
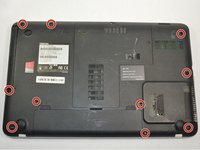
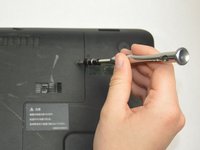
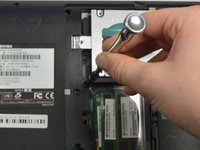
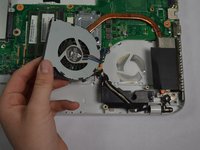
    • Remove two screws located diagonally from the bottom-left screw of the hard drive using a J0 screwdriver. The screw closest to the hard drive is 5.2 mm long and the screw farther away is 4.2 mm long.

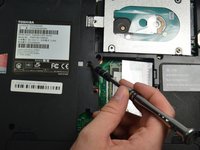
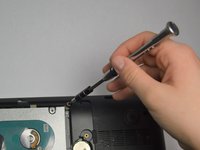
    • Remove the screw located diagonally from the top right screw of the hard drive using a J0 screwdriver. This screw is 5.2 mm long.

  6. Toshiba Dynabook T552-58G Fan Replacement: 6 단계, 이미지 1/3 Toshiba Dynabook T552-58G Fan Replacement: 6 단계, 이미지 2/3 Toshiba Dynabook T552-58G Fan Replacement: 6 단계, 이미지 3/3
    • Slowly lift the back panel away from the computer.

    • There should be some resistance.

    • Once lifted, carefully remove the back panel.

  7. Toshiba Dynabook T552-58G Fan Replacement, Fan: 7 단계, 이미지 1/1
    • After removing the back panel, locate the fan in the bottom right corner.

    • Make sure computer is turned off and unplugged.

  8. Toshiba Dynabook T552-58G Fan Replacement: 8 단계, 이미지 1/1
    • Remove the two screws located on the top left and bottom right of the fan. You should use a PH 0 screwdriver.

    • Both screws are 2.7 mm long.

  9. Toshiba Dynabook T552-58G Fan Replacement: 9 단계, 이미지 1/2 Toshiba Dynabook T552-58G Fan Replacement: 9 단계, 이미지 2/2
    • Gently lift the fan away from the base. There should be three wires that are connected to the base of the computer through a port.

  10. Toshiba Dynabook T552-58G Fan Replacement: 10 단계, 이미지 1/1
    • With your fingers, carefully pinch the white connector and pull up.

    • There will be some resistance.

  11. Toshiba Dynabook T552-58G Fan Replacement: 11 단계, 이미지 1/1
    • Remove the faulty fan.

결론

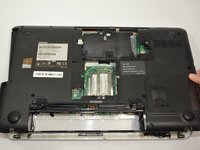
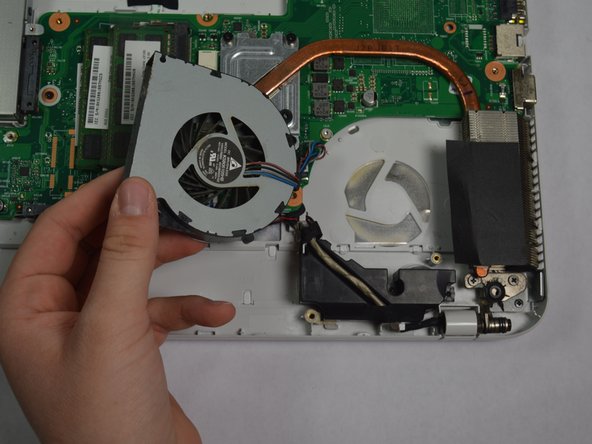
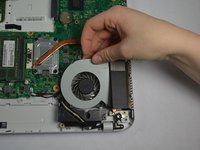
To reassemble your device, follow these instructions in reverse order.

Lilly Pilkington

회원 가입일: 01/31/19

235 평판

안내서 2개 작성하였습니다

댓글 0개

댓글 쓰기

조회 통계:

24 시간 전: 0

7일 전: 3

30일 전: 14

전체 시간: 658