이 버전에는 잘못된 편집 사항이 있을 수 있습니다. 최신 확인된 스냅샷으로 전환하십시오.
필요한 것
-
이 단계는 번역되지 않았습니다. 번역을 도와주십시오
-
Use the metal spudger to create a gap between the back cover and the device.
-
-
이 단계는 번역되지 않았습니다. 번역을 도와주십시오
-
Use the nylon spudger to completely separate the back of the device.
-
Take the nylon spudger around the outside of the device cover until it comes free.
-
-
이 단계는 번역되지 않았습니다. 번역을 도와주십시오
-
Use the Phillips head PH0 to remove the 7 battery screws.
-
The 5 side screws measure 3.5mm.
-
The 2 top and bottom screws measure 4.5 mm.
-
-
이 단계는 번역되지 않았습니다. 번역을 도와주십시오
-
To disconnect the cable, use the fine tweezers to flip up the small retaining flap. Then, you can safely pull the ribbon cable out.
-
-
-
이 단계는 번역되지 않았습니다. 번역을 도와주십시오
-
Remove the colored power cable from its connector.
-
To disconnect it safely, use the pointed tip of a spudger to carefully push on each side of the connector.
-
Alternating from one side to the other, gently “walk” the connector out of its socket.
-
-
이 단계는 번역되지 않았습니다. 번역을 도와주십시오
-
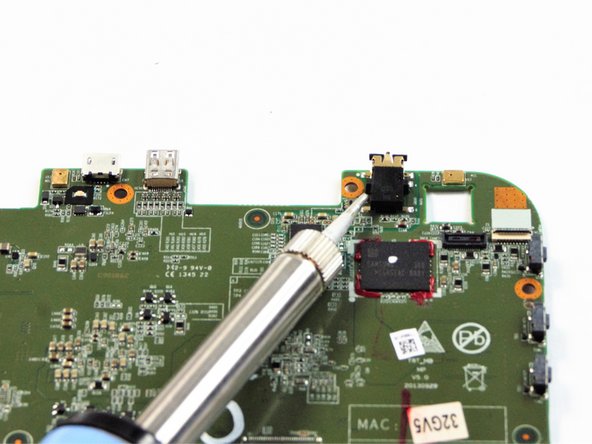
Use the soldering iron to melt the metal connection from the motherboard to the audio jack.
-
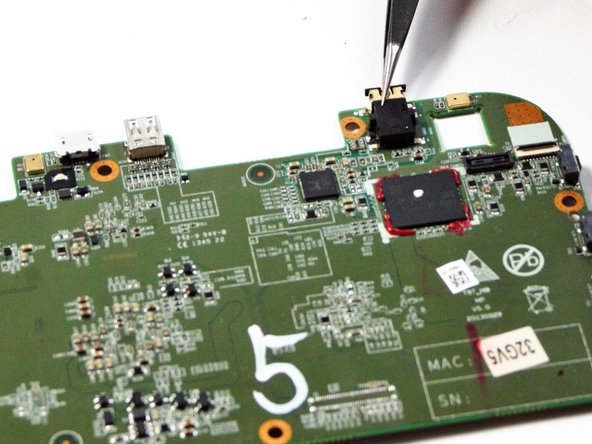
Use the fine pointed tweezers to pull the audio jack away from the motherboard.
-


다른 한 분이 해당 안내서를 완성하였습니다.
팀

USF Tampa, Team 17-4, Blackwell Fall 2016 USF Tampa, Team 17-4, Blackwell Fall 2016 회원
USFT-BLACKWELL-F16S17G4
3 회원들
안내서 8개 작성하였습니다