이 버전에는 잘못된 편집 사항이 있을 수 있습니다. 최신 확인된 스냅샷으로 전환하십시오.
필요한 것
-
이 단계는 번역되지 않았습니다. 번역을 도와주십시오
-
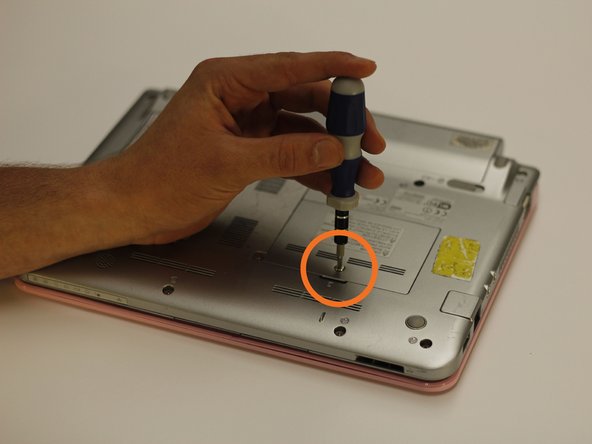
Use a bit driver and a Phillips #0 bit to remove the one 5 mm retaining screw.
-
Lift the panel up and out of the way.
-
-
이 단계는 번역되지 않았습니다. 번역을 도와주십시오
-
The RAM chip is secured by two retaining arms that run parallel with the chip. Gently pull these arms in opposite directions off of the chip.
-
After the retainer arms are free, push the chip towards the top of the netbook. This will free the chip for removal.
-
-
-
이 단계는 번역되지 않았습니다. 번역을 도와주십시오
-
Push the replacement RAM into the original position.
-
Reattach both securing arms onto the sides of the RAM chip.
-
-
이 단계는 번역되지 않았습니다. 번역을 도와주십시오
-
Place the panel back into the securing slots and let it rest in its original position.
-
With the bit driver and Phillips #0 bit, secure the panel down with one screw.
-


다른 한 분이 해당 안내서를 완성하였습니다.
팀

Clemson, Team 14-2, Benson Fall 2013 Clemson, Team 14-2, Benson Fall 2013 회원
CLEM-BENSON-F13S14G2
3 회원들
안내서 27개 작성하였습니다