주요 콘텐츠로 건너뛰기

Toshiba Portege R500 CD Drive Replacement

필요한 것

  1. Toshiba Portege R500 CD Drive Replacement, Battery: 1 단계, 이미지 1/2 Toshiba Portege R500 CD Drive Replacement, Battery: 1 단계, 이미지 2/2
    • Make sure the device is off to prevent data loss.

    • Slide both latches to the unlocked position to release the battery.

    • Switch the latch on the right to reveal red. The latch on the left needs to be held.

    • Pull the battery toward you while holding the left latch.

  2. Toshiba Portege R500 CD Drive Replacement, CD Drive: 2 단계, 이미지 1/1
    • Remove the sixteen screws at the locations shown with the Phillips 00 screwdriver.

  3. Toshiba Portege R500 CD Drive Replacement: 3 단계, 이미지 1/2 Toshiba Portege R500 CD Drive Replacement: 3 단계, 이미지 2/2
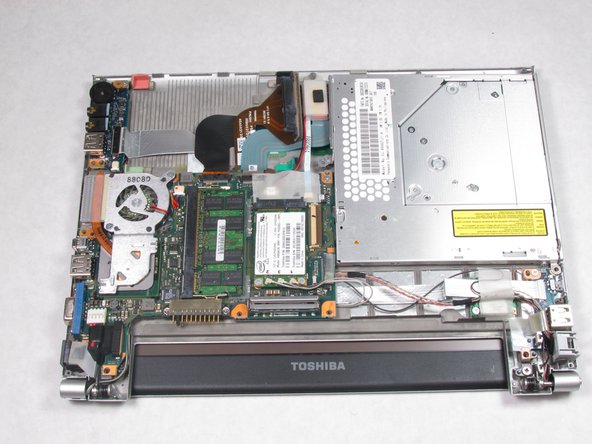
    • Pull up on the back casing and remove it, revealing the CD drive.

  4. Toshiba Portege R500 CD Drive Replacement: 4 단계, 이미지 1/1
    • Flip the CD Drive over carefully, lifting the right side and turning the drive in order to reveal the attachment.

  5. Toshiba Portege R500 CD Drive Replacement: 5 단계, 이미지 1/2 Toshiba Portege R500 CD Drive Replacement: 5 단계, 이미지 2/2
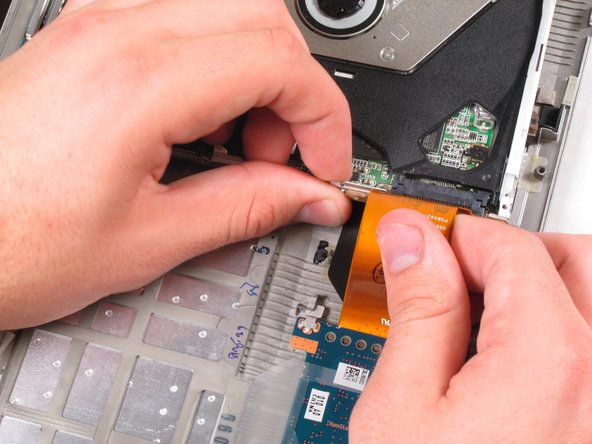
    • Rotate the laptop ninety degrees so the screws and connection are visible.

    • Remove the two 4 mm screws with the Phillips 00 screwdriver.

    • Pull the ribbon cable away from the laptop to release the CD drive from the computer.

    • A small metal divider may fall when you remove the ribbon cable. It needs to be reattached in between the ribbon cable and the drive when the new drive is put in.

결론

To reassemble your device, follow these instructions in reverse order.

다른 한 분이 해당 안내서를 완성하였습니다.

JRJones

회원 가입일: 04/19/13

169 평판

안내서 5개 작성하였습니다

Cal Poly, Team 2-19, Maness Spring 2013 Cal Poly, Team 2-19, Maness Spring 2013 회원

CPSU-MANESS-S13S2G19

3 회원들

안내서 15개 작성하였습니다

댓글 0개

댓글 쓰기

조회 통계:

24 시간 전: 0

7일 전: 0

30일 전: 0

전체 시간: 1,858