주요 콘텐츠로 건너뛰기

Toshiba Satellite A105-S4074 Hard Drive Replacement

필요한 것

  1. Toshiba Satellite A105-S4074 Hard Drive Replacement, Battery: 1 단계, 이미지 1/2 Toshiba Satellite A105-S4074 Hard Drive Replacement, Battery: 1 단계, 이미지 2/2
    • To prevent electrical shock, make sure the computer is turned off; and disconnect the power adapter from the computer and electrical outlet prior to beginning any repairs on this device.

    • Turn the laptop upside down with the battery facing you.

  2. Toshiba Satellite A105-S4074 Hard Drive Replacement: 2 단계, 이미지 1/3 Toshiba Satellite A105-S4074 Hard Drive Replacement: 2 단계, 이미지 2/3 Toshiba Satellite A105-S4074 Hard Drive Replacement: 2 단계, 이미지 3/3
    • Slide both the left and right battery release tabs outwards away from center of the laptop.

    • Right release tab will remain locked in place.

    • While still holding the left release tab, slide the battery towards you using your right hand.

    • Fully remove the battery from the laptop.

  3. Toshiba Satellite A105-S4074 Hard Drive Replacement, Hard Drive: 3 단계, 이미지 1/3 Toshiba Satellite A105-S4074 Hard Drive Replacement, Hard Drive: 3 단계, 이미지 2/3 Toshiba Satellite A105-S4074 Hard Drive Replacement, Hard Drive: 3 단계, 이미지 3/3
    • Turn the laptop around so that the battery slot is facing away from you, and locate the hard drive access panel in the lower left-hand corner.

    • Locate the hard drive access panel in the lower left-hand corner on the bottom of the laptop, and loosen the 4.0 mm screw in the top center of the panel using the Phillips #1 screwdriver.

    • This is a captive screw and will remain intact with the panel.

    • Carefully remove the panel with your fingers by lifting the edge at the indent.

  4. Toshiba Satellite A105-S4074 Hard Drive Replacement: 4 단계, 이미지 1/3 Toshiba Satellite A105-S4074 Hard Drive Replacement: 4 단계, 이미지 2/3 Toshiba Satellite A105-S4074 Hard Drive Replacement: 4 단계, 이미지 3/3
    • You should now have full access to the hard drive.

    • Slide the hard drive to the left.

    • Gently lift the hard drive from the side closest to you and remove it.

결론

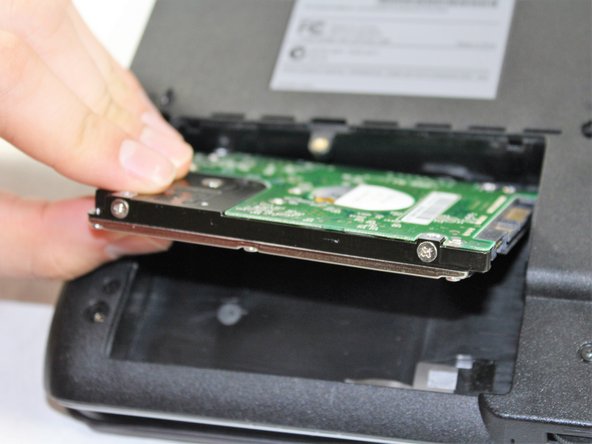
To reassemble your device after replacing the hard drive, follow these instructions in reverse order.

다른 한 분이 해당 안내서를 완성하였습니다.

Ryan Bortnick

회원 가입일: 03/20/17

722 평판

안내서 5개 작성하였습니다

UMass Dartmouth, Team S2-G1, Isaacson Spring 2017 UMass Dartmouth, Team S2-G1, Isaacson Spring 2017 회원

UMASSD-ISAACSON-S17S2G1

4 회원들

안내서 15개 작성하였습니다

댓글 0개

댓글 쓰기

조회 통계:

24 시간 전: 0

7일 전: 1

30일 전: 7

전체 시간: 1,247