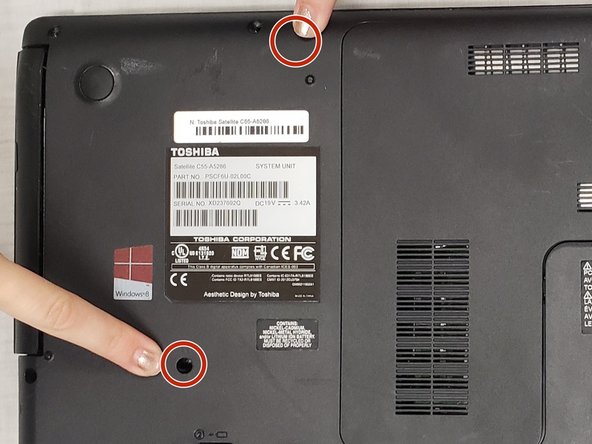
주요 콘텐츠로 건너뛰기

Toshiba Satellite C55-A5286 Optical Drive Replacement

필요한 것

  1. Toshiba Satellite C55-A5286 Optical Drive Replacement, Optical Drive: 1 단계, 이미지 1/1
    • Unplug the AC adapter and all other auxiliary components from the laptop

  2. Toshiba Satellite C55-A5286 Optical Drive Replacement: 2 단계, 이미지 1/2 Toshiba Satellite C55-A5286 Optical Drive Replacement: 2 단계, 이미지 2/2
    • Unscrew the only screw (5 mm) that is holding on the removable back panel and remove the back panel.

  3. Toshiba Satellite C55-A5286 Optical Drive Replacement: 3 단계, 이미지 1/1
    • Remove the two 5-mm screws near the disk drive on the back panel. These two screws are above and below the manufacturer’s sticker.

  4. Toshiba Satellite C55-A5286 Optical Drive Replacement: 4 단계, 이미지 1/1
    • Under the back panel, remove the 4-mm screw holding the disk drive in place.

  5. Toshiba Satellite C55-A5286 Optical Drive Replacement: 5 단계, 이미지 1/2 Toshiba Satellite C55-A5286 Optical Drive Replacement: 5 단계, 이미지 2/2
    • Carefully slide the optical drive out of its place in the laptop.

결론

To reassemble your device, follow these instructions in reverse order.

다른 2명이 해당 안내서를 완성하였습니다.

Nicole Zellers

회원 가입일: 11/06/18

265 평판

안내서 2개 작성하였습니다

IUPUI, Team S1-G5, Hovde Fall 2018 IUPUI, Team S1-G5, Hovde Fall 2018 회원

IUPUI-HOVDE-F18S1G5

2 회원들

안내서 9개 작성하였습니다

댓글 한 개

Not a medium effort at all - very easy.

…although, I did have to use an iFixt It needle-nose tweezer to pull the middle 5mm screw out after it was unscrewed - it would not fall out nor did it cling to the screwdriver.

William Totman - 답글

댓글 쓰기

조회 통계:

24 시간 전: 0

7일 전: 6

30일 전: 13

전체 시간: 294