주요 콘텐츠로 건너뛰기

Toshiba Satellite E105-S1602 Keyboard Replacement

필요한 것

  1. Toshiba Satellite E105-S1602 Keyboard Replacement, Battery: 1 단계, 이미지 1/2 Toshiba Satellite E105-S1602 Keyboard Replacement, Battery: 1 단계, 이미지 2/2
    • Slide both of the latches to the outside to release the battery.

  2. Toshiba Satellite E105-S1602 Keyboard Replacement: 2 단계, 이미지 1/2 Toshiba Satellite E105-S1602 Keyboard Replacement: 2 단계, 이미지 2/2
    • Pull the battery out by lifting the battery cover away from the laptop.

  3. Toshiba Satellite E105-S1602 Keyboard Replacement, Keyboard: 3 단계, 이미지 1/3 Toshiba Satellite E105-S1602 Keyboard Replacement, Keyboard: 3 단계, 이미지 2/3 Toshiba Satellite E105-S1602 Keyboard Replacement, Keyboard: 3 단계, 이미지 3/3
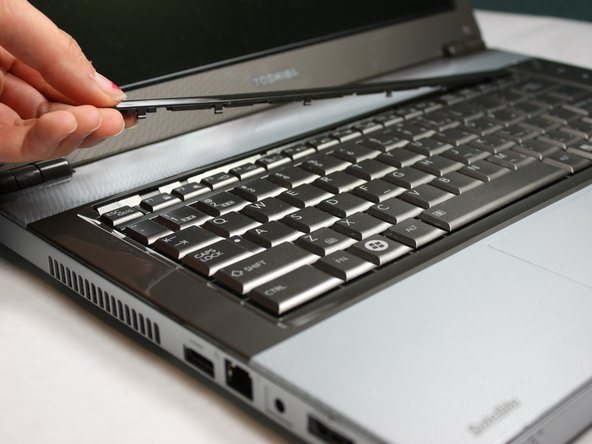
    • Flip the computer over and insert the plastic opening tool under the plastic strip at the top of the keyboard.

    • Pry the top plastic strip from the top of the keyboard.

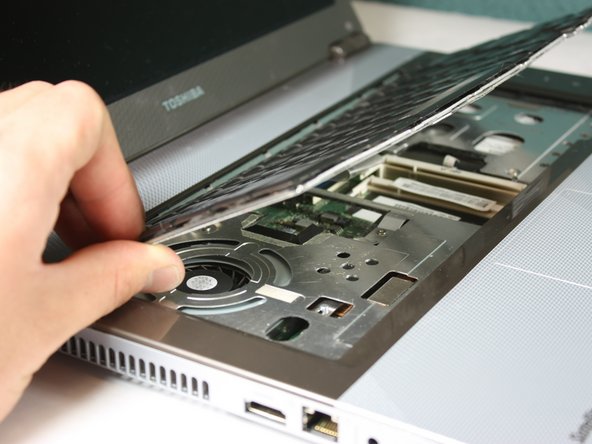
    • Peel the strip completely away from the keyboard.

  4. Toshiba Satellite E105-S1602 Keyboard Replacement: 4 단계, 이미지 1/2 Toshiba Satellite E105-S1602 Keyboard Replacement: 4 단계, 이미지 2/2
    • Using your Phillips #00, unscrew the two 4.80mm screws at the top of the keyboard.

  5. Toshiba Satellite E105-S1602 Keyboard Replacement: 5 단계, 이미지 1/2 Toshiba Satellite E105-S1602 Keyboard Replacement: 5 단계, 이미지 2/2
    • When removing the keyboard, be careful not to rip the ribbon cable connecting the keyboard to the computer, to avoid damaging it.

    • Flip the keyboard up from the bottom in order to see the two ribbons connecting it to the motherboard.

  6. Toshiba Satellite E105-S1602 Keyboard Replacement: 6 단계, 이미지 1/1
    • Using the plastic opening tools, pop out the ribbon cable from the rest of the computer.

  7. Toshiba Satellite E105-S1602 Keyboard Replacement: 7 단계, 이미지 1/1
    • Using the plastic opening tools, pop out the second ribbon cable from the rest of the computer.

  8. Toshiba Satellite E105-S1602 Keyboard Replacement: 8 단계, 이미지 1/2 Toshiba Satellite E105-S1602 Keyboard Replacement: 8 단계, 이미지 2/2
    • Completely remove the keyboard from the laptop by lifting up the part closest to the screen, and then gently pulling out the bottom half.

    • Keep the keyboard safe by storing it on a flat, non-metallic surface until needed.

결론

To reassemble your device, follow these instructions in reverse order.

Ian Washburne

회원 가입일: 01/11/13

59 평판

안내서 6개 작성하였습니다

Cal Poly, Team 17-21, Forte Winter 2013 Cal Poly, Team 17-21, Forte Winter 2013 회원

CPSU-FORTE-W13S17G21

5 회원들

안내서 14개 작성하였습니다

댓글 0개

댓글 쓰기

조회 통계:

24 시간 전: 0

7일 전: 0

30일 전: 2

전체 시간: 1,553