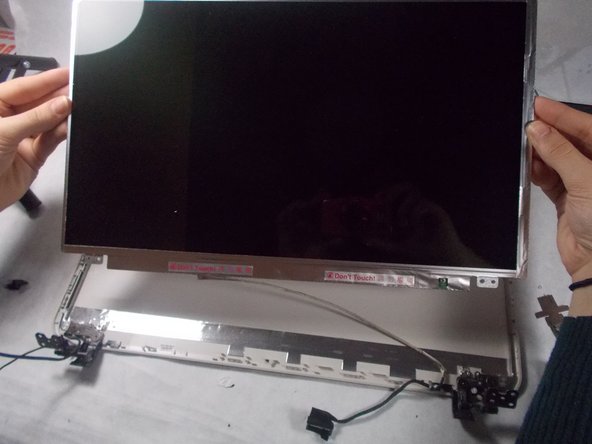
주요 콘텐츠로 건너뛰기

Toshiba Satellite L55t-B5271 Screen Replacement

필요한 것

  1. Toshiba Satellite L55t-B5271 Screen Replacement, Battery: 1 단계, 이미지 1/3 Toshiba Satellite L55t-B5271 Screen Replacement, Battery: 1 단계, 이미지 2/3 Toshiba Satellite L55t-B5271 Screen Replacement, Battery: 1 단계, 이미지 3/3
    • Make sure you turn the laptop off first.

    • Close the laptop lid and flip it over so that Toshiba logo is facing down.

  2. Toshiba Satellite L55t-B5271 Screen Replacement: 2 단계, 이미지 1/2 Toshiba Satellite L55t-B5271 Screen Replacement: 2 단계, 이미지 2/2
    • Remove the two 6.5 mm Phillips head screws indicated using a Phillips #00 screw driver.

  3. Toshiba Satellite L55t-B5271 Screen Replacement: 3 단계, 이미지 1/3 Toshiba Satellite L55t-B5271 Screen Replacement: 3 단계, 이미지 2/3 Toshiba Satellite L55t-B5271 Screen Replacement: 3 단계, 이미지 3/3
    • Once the screws are removed, slide the battery pack out of the computer.

  4. Toshiba Satellite L55t-B5271 Screen Replacement, Back Panel: 4 단계, 이미지 1/3 Toshiba Satellite L55t-B5271 Screen Replacement, Back Panel: 4 단계, 이미지 2/3 Toshiba Satellite L55t-B5271 Screen Replacement, Back Panel: 4 단계, 이미지 3/3
    이 단계에 사용된 도구:
    Anti-Static Wrist Strap
    $7.95
    구매
    • Remove all 6.5 mm Philips head screws on the back cover of the laptop with a Philips #00 screwdriver.

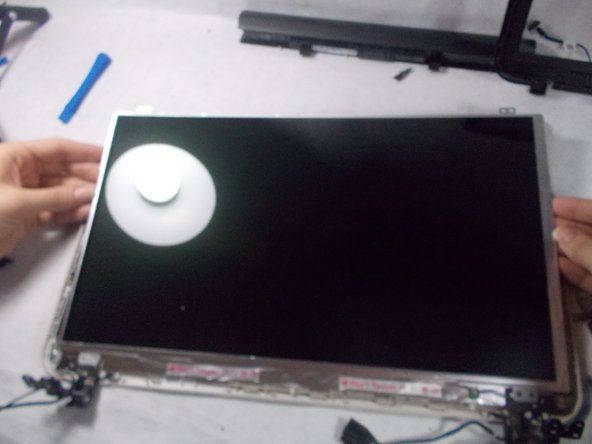
    • Use the plastic opening tool to remove the back cover from the laptop.

    • Be aware that static discharge can cause damage to sensitive electrical components within the computer. To avoid this you can wear an anti-static wrist strap.

  5. Toshiba Satellite L55t-B5271 Screen Replacement, Screen: 5 단계, 이미지 1/3 Toshiba Satellite L55t-B5271 Screen Replacement, Screen: 5 단계, 이미지 2/3 Toshiba Satellite L55t-B5271 Screen Replacement, Screen: 5 단계, 이미지 3/3
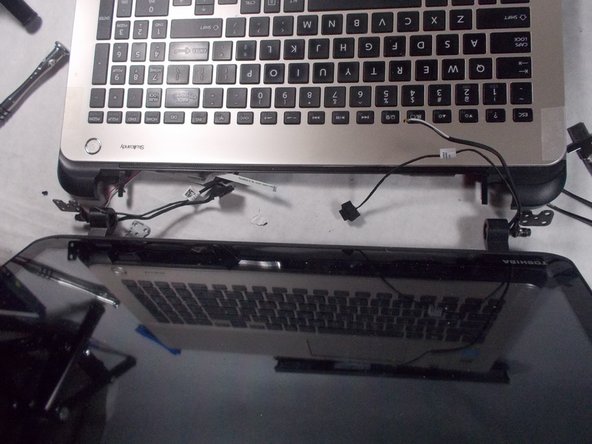
    • Unscrew the four 6mm screws from each of the laptop hinges using a Philips head #00 screwdriver.

  6. Toshiba Satellite L55t-B5271 Screen Replacement: 6 단계, 이미지 1/3 Toshiba Satellite L55t-B5271 Screen Replacement: 6 단계, 이미지 2/3 Toshiba Satellite L55t-B5271 Screen Replacement: 6 단계, 이미지 3/3
    • Disconnect connect the ribbon marked in red.

    • Disconnect all ribbons and cables marked in orange.

  7. Toshiba Satellite L55t-B5271 Screen Replacement: 7 단계, 이미지 1/1
    • Flip your laptop back to the front.

    • Lift up the screen cover.

  8. Toshiba Satellite L55t-B5271 Screen Replacement: 8 단계, 이미지 1/2 Toshiba Satellite L55t-B5271 Screen Replacement: 8 단계, 이미지 2/2
    • Gently pull the screen to disconnect the monitor from the hinges.

  9. Toshiba Satellite L55t-B5271 Screen Replacement: 9 단계, 이미지 1/3 Toshiba Satellite L55t-B5271 Screen Replacement: 9 단계, 이미지 2/3 Toshiba Satellite L55t-B5271 Screen Replacement: 9 단계, 이미지 3/3
    • Use the plastic opening tool to pry the plastic covering off of the monitor.

    • Be careful not to break the glass, as this can cause injury.

  10. Toshiba Satellite L55t-B5271 Screen Replacement: 10 단계, 이미지 1/3 Toshiba Satellite L55t-B5271 Screen Replacement: 10 단계, 이미지 2/3 Toshiba Satellite L55t-B5271 Screen Replacement: 10 단계, 이미지 3/3
    • Remove the four 3mm Phillips head screws with a Phillips #00 screwdriver.

    • Gently remove the screen from the device.

결론

To reassemble your device, follow these instructions in reverse order.

다른 2명이 해당 안내서를 완성하였습니다.

Carson Longendorfer

회원 가입일: 03/26/18

274 평판

안내서 2개 작성하였습니다

UMass Dartmouth, Team S3-G3, Peak Spring 2018 UMass Dartmouth, Team S3-G3, Peak Spring 2018 회원

UMASSD-PEAK-S18S3G3

3 회원들

안내서 8개 작성하였습니다

댓글 0개

댓글 쓰기

조회 통계:

24 시간 전: 0

7일 전: 0

30일 전: 3

전체 시간: 1,424